On the Wurlitzer 700 Service Manual

Detail of the Wurlitzer 700 diagram. The original depicts the full keyboard, including the console base, and is in the schematic.
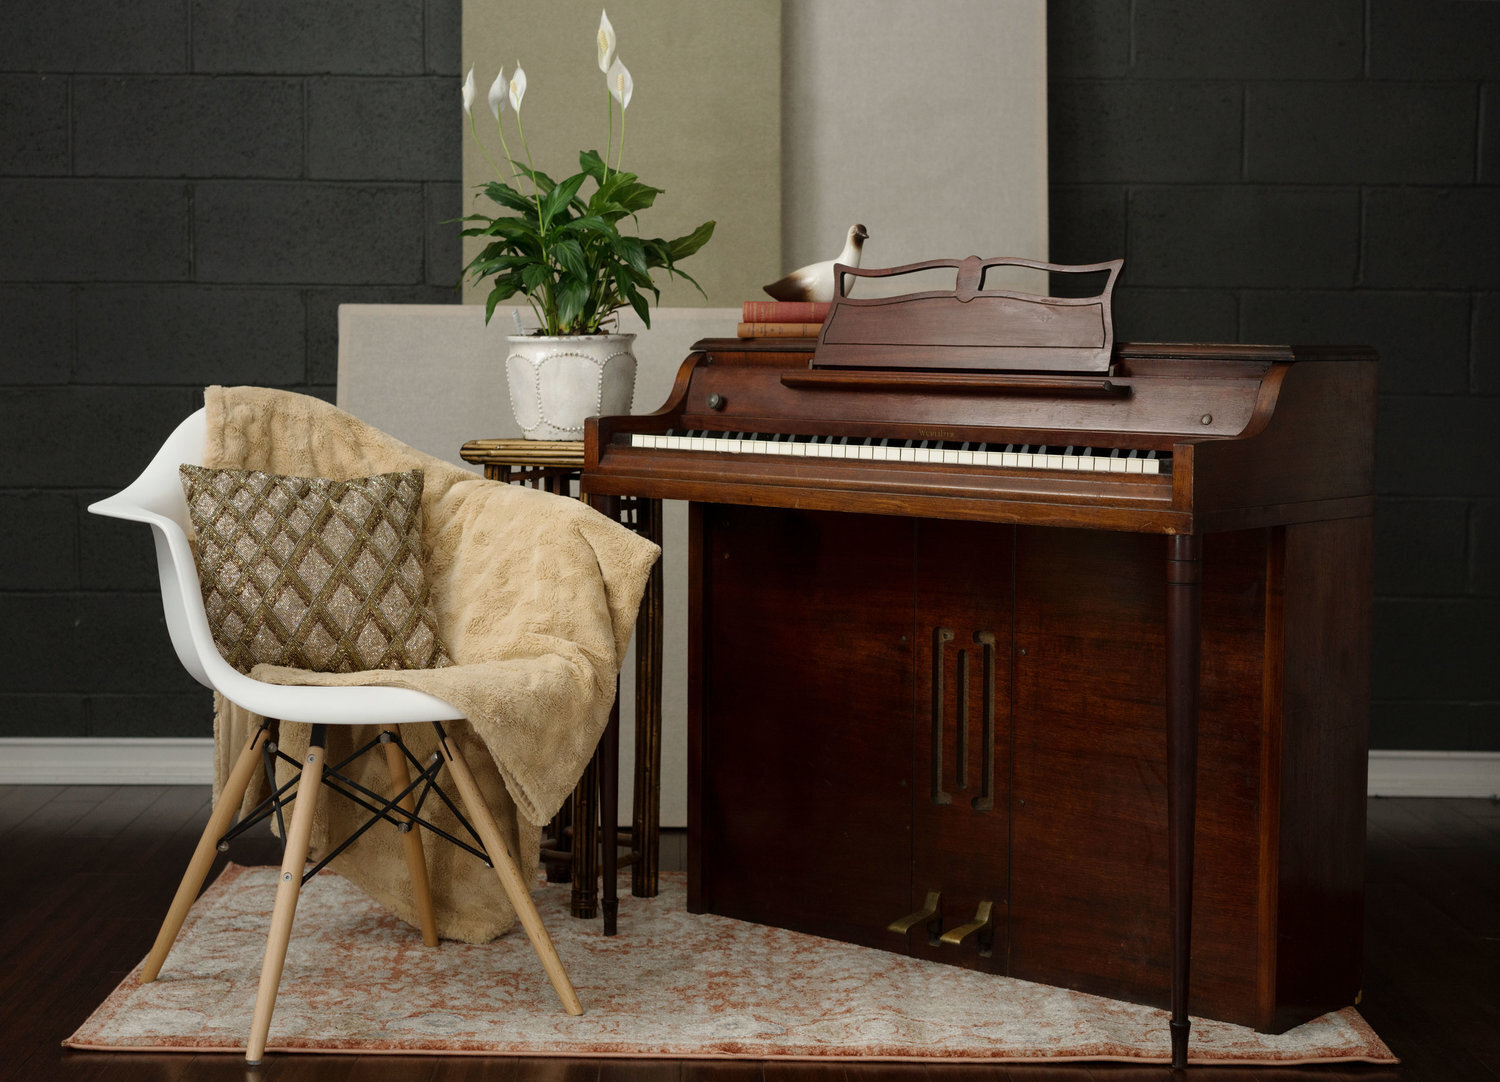
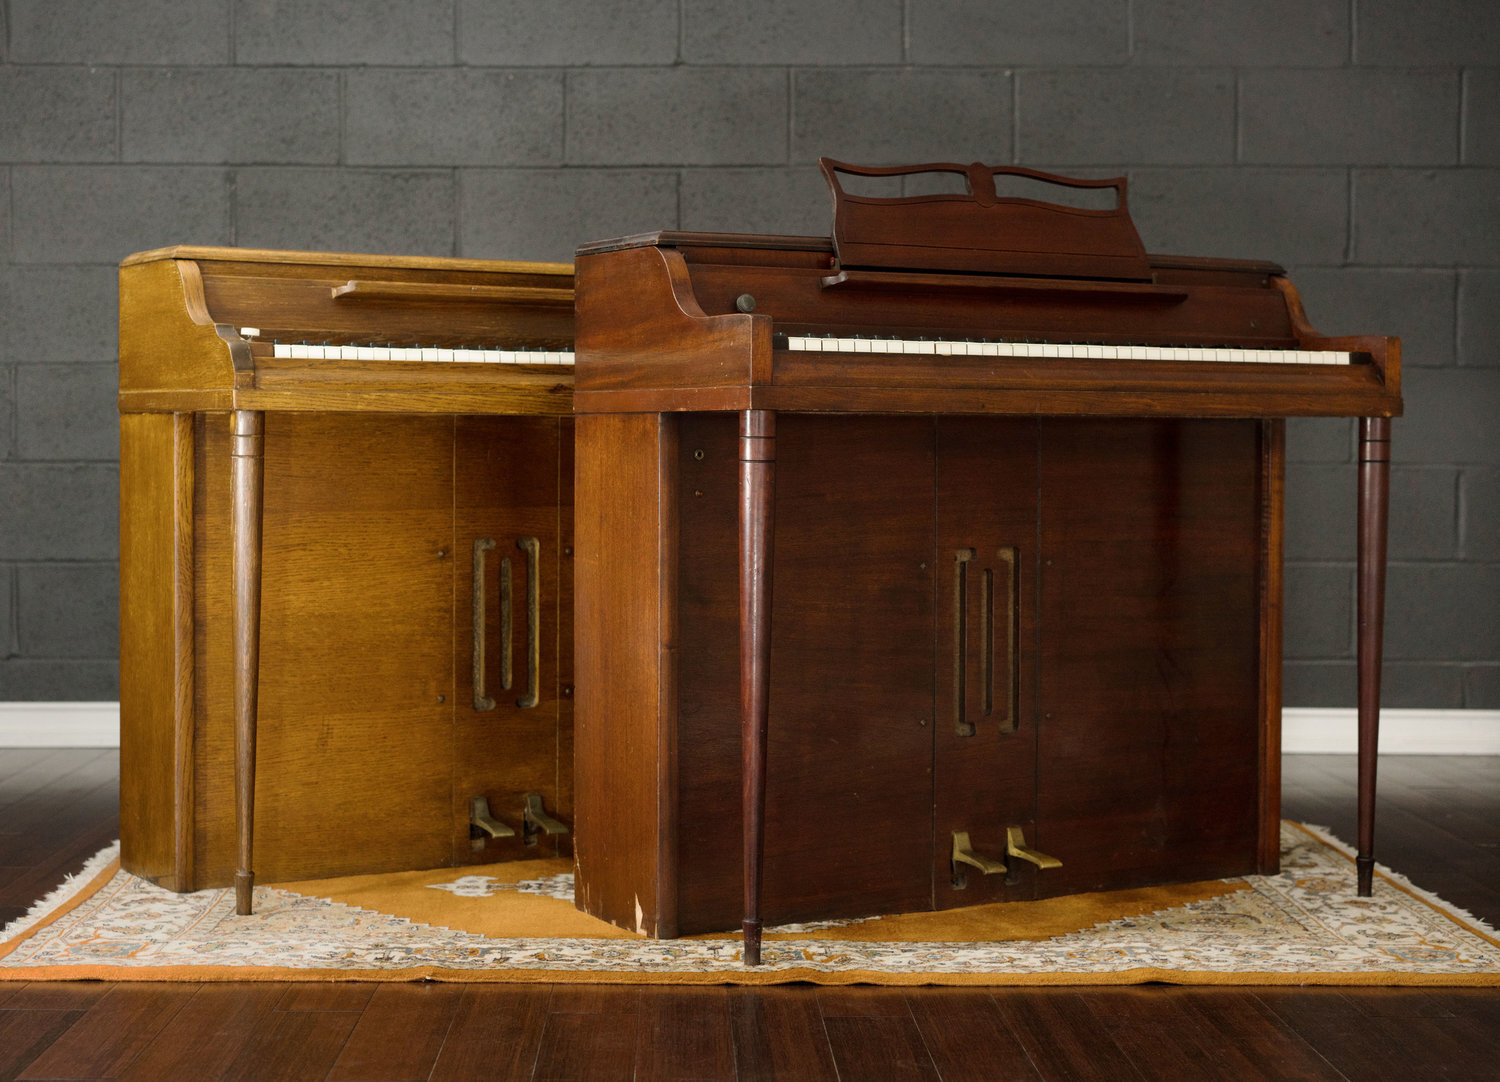
The Wurlitzer 700 is the console version of the Wurlitzer 120, and its manual is very similar to the 120 manual. The 700 is the same keyboard, except that it is housed in a more traditional cabinet that resembles a spinet piano. The primary differences between the two manuals is that the 700 manual has photos and diagrams of the console.
The 700 schematics are slightly different as well, to account for a few different wiring harness connections. However, it is much easier to read than the 120 schematic, so if we just need to refer to the general topology, we usually reach for the 700 schematic. (If you are consulting the schematic, download the Schematics & Diagrams version of the manual. Because the full version is text-searchable, the schematics ended up a little bit distorted in the main manual.)
Here are the major differences between the 120 and 700 amplifiers:
The Wurlitzer 120 has a neon pilot light, which is connected to the DC power supply. The 700 has a different kind of lamp, and it is powered by the AC heaters. For this reason, the wiring harnesses are not interchangeable.
The Wurlitzer 700 has a soft pedal. It is electronic, and simply attenuates the signal when engaged.
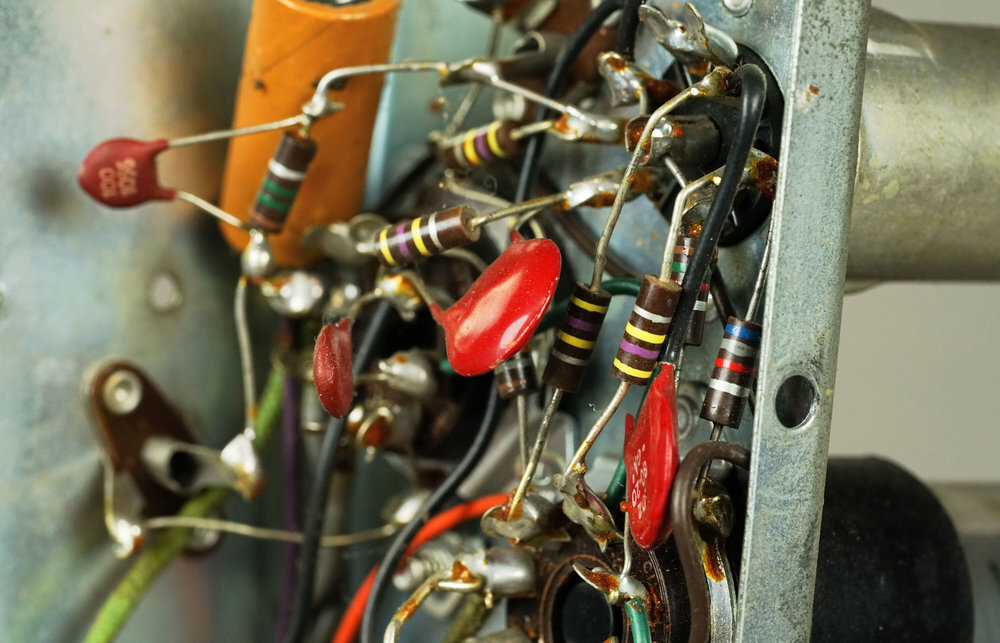
There may be some minor differences in component values, particularly at the input circuit. However this should be attributed to the fact that the 700 is a later release than the 120, and the amplifier underwent a few slight revisions over the years. If you have a 120, it might pre-date the release of the 700.
Some 700 models may have the input coupling capacitor and the power supply resistor mounted on the reed bar, instead of inside the amplifier. This was intended to reduce “frying noise,” which Wurlitzer identified as a problem in some 700 keyboards in a service memo. When we repair a 700 amplifier, we typically remove them from the reed bar and install new ones in the chassis. We have never encounter the frying noise, and putting everything in the chassis makes it easier to test the amplifier. Also, the resistor is intended to reduce the current of the polarizing voltage, so it is safer for it to be mounted inside where you can’t accidentally touch it during routine service.
Download the Wurlitzer 700 service manual (and other Wurlitzer service manuals) here.
Wurlitzer 700 Service Manual Readers’ Guide
If you are consulting the service manual for advice on regulating your Wurlitzer, here are the pages to look for:

A photo from the 700 schematic illustrating how to remove the cheek block.
First of all, Wurlitzer published a lot of images to show you how to unscrew the top of the keyboard and remove the cheek block (pages 4 through 6). It’s not rocket science, but they bothered to do it and you should appreciate them. This bullet point was brought to you by our traumatic experience taking apart Optigans.
An enormous pull-out diagram of everything inside the 700, from top to bottom (page 9). This is high art and we love it.
Checking the Bar and Reeds (page 11) describes how the reed bar should “float freely” on its rubber washers, and should not be screwed down too tightly.
Instruction on Key and Action Regulation on pages 12-18, which has a lot of text as well as some pretty useful images.
Specific regulation tasks: Key Leveling and Adjusting Capstan Screws and Let-Off are found on page 12. Adjusting the Butt Spoon is on page 16. Adjusting Dampers is on page 18. Setting the Hammer Strike Point, and how to tell if it needs adjustment at all, is also on page 18.
Troubleshooting information on Blocking Hammers and Tones not produced by a light touch are found on page 19.
The manual’s advice on using the Headphones and External Speaker is somewhat risky, since it suggests that “any” low-impedance speaker may be used. If you connect too low of an impedance to the amplifier, the output transformer and power tubes may become stressed. This may be acceptable when the amplifier was new, but today we recommend mitigating the risk by being more strategic about the devices you connect to your instrument, particularly if you plan on keeping them plugged in for the long haul. More information here.
Interesting notes:

This manual has the same amazing photos of the one-key demonstration assembly as the Wurlitzer 120 manual. However, it also contains quite a few supplemental photographs that show someone regulating the actual complete instrument. These photos are not found in the 120 manual, even though the actions they depict are equally applicable to the 120.
Currently dreaming of an alternative universe where Wurlitzer put the 920 extension amplifier inside the 700. There is so much unused space in that cabinet, and, plus, Wurlitzer dreamed of adding onboard tremolo to the electronic piano from the very beginning. Effects and a more powerful amplifier would have made the 700 unstoppable.
There is a huge parts list at the end of the 700 manual, starting at page 25. Lists like these always make us a little sad: here is every part in the keyboard, ripe for the ordering, anytime you need it. Now, of course, you can’t obtain any of these parts, unless you really get lucky. But imagine ordering a new damper rod rubber grommet, straight from Wurlitzer.
One subtle point in the list is the instruction to “specify the finish on all wood parts.” We know of two finishes for the Wurlitzer 700: mahogany and oak. However, on page 26, there are four colors listed under “grille cloth:” ebony, oak, walnut & mahogany. (Walnut & mahogany share a line.) Are these different colors of fabric? Are these different finishes of keyboard? Where are the ebony 700 Wurlitzers??
There are also four colors listed under “volume control knob”: mahogany & walnut, ivory, and ebony. We think these refer to the color of the knob, because oak is missing (we know that oak 700s exist), and we have seen “ivory” and “ebony” knobs on different 700s.
You could also choose between a black Power Supply Cord (EP-347-1) and a brown one (EP-347-2). Of course: everyone deserves a power cord that matches their keyboard. Wish we had a silver cord for our Minilogue.
Further Reading
Browse all of our articles on restoring vintage gear. Or, click on an image below.