Allen & Heath GS-3: Cleaning the Knobs on a Vintage Console
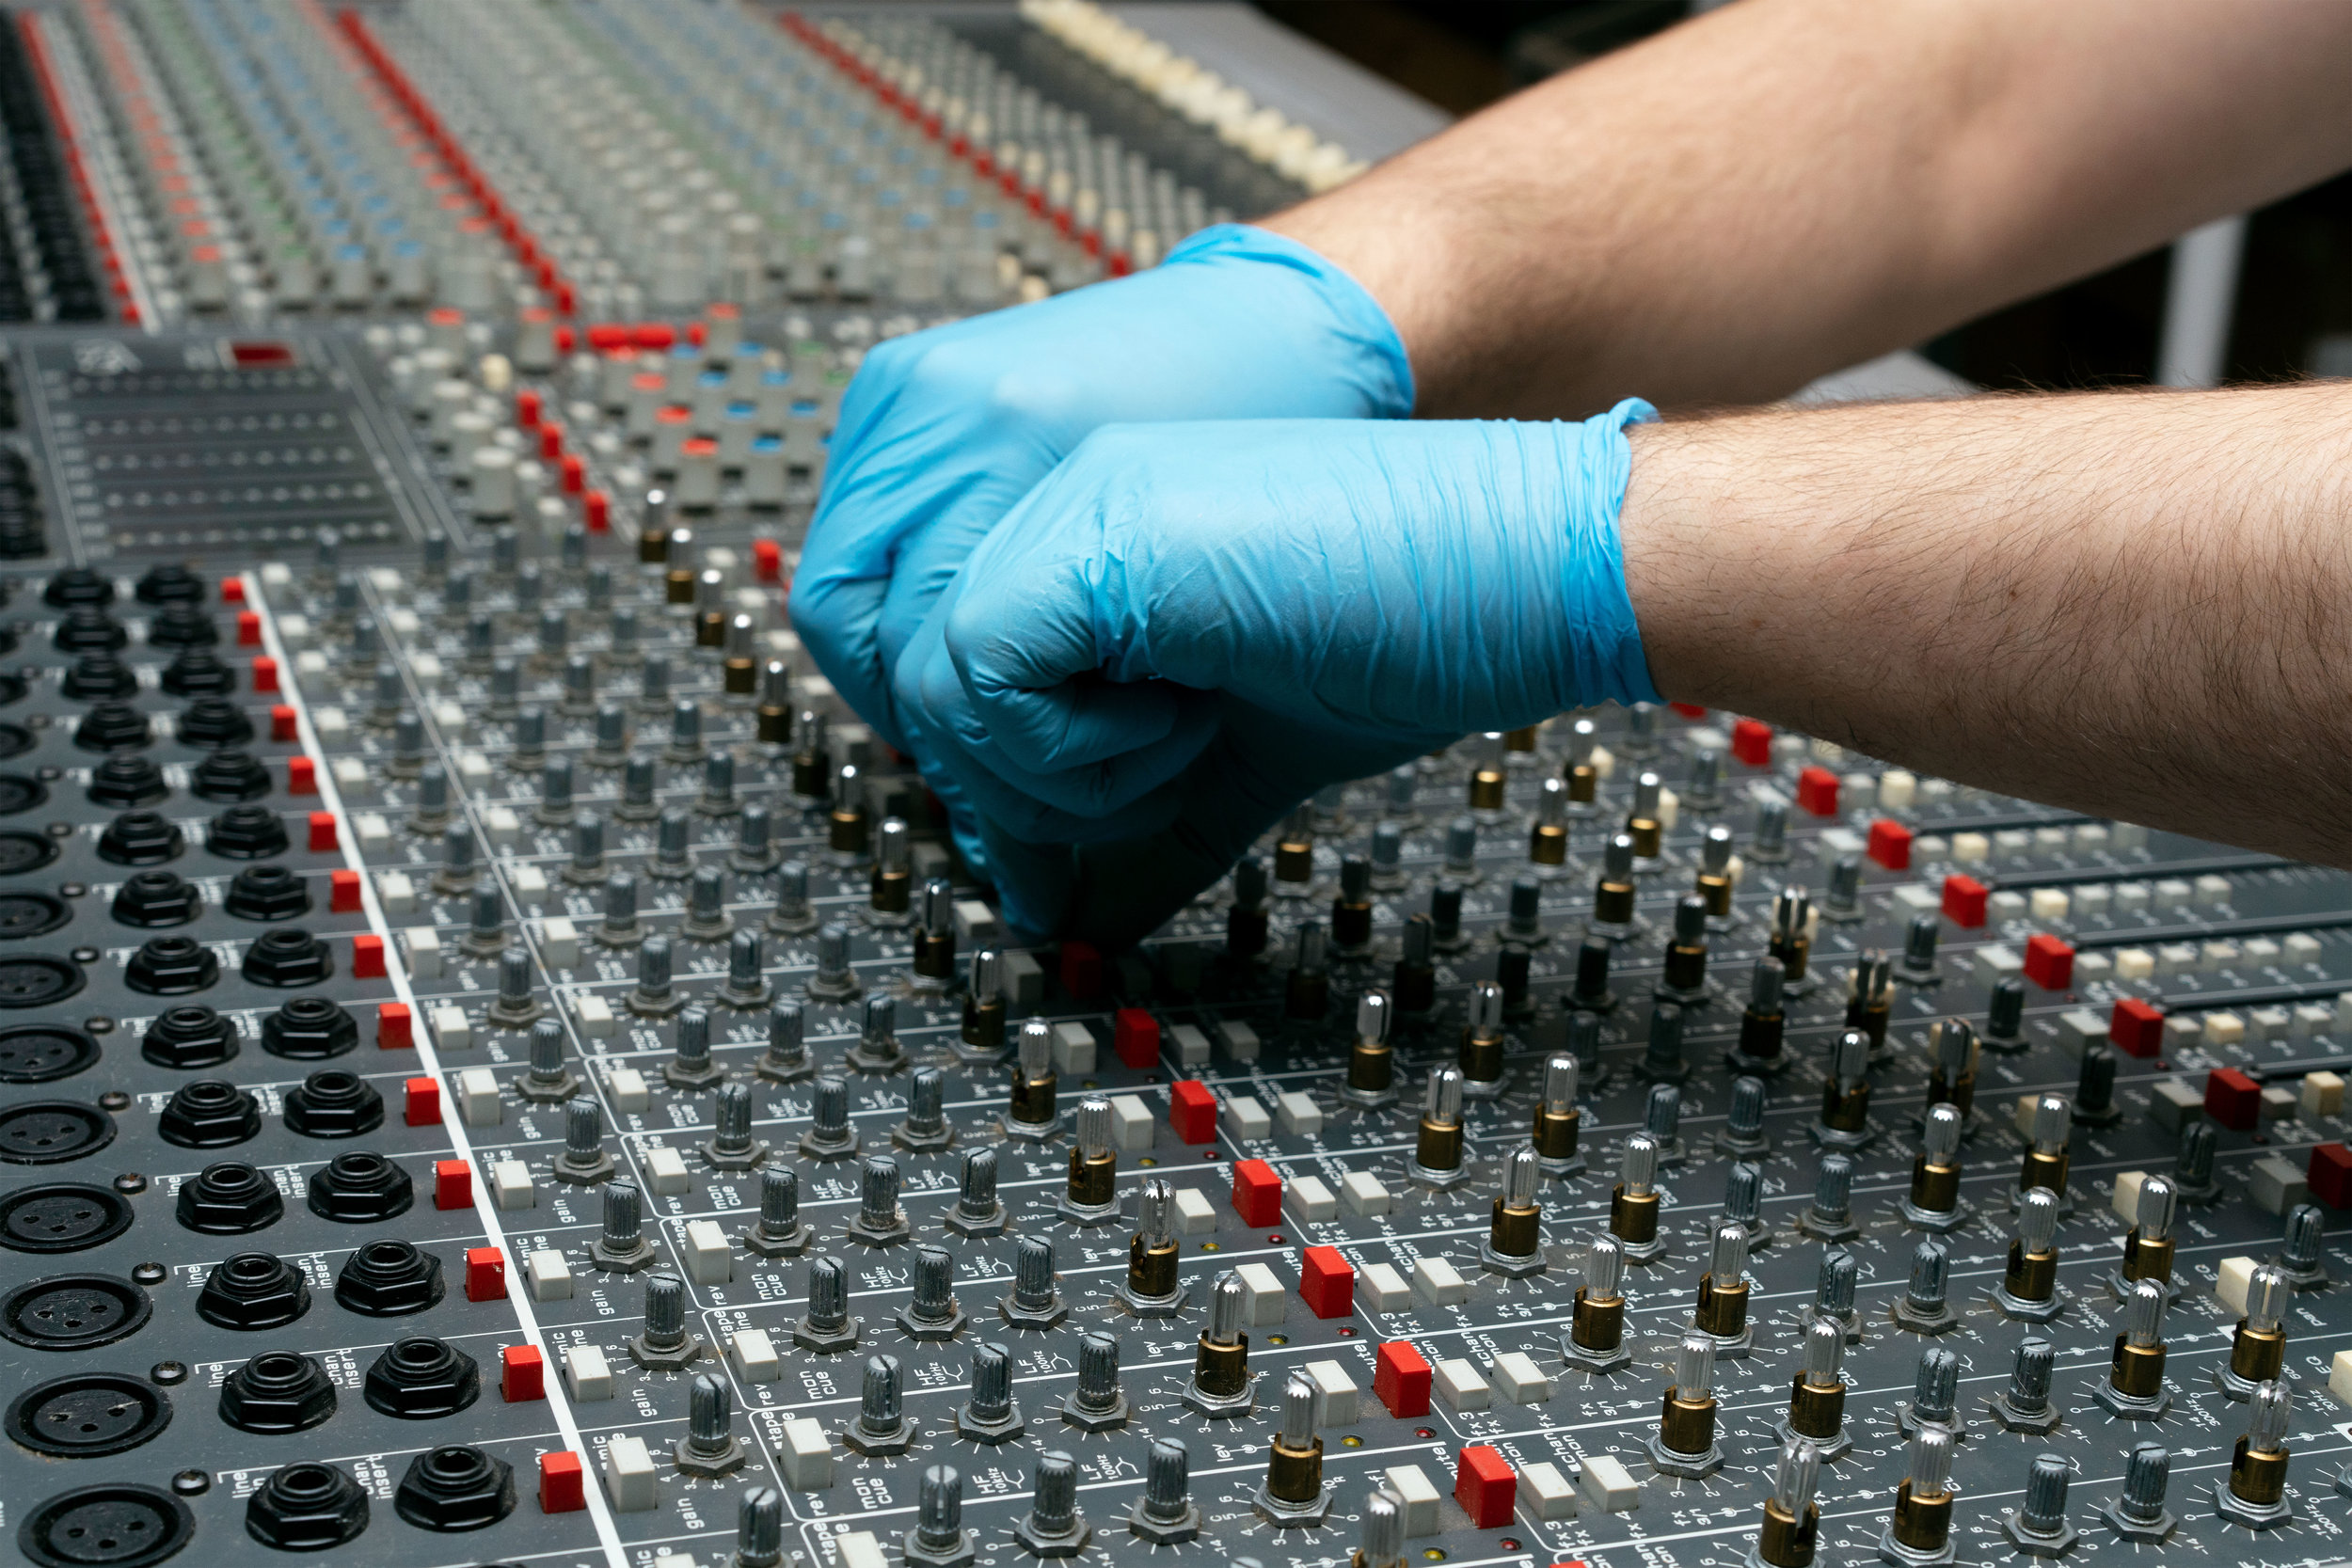
When we received our Allen & Heath GS3, it was caked in dust but otherwise in great working condition. We wanted it to sparkle like the technological marvel it was when it was released in 1994, so we took it apart and gave it a deep clean. The worst areas were in the crevices of the knobs and the spaces underneath the knobs. (There was also some tape residue across the front hand-rest area, which is always upsetting to see, but it was trivial to remove.)
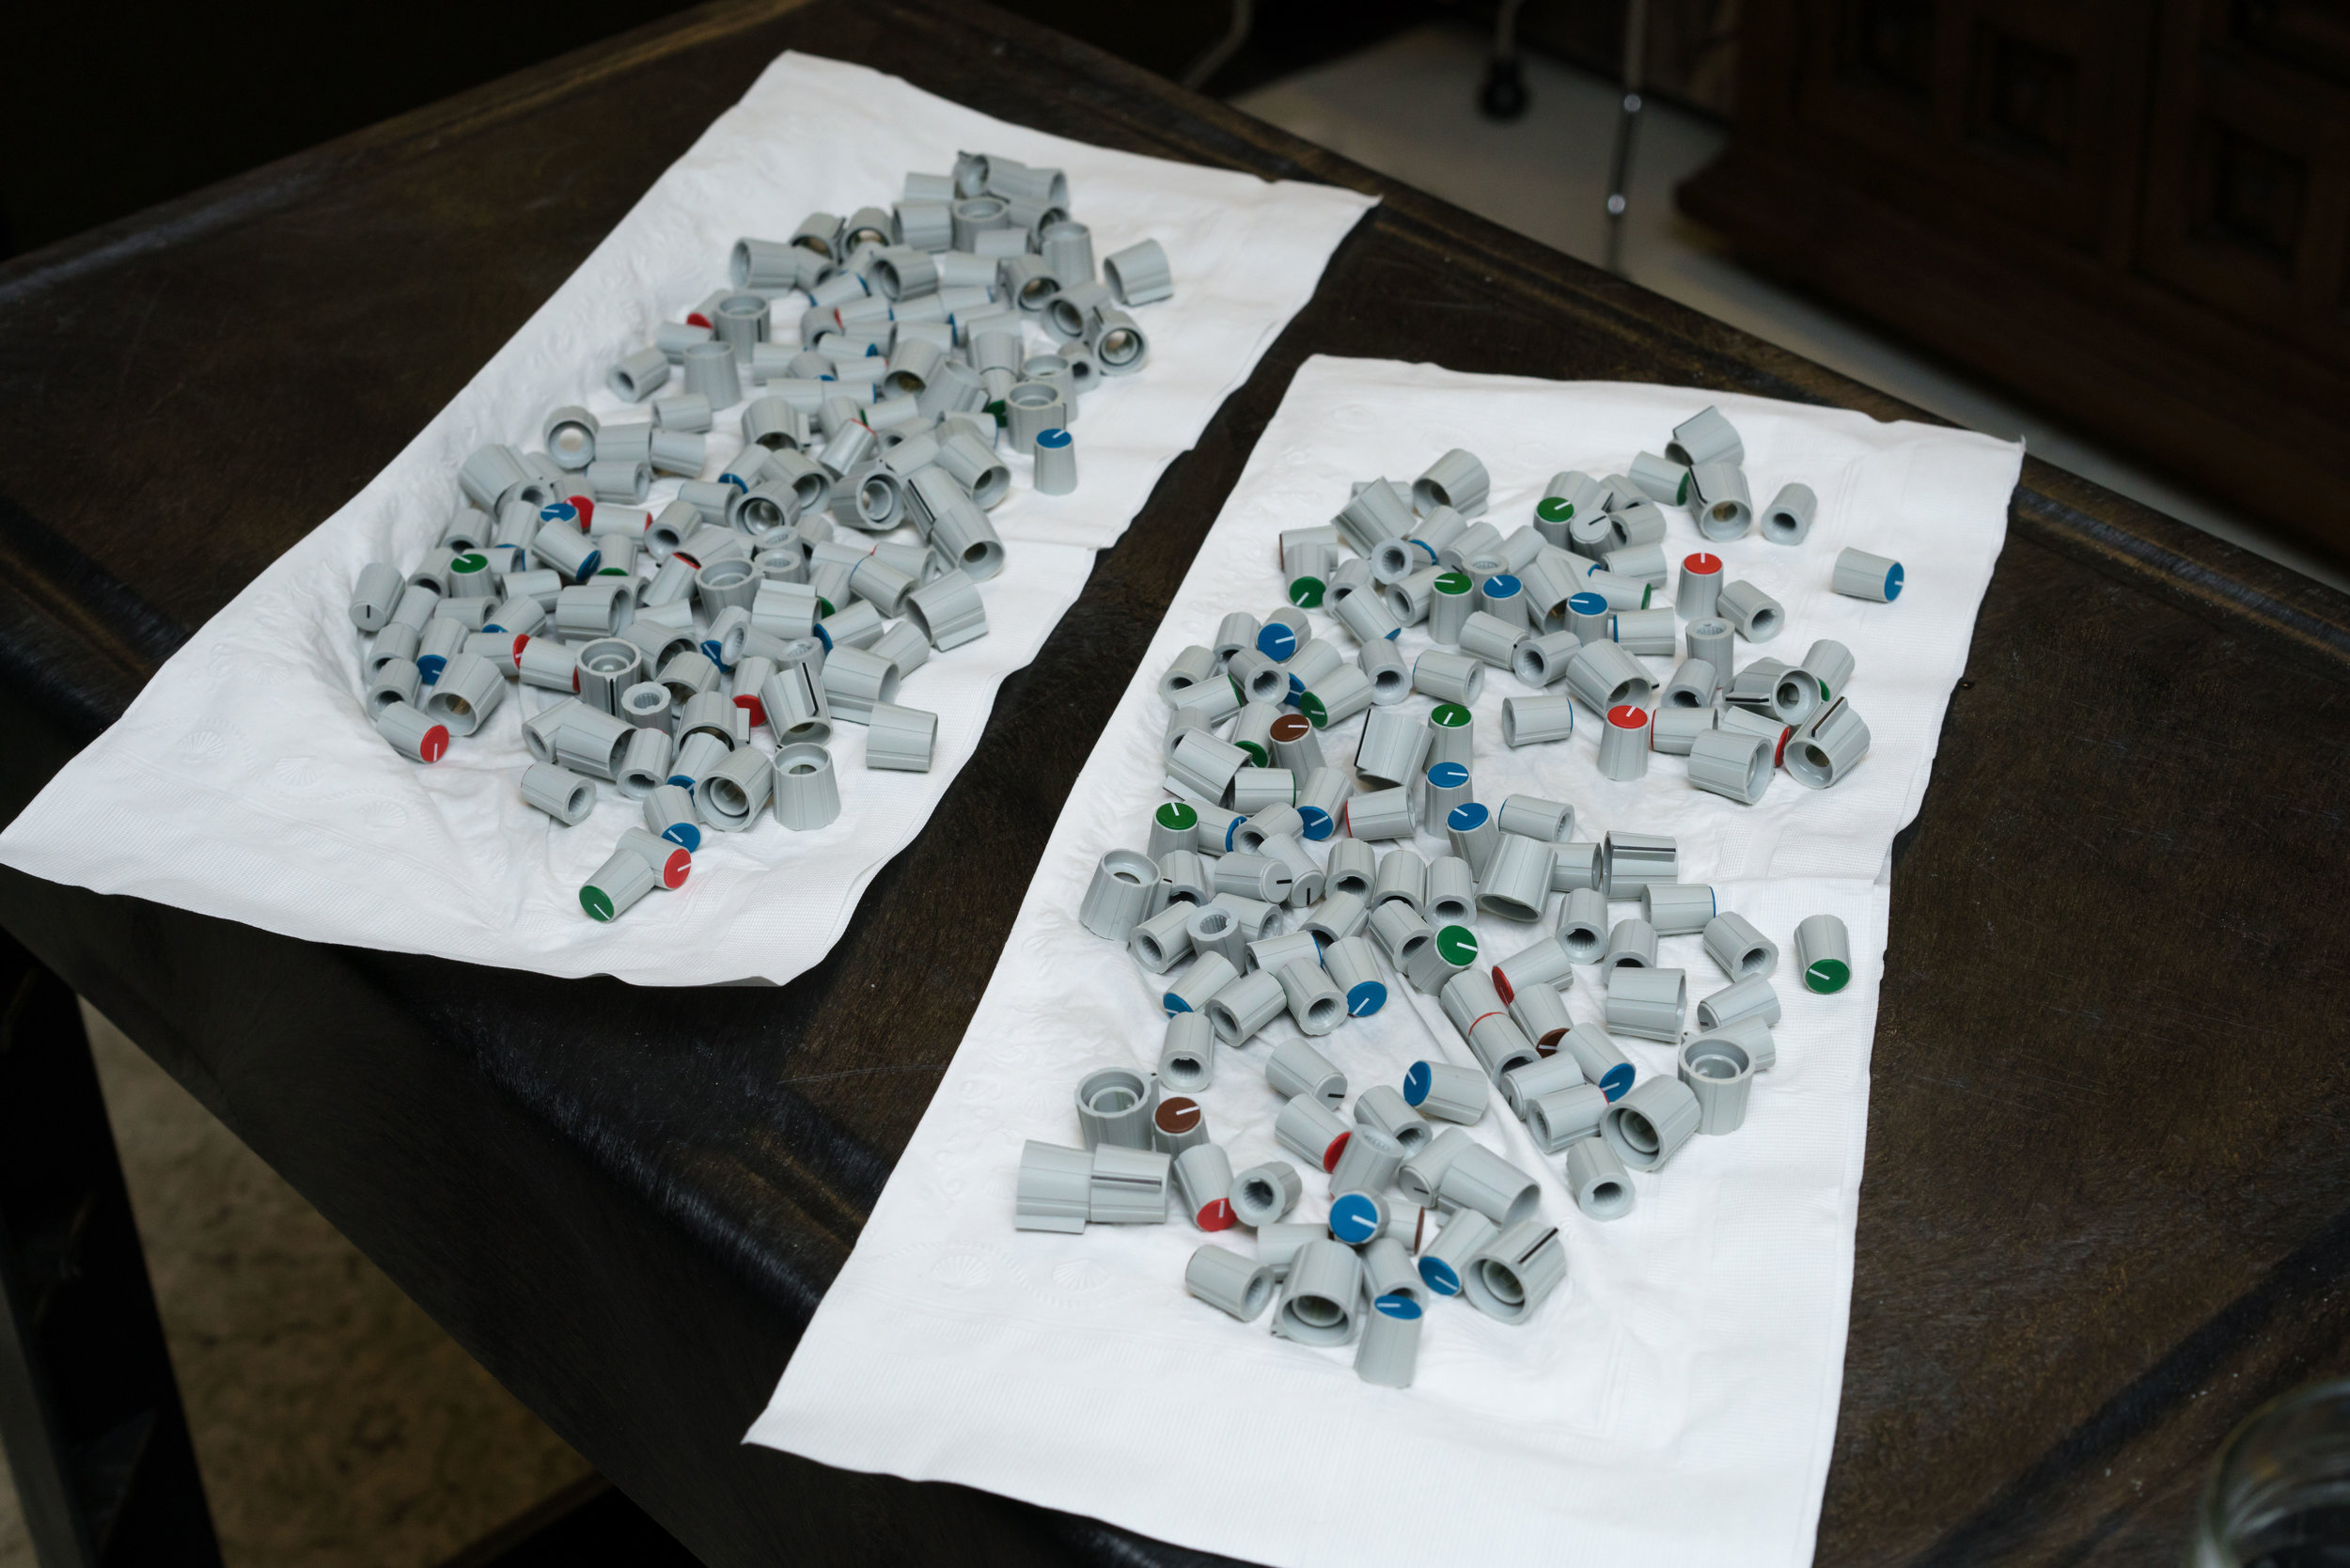
The Allen & Heath knobs once they were all cleaned. Somehow, it looks like a lot more knobs once you take them off the console.
To avoid getting liquid into any sensitive areas of the board, we first removed all of the knobs. Then, we soaked them in a mixture of water and mild detergent. While the knobs were soaking, we cleaned the face of the board. Finally, we removed the knobs from their bath and used a soft brush to dislodge any stubborn dirt.
We took photos of the board before we started, which was important because after spending a couple of hours cleaning the knobs we forgot which colors went where. Also, on the 24-track board, there was one knob that was dark green and didn’t match any of the others. We definitely needed the photos to put that one back, since there was no rhyme or reason to its existence (maybe it was a replacement?).

The 16-channel Allen & Heath on our recording desk.
The GS3 originally retailed for around $4500 for the 16-channel version and $6500 for the 24-channel version. An 8-channel extension was also available for $2000. Of course, it isn’t worth anything near that these days, but that does give you a little indication of what went into manufacturing it.
We went on an Allen & Heath spree and had both the 16- and 24-channel units for a while. We ended up re-homing the 24-channel GS3, but we currently use our 16-channel one. Its preamps are clean and accurate and it is still a workhorse after all these years.
Cleaning Tips for vintage consoles
Turn off the console and unplug it before cleaning.
Take photos before you start. That way, if you forget how to put something back together, you have the pictures to help. Plus, you’ll have photographic evidence of your progress when you’ve finished.
Remove anything that can be removed, and clean it separately. This diminishes the chance of getting liquid inside the console where it can damage the electronics.
When cleaning the face of the board, use as little liquid as possible. If your detergent comes in a spray bottle, always spray the cloth and not the board.
Always spot-test any cleaning product before using it on screenprinted areas.
If you do spill liquid inside the console, make sure that it dries thoroughly before turning it back on. (Even if it’s just a little overspray from a spray cleaner, it doesn’t hurt to leave it alone for a few hours before firing it up again.) To help the drying process, open up the console to increase airflow and make sure it is in a dust-free, low-humidity area.
Further Reading
Browse all of our articles on restoring vintage gear. Or, click on an image below.