How to Replace Vintage Filter Capacitor Cans
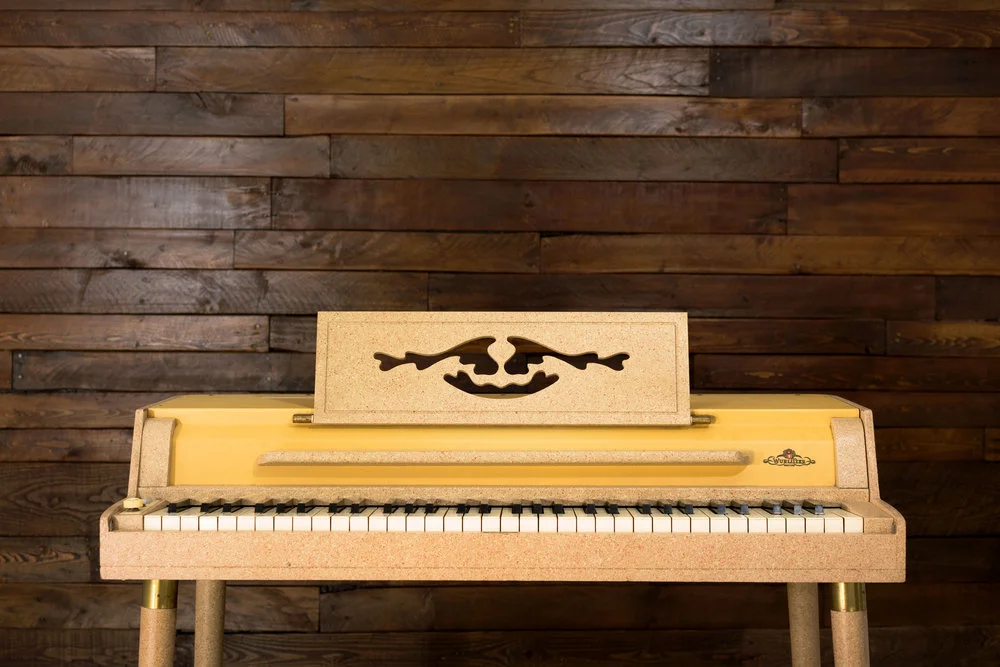
The filter capacitor can in a Wurlitzer 700.
The filter capacitors in many amps are mounted in a metal can, which can be an obstacle to successfully recapping the amp. These days, filter cans are only made in a limited values, so it's hard to find the exact match. Mounting the caps outside of the can is another option, but finding the space can be tricky. Removing the can can leave a giant hole, which can allow dust to enter the chassis over time. So, what's the best way to replace can-style filter capacitors?
Use a new replacement filter can. Multi-capacitor cans are rarely used these days in consumer electronics. For that reason, new cans are available in fewer values than they used to be. If you can't find a can with your exact values, you can use one with approximately the same values.
Disconnect the old can and mount the new capacitors inside the chassis. This can be difficult if your chassis is small. Filter capacitors are usually very large. Mounting them in a can conserves space in the chassis that can be used for other components.
If the can is not physically leaking, you can leave it in place as long as you ensure that the old leads aren’t touching anything they’re not supposed to. This preserves the original appearance of the amplifier, and keeps the chassis enclosed so that dust can’t enter the space where the can used to be. However, if the can is leaking, you’re probably better off taking it out.
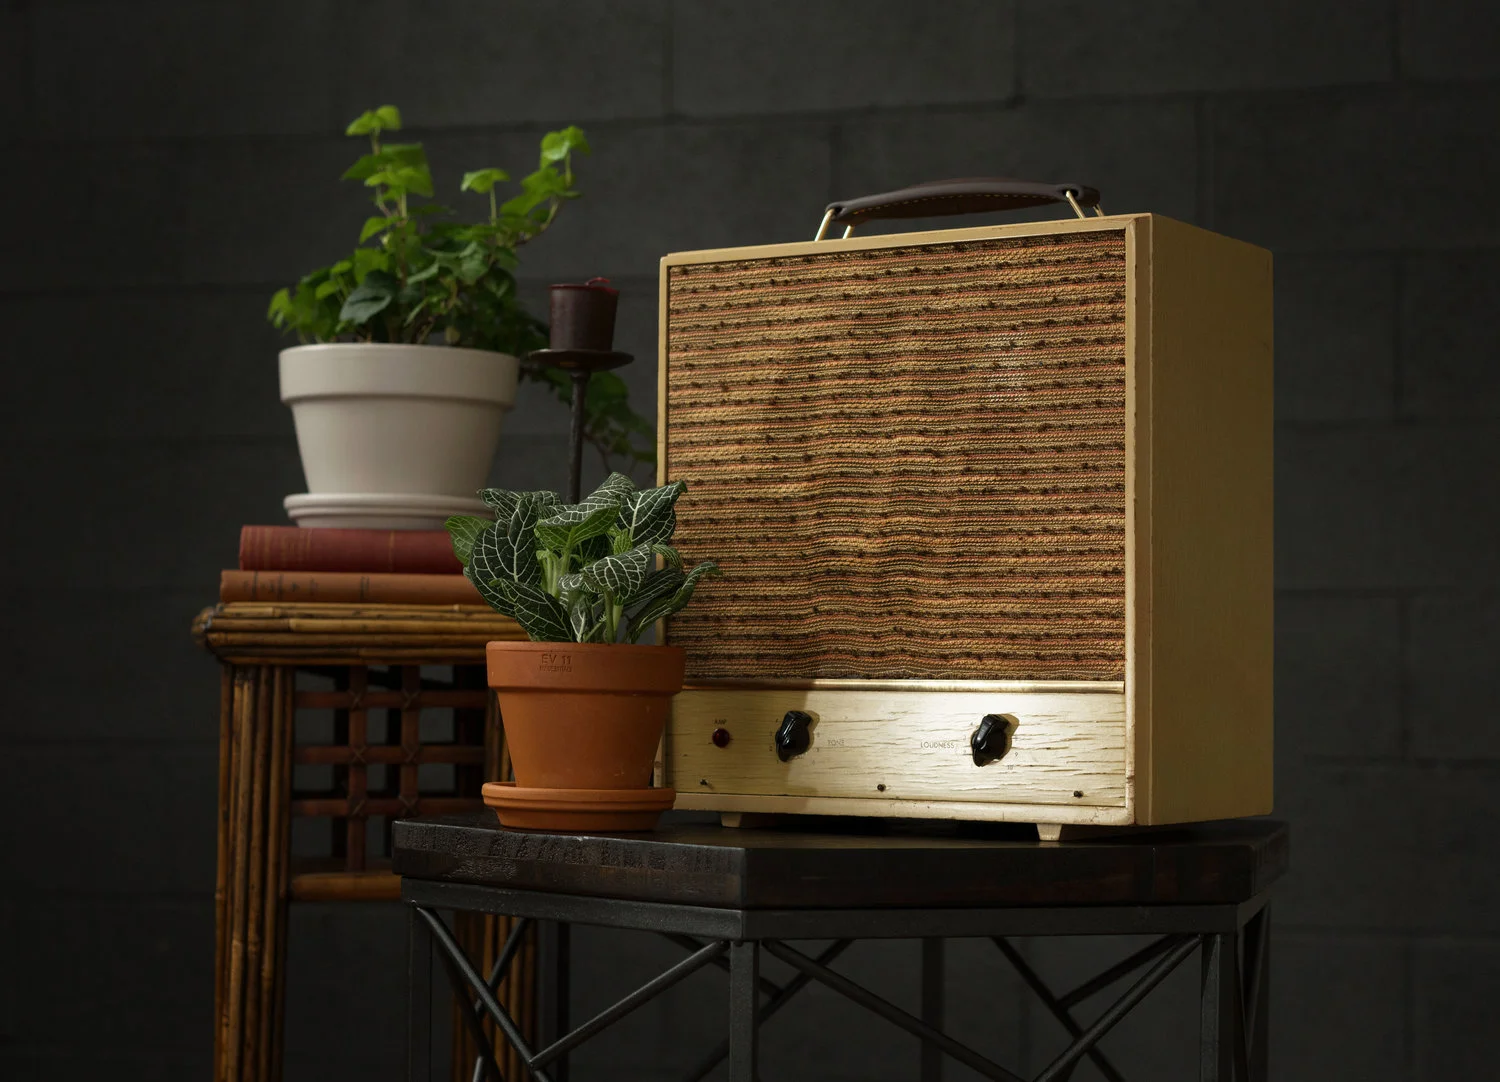
The capacitor can in a Wurlitzer 145 amplifier.
Note that certain brands of filter cans used materials that are highly toxic. Wear gloves when handling any leaky old components and dispose of any hazardous materials appropriately.
Where should I mount the new capacitors? Filter capacitors should be mounted near the stage that they are filtering. If there’s no room for that in your circuit, that’s fine. After all, the original capacitors in the can weren’t mounted near their corresponding stage: they were mounted wherever the can was, usually near the power transformer. If you can mount the new caps somewhere in the vicinity of the old can, that’s a good spot.
Often, there is very little extra space within the chassis, and you’ll need to get creative in your mounting. Just try to keep your power supply leads short, close to the chassis, and physically distant from signal leads.
Choosing capacitor values. Many vintage amplifiers use capacitor values that are no longer standard. Remember, though, that filter caps were never precisely chosen and often had a 20% tolerance. For instance, 50 uf is found in many vintage amps, but it is a rare value today. However, 47 uf is common, and because it’s within 20% of 50uf, it’s functionally equivalent. Note that if you’re set on a particular value, you can often find it, but it will likely be more expensive.
You can also choose slightly different values, which can change the voicing of your amp. Higher values are associated with a stiffer power supply, less compression, and more accurate response. Lower values increase compression and sag, but values that are too low can reduce the isolation between stages and may cause the amp to become unstable. Also note that the total compression and responsiveness of the amp depends on the design of the power supply as a whole. Filter caps alone can only do so much.
If your amp has a tube rectifier, you should take care not to exceed its maximum input capacitance. If the first filter capacitor is too large for the rectifier to keep up with, it will fail. You should also take note of the voltage rating of the original capacitors. You can exceed that rating, but don’t install any capacitors with lower voltage ratings. Note that if you install two or more capacitors in series, you can add their voltage ratings together. (Their capacitance is equal to 1/(1/C1+1/C2).) This is particularly useful if the expected voltage of the circuit is around 450v or more. Electrolytic capacitors are rarely found with ratings exceeding 450v, but you can use two 350v capacitors in series to create a rating of 700v.
Further Reading
Browse all of our articles on restoring vintage gear. Or, click on an image below.