How We Digitized the Wurlitzer Service Manuals

We are very excited to announce that our collection of Wurlitzer service manuals are available for download!
The Wurlitzer service manuals are a valuable resource in restoring Wurlitzer keyboards. Although they are not perfect, they contain a lot of interesting, useful, and historically important information. The 112 claims that it is not a guide on servicing pianos in “ten easy steps” (condescending air-quotes theirs!), but it kind of is. You should read the service manual corresponding to your Wurlitzer — and maybe even a few others, since a lot of the information can be applied across models.
When we scanned the manuals, we wanted the final files to be accurate, legible, and a useful reference. To that end, we made them text-searchable. Because the OCR reader made every page searchable, even the schematics, some of the schematics may be distorted. If you need to refer to the schematics, please download the corresponding Manuals & Diagrams file. All of the manuals are high-res and can be printed.
Unfortunately, we do not currently have an original copy of the 140-series manual. When we find it, we will digitize it. If you have one and would be willing to lend it to us, please get in touch. We are also interested in digitizing any other Wurlitzer manuals or materials that you might have. Our scanning methods are non-destructive, so your originals will be safe.

How we digitized the manuals
Scanning the manuals. We scanned the manuals using a mirrorless Sony camera outfitted with a 90mm macro lens. This provided higher resolution files than our (admittedly cheap) scanner, in a format that is easier for us to batch-process in Lightroom. You have to spend a lot of money to get a scanner that will do a better job than a quality camera.
To scan with a camera, you need a tripod that allows you to mount the camera parallel to the subject of your scan. It is difficult to find a tripod that will do this without getting the legs in the shot. We have three tripods, and only one of them (an old Sunpak, and incidentally the cheapest of the three) allows the camera to be positioned in this way. The correct tool is actually something called a copy stand, which we don’t have because they are kind of expensive and we scan things infrequently. (Maybe one day!)
We used two lights to illuminate the pages and ensure that there were no inconsistent shadows. Because we were using a slow shutter speed, and also because we didn’t want to risk unintentionally moving the camera by touching it too frequently, we used a remote. The 90mm macro lens allowed us to fill the frame with the page without introducing distortion. (The long focal length also helped us keep the tripod legs out of the shot.) However, with any lens, the center of the frame will be the sharpest. To keep the page consistently sharp across its length and width, we left some negative space at the top and sides of the page (which we of course cropped later).
We chose to use a lightbox as a scanning surface, because it has ruled edges and a neutral background. (We did not turn the lightbox on.) We did not have a table large enough to keep the tripod stable, so we worked on the floor, using a wooden box to elevate the lightbox several inches.
With one person taking the photos and one person swapping out the pages, scanning took about half an hour. With two people working, it was possible for the photographer to monitor the scans to ensure that nothing shifted or fell out of focus. It would have been possible for one person to work alone, but it would have been more time-consuming.
Editing the scans. We ended up with 218 photos, which we imported into Lightroom. There, we flagged any duplicates, increased the contrast, and removed much of the color cast of the faded old paper. Because our goal was legibility, we planned on editing out every trace of the paper’s texture. We wanted the finished product to have a clean, digital look. At the same time, we wanted to preserve the vintage character of the illustrations as well as the natural look of the typesetting.
After batch-editing the pages into a decent intermediate state, we imported them into photoshop. Here, we turned the background pure white, while preserving as much detail in the text as possible. If you do this step automatically, you will lose all of the subtle light-gray areas in the lettering. The text will still be legible, but you lose the realism of the freshly-scanned page. To preserve the appearance of the text, we used luminosity masks. This allows us to edit the dark and light areas of the page independently.
At this point, we had three types of pages that required further processing.
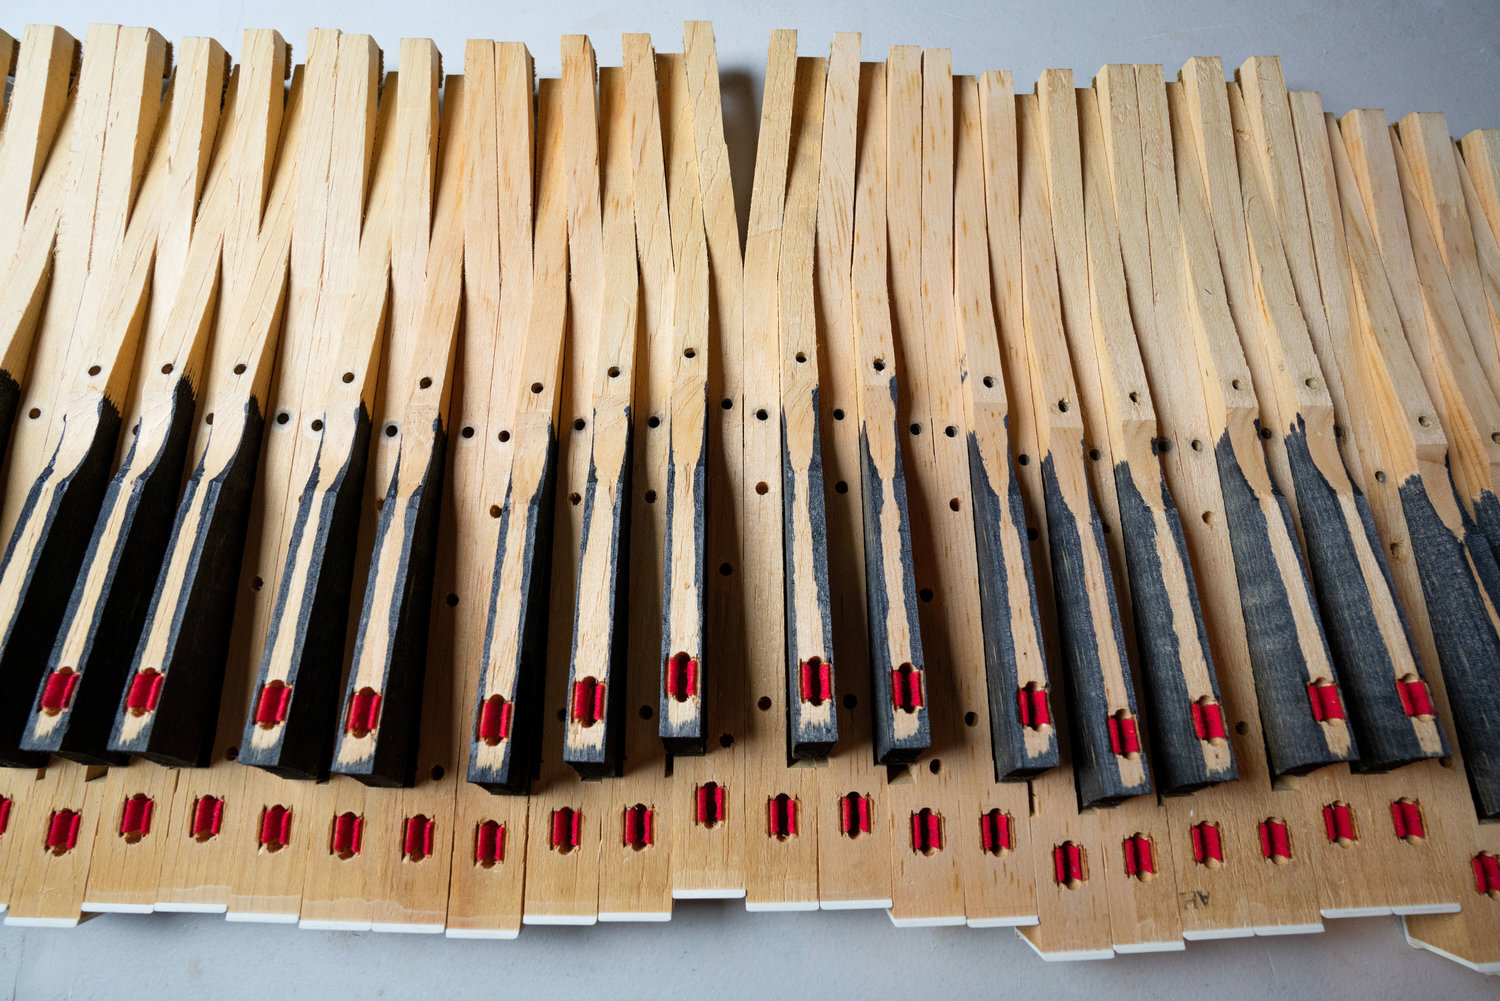
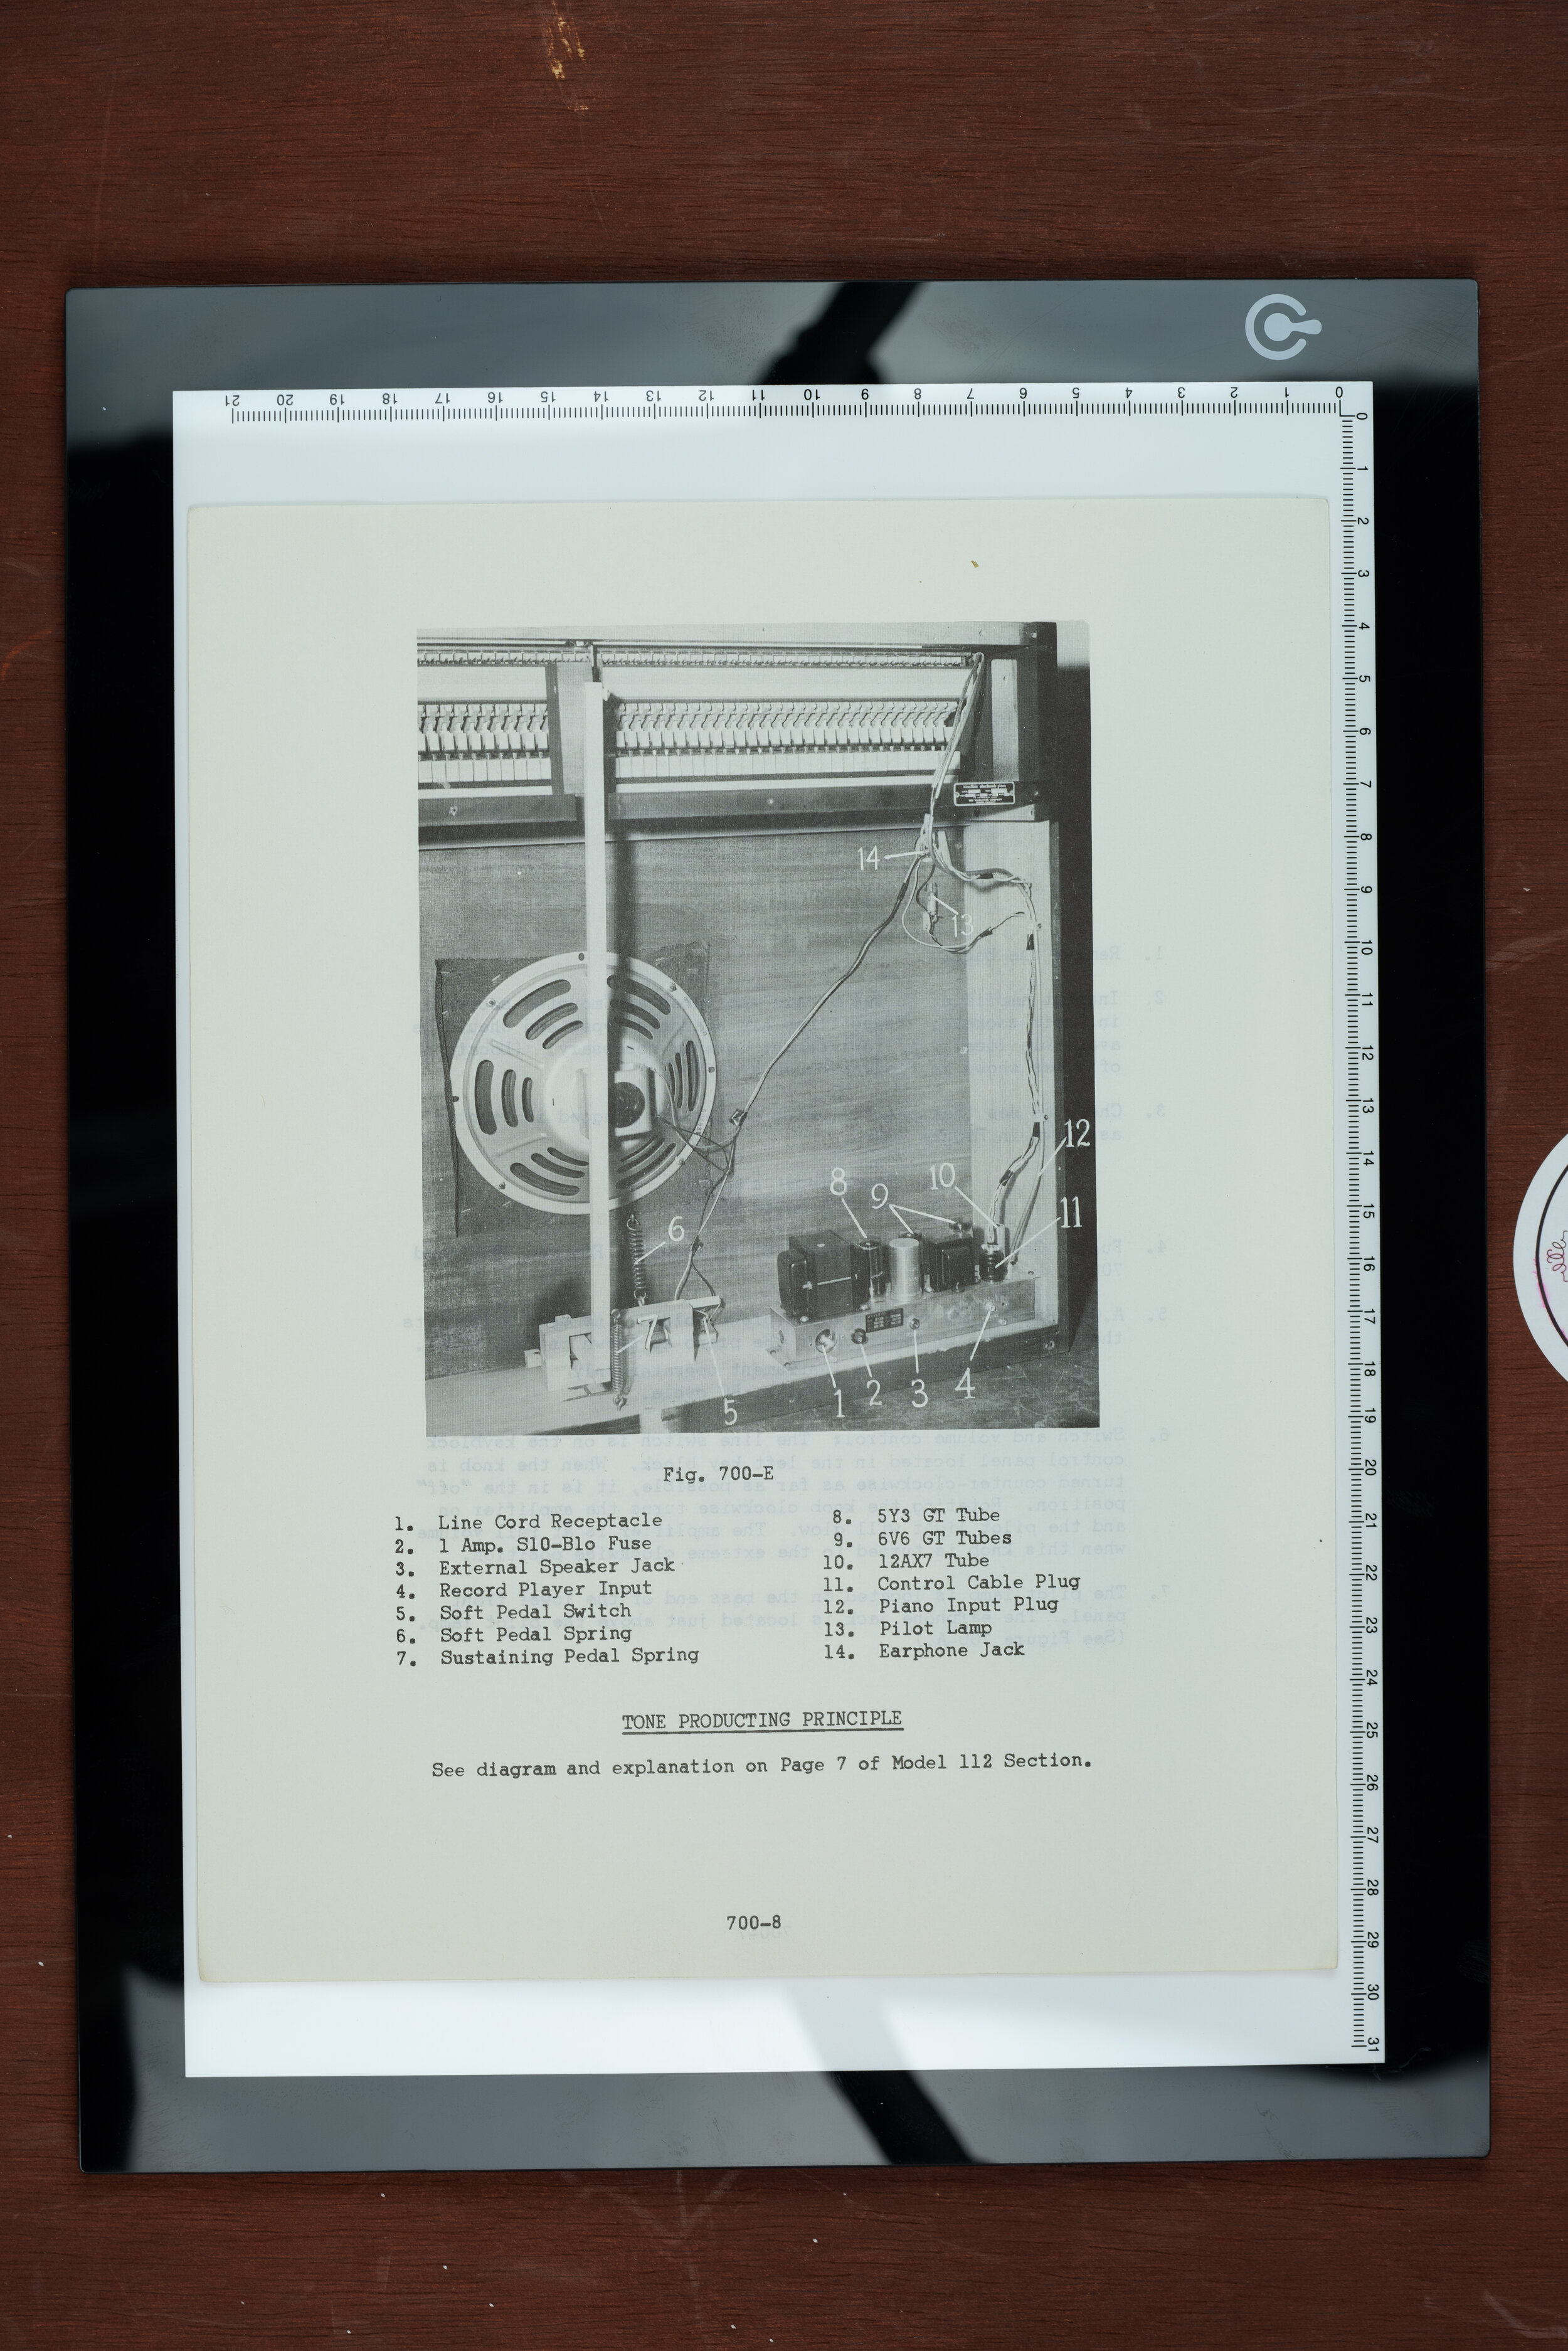
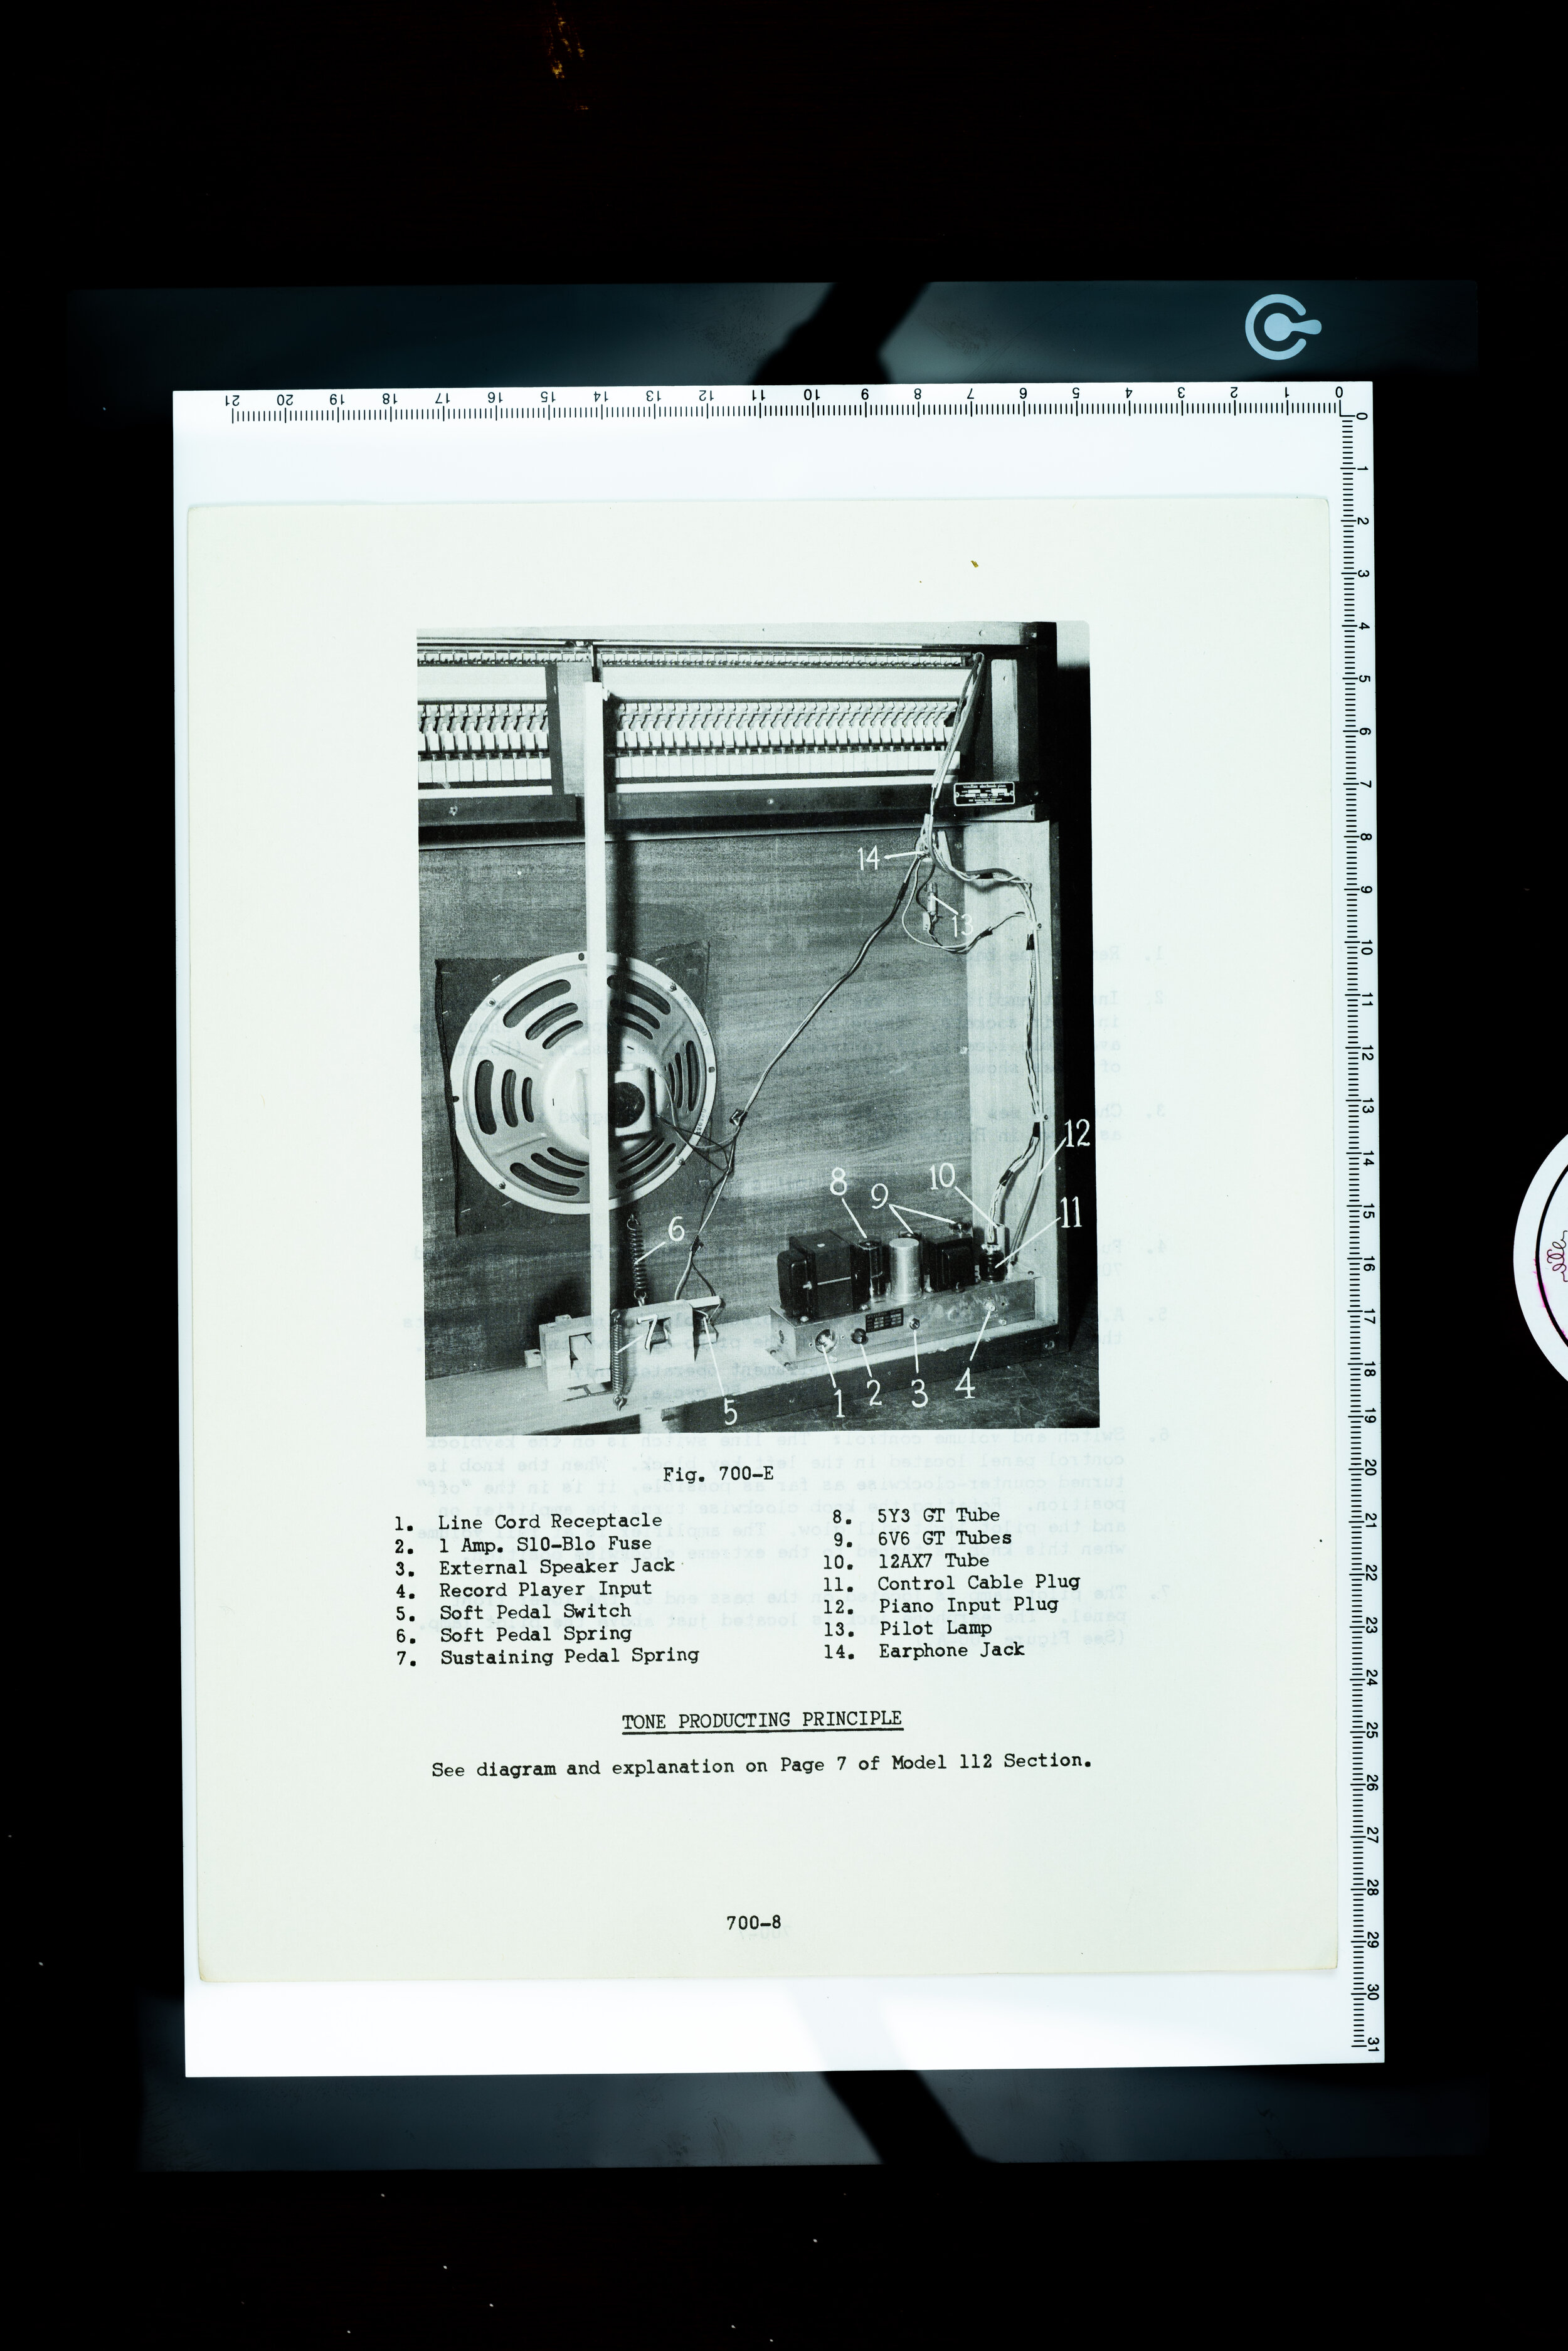
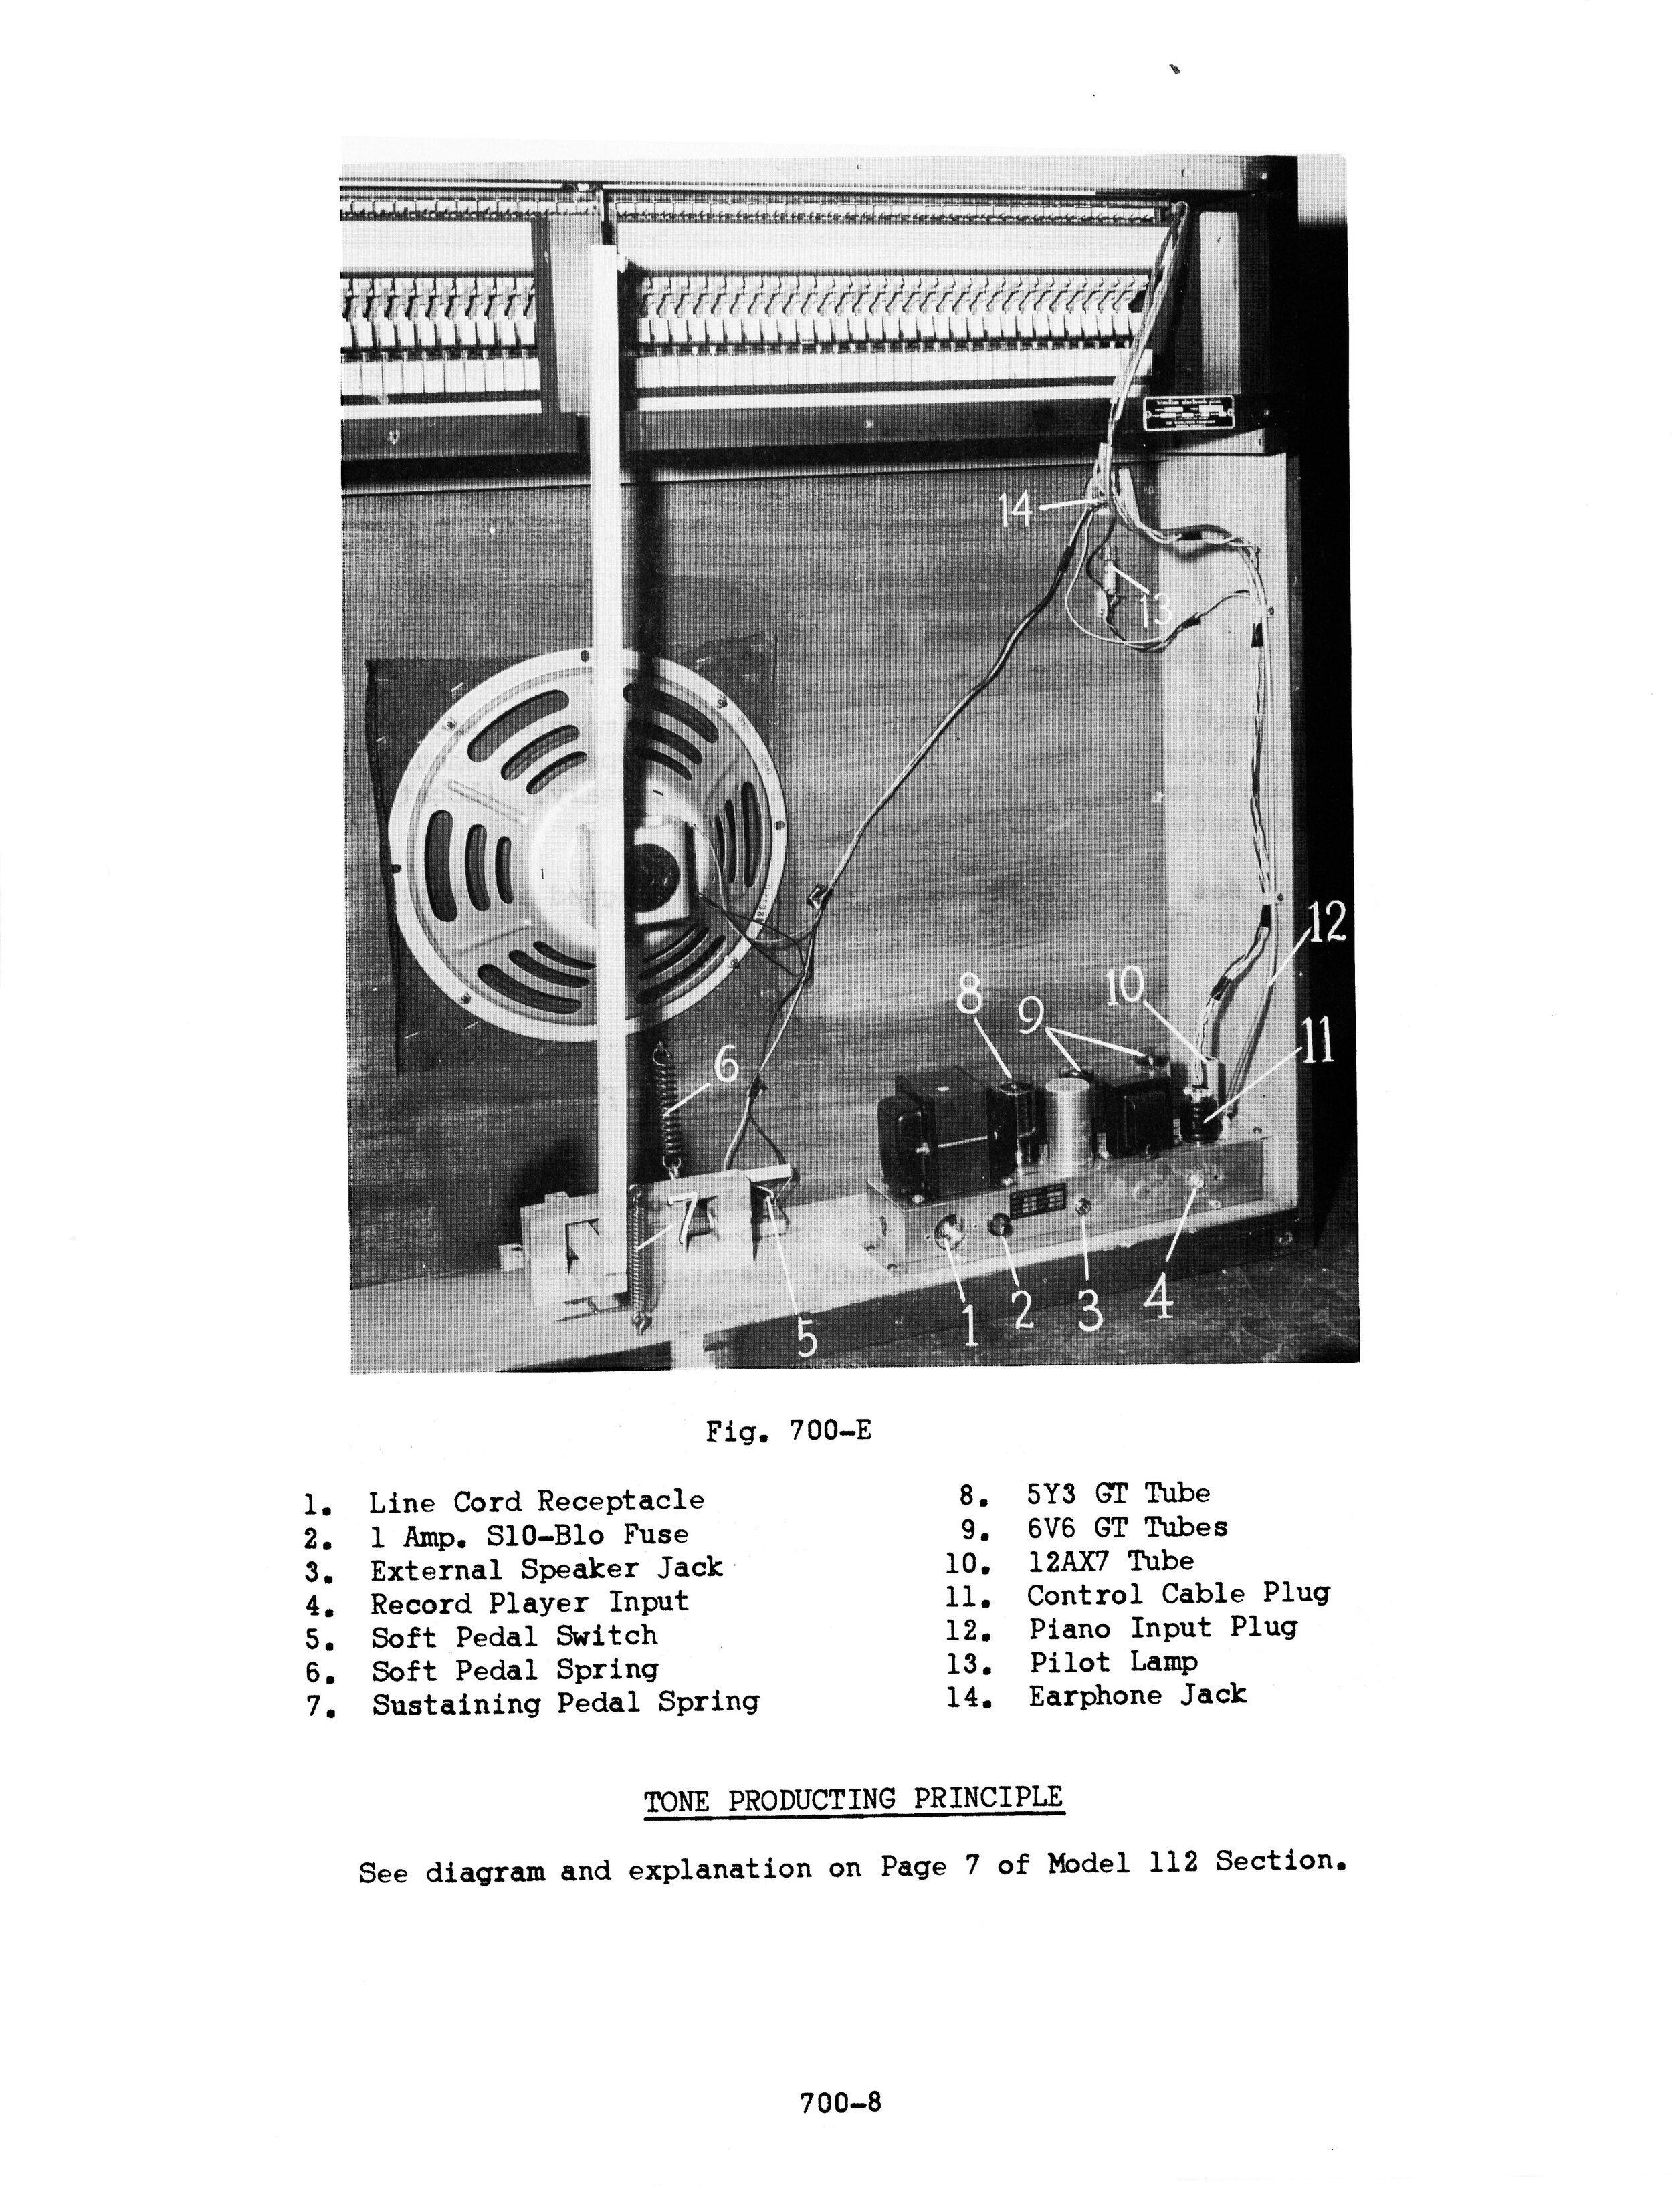
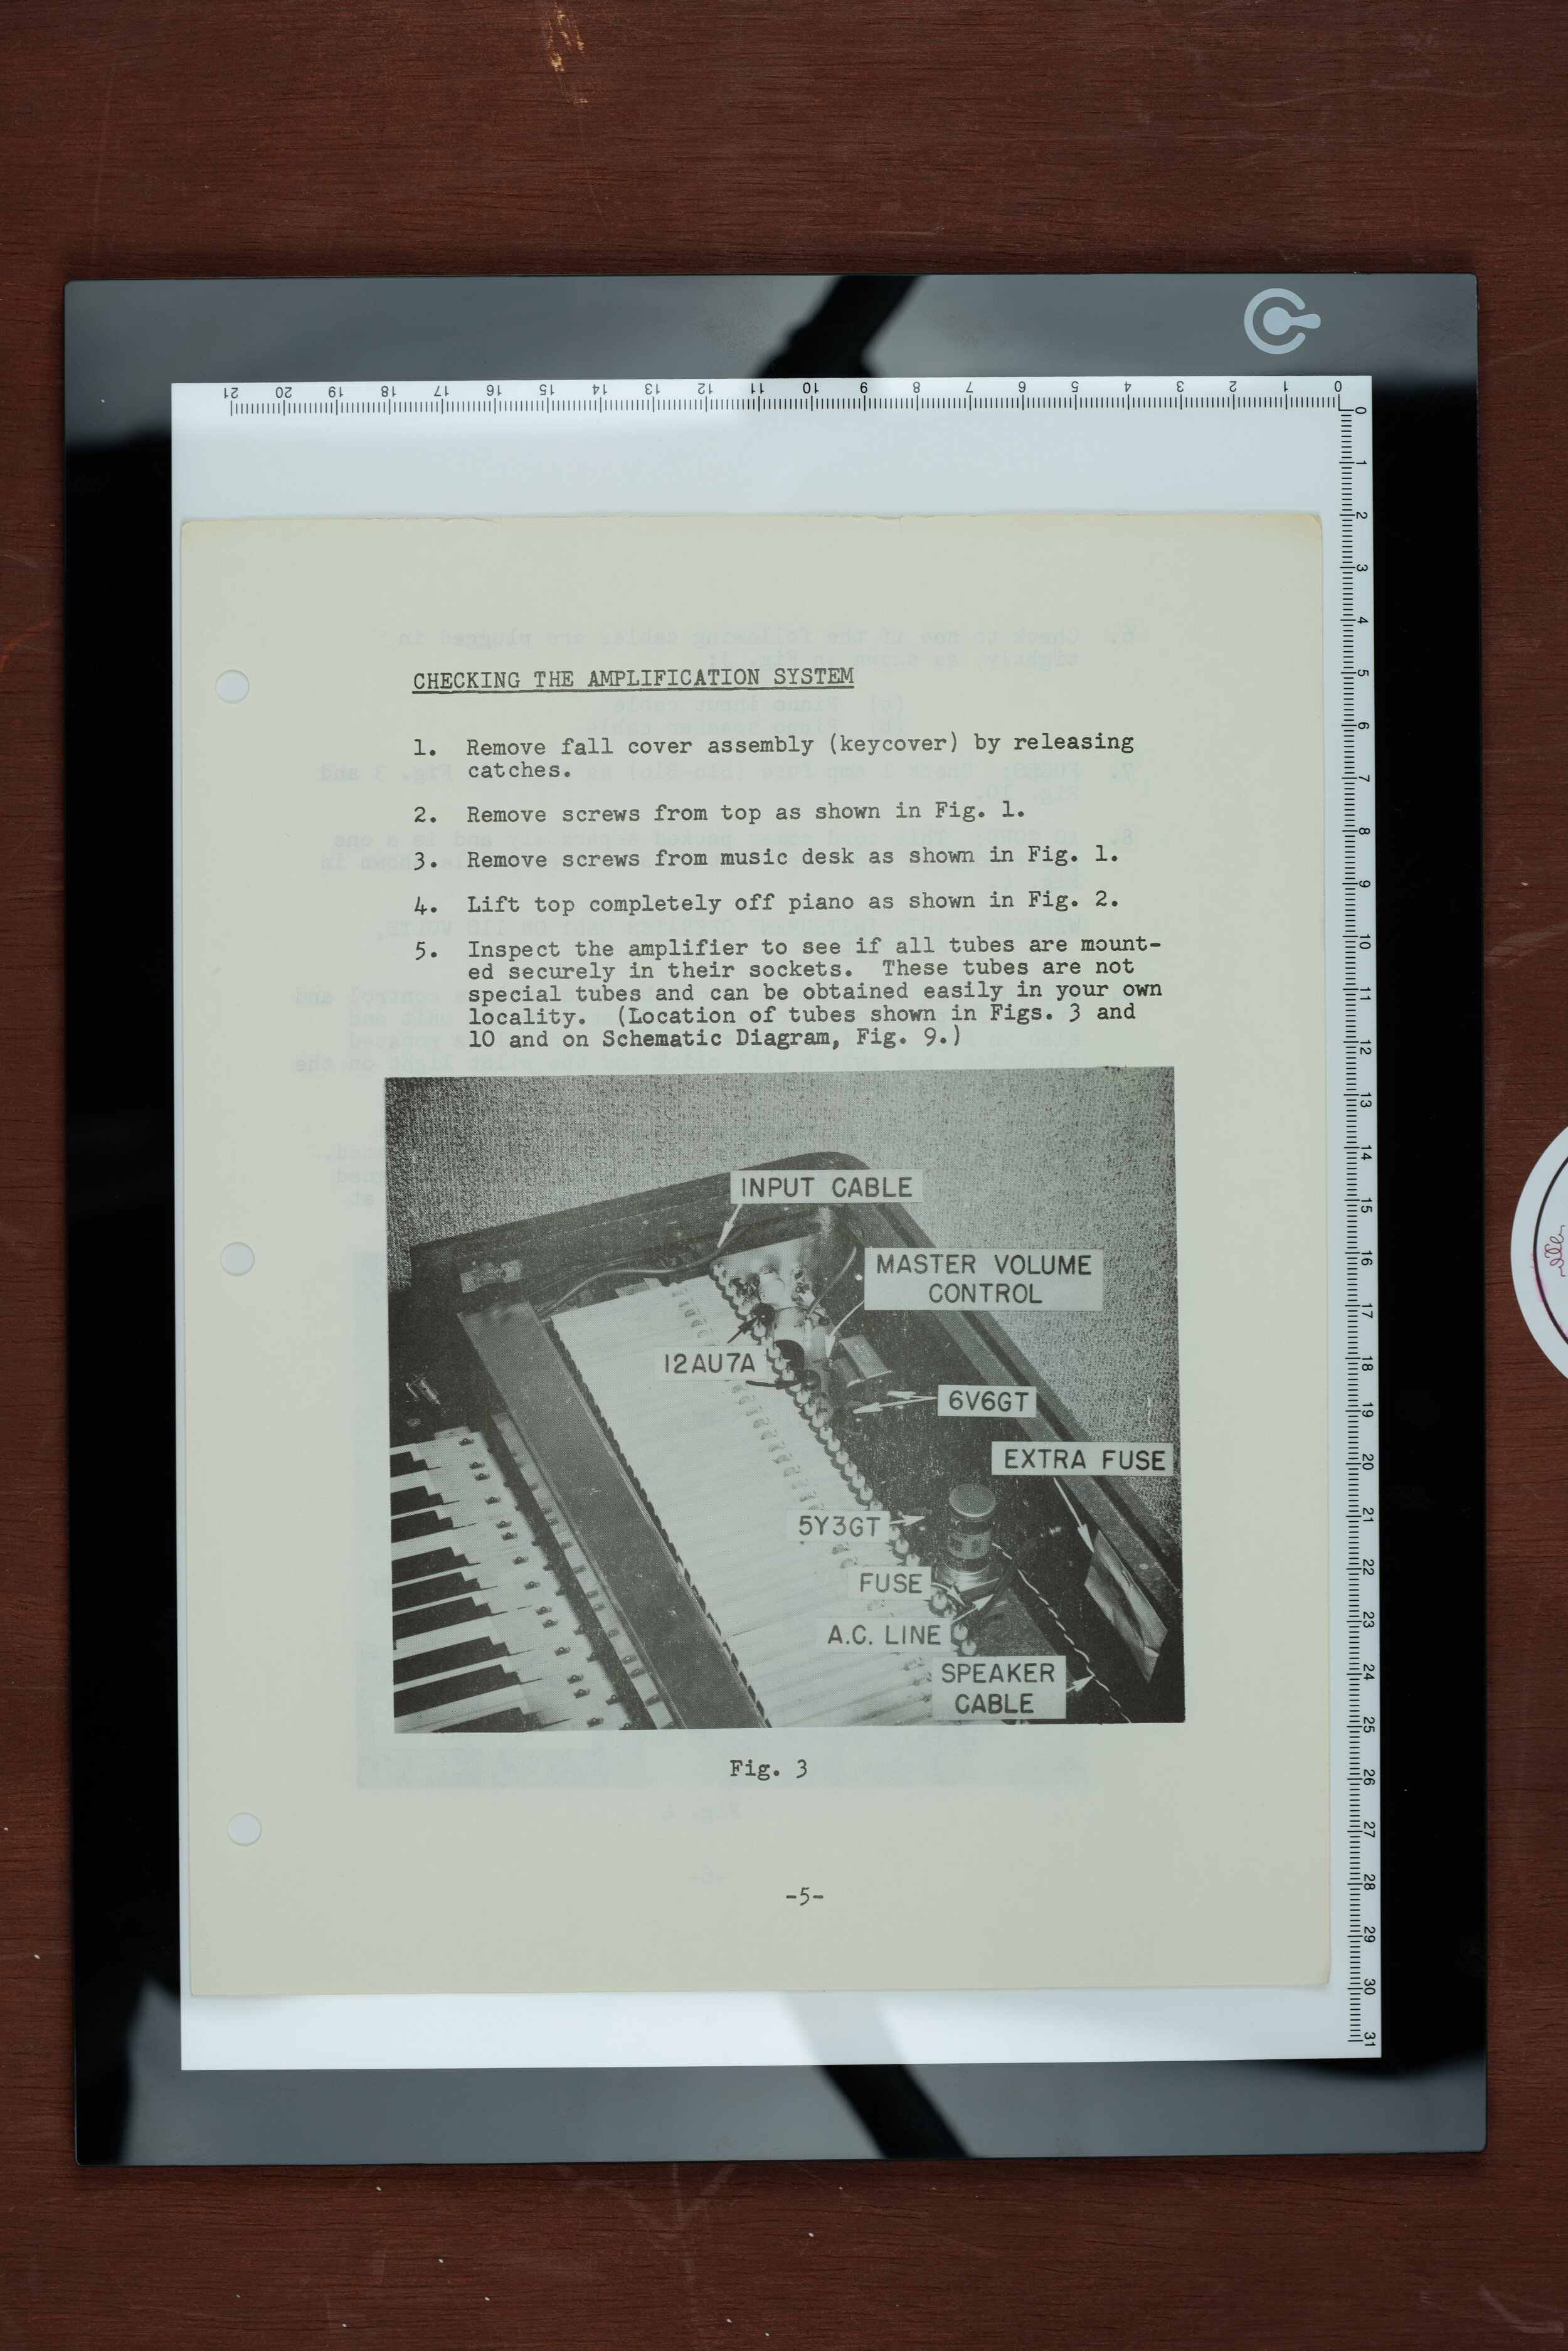
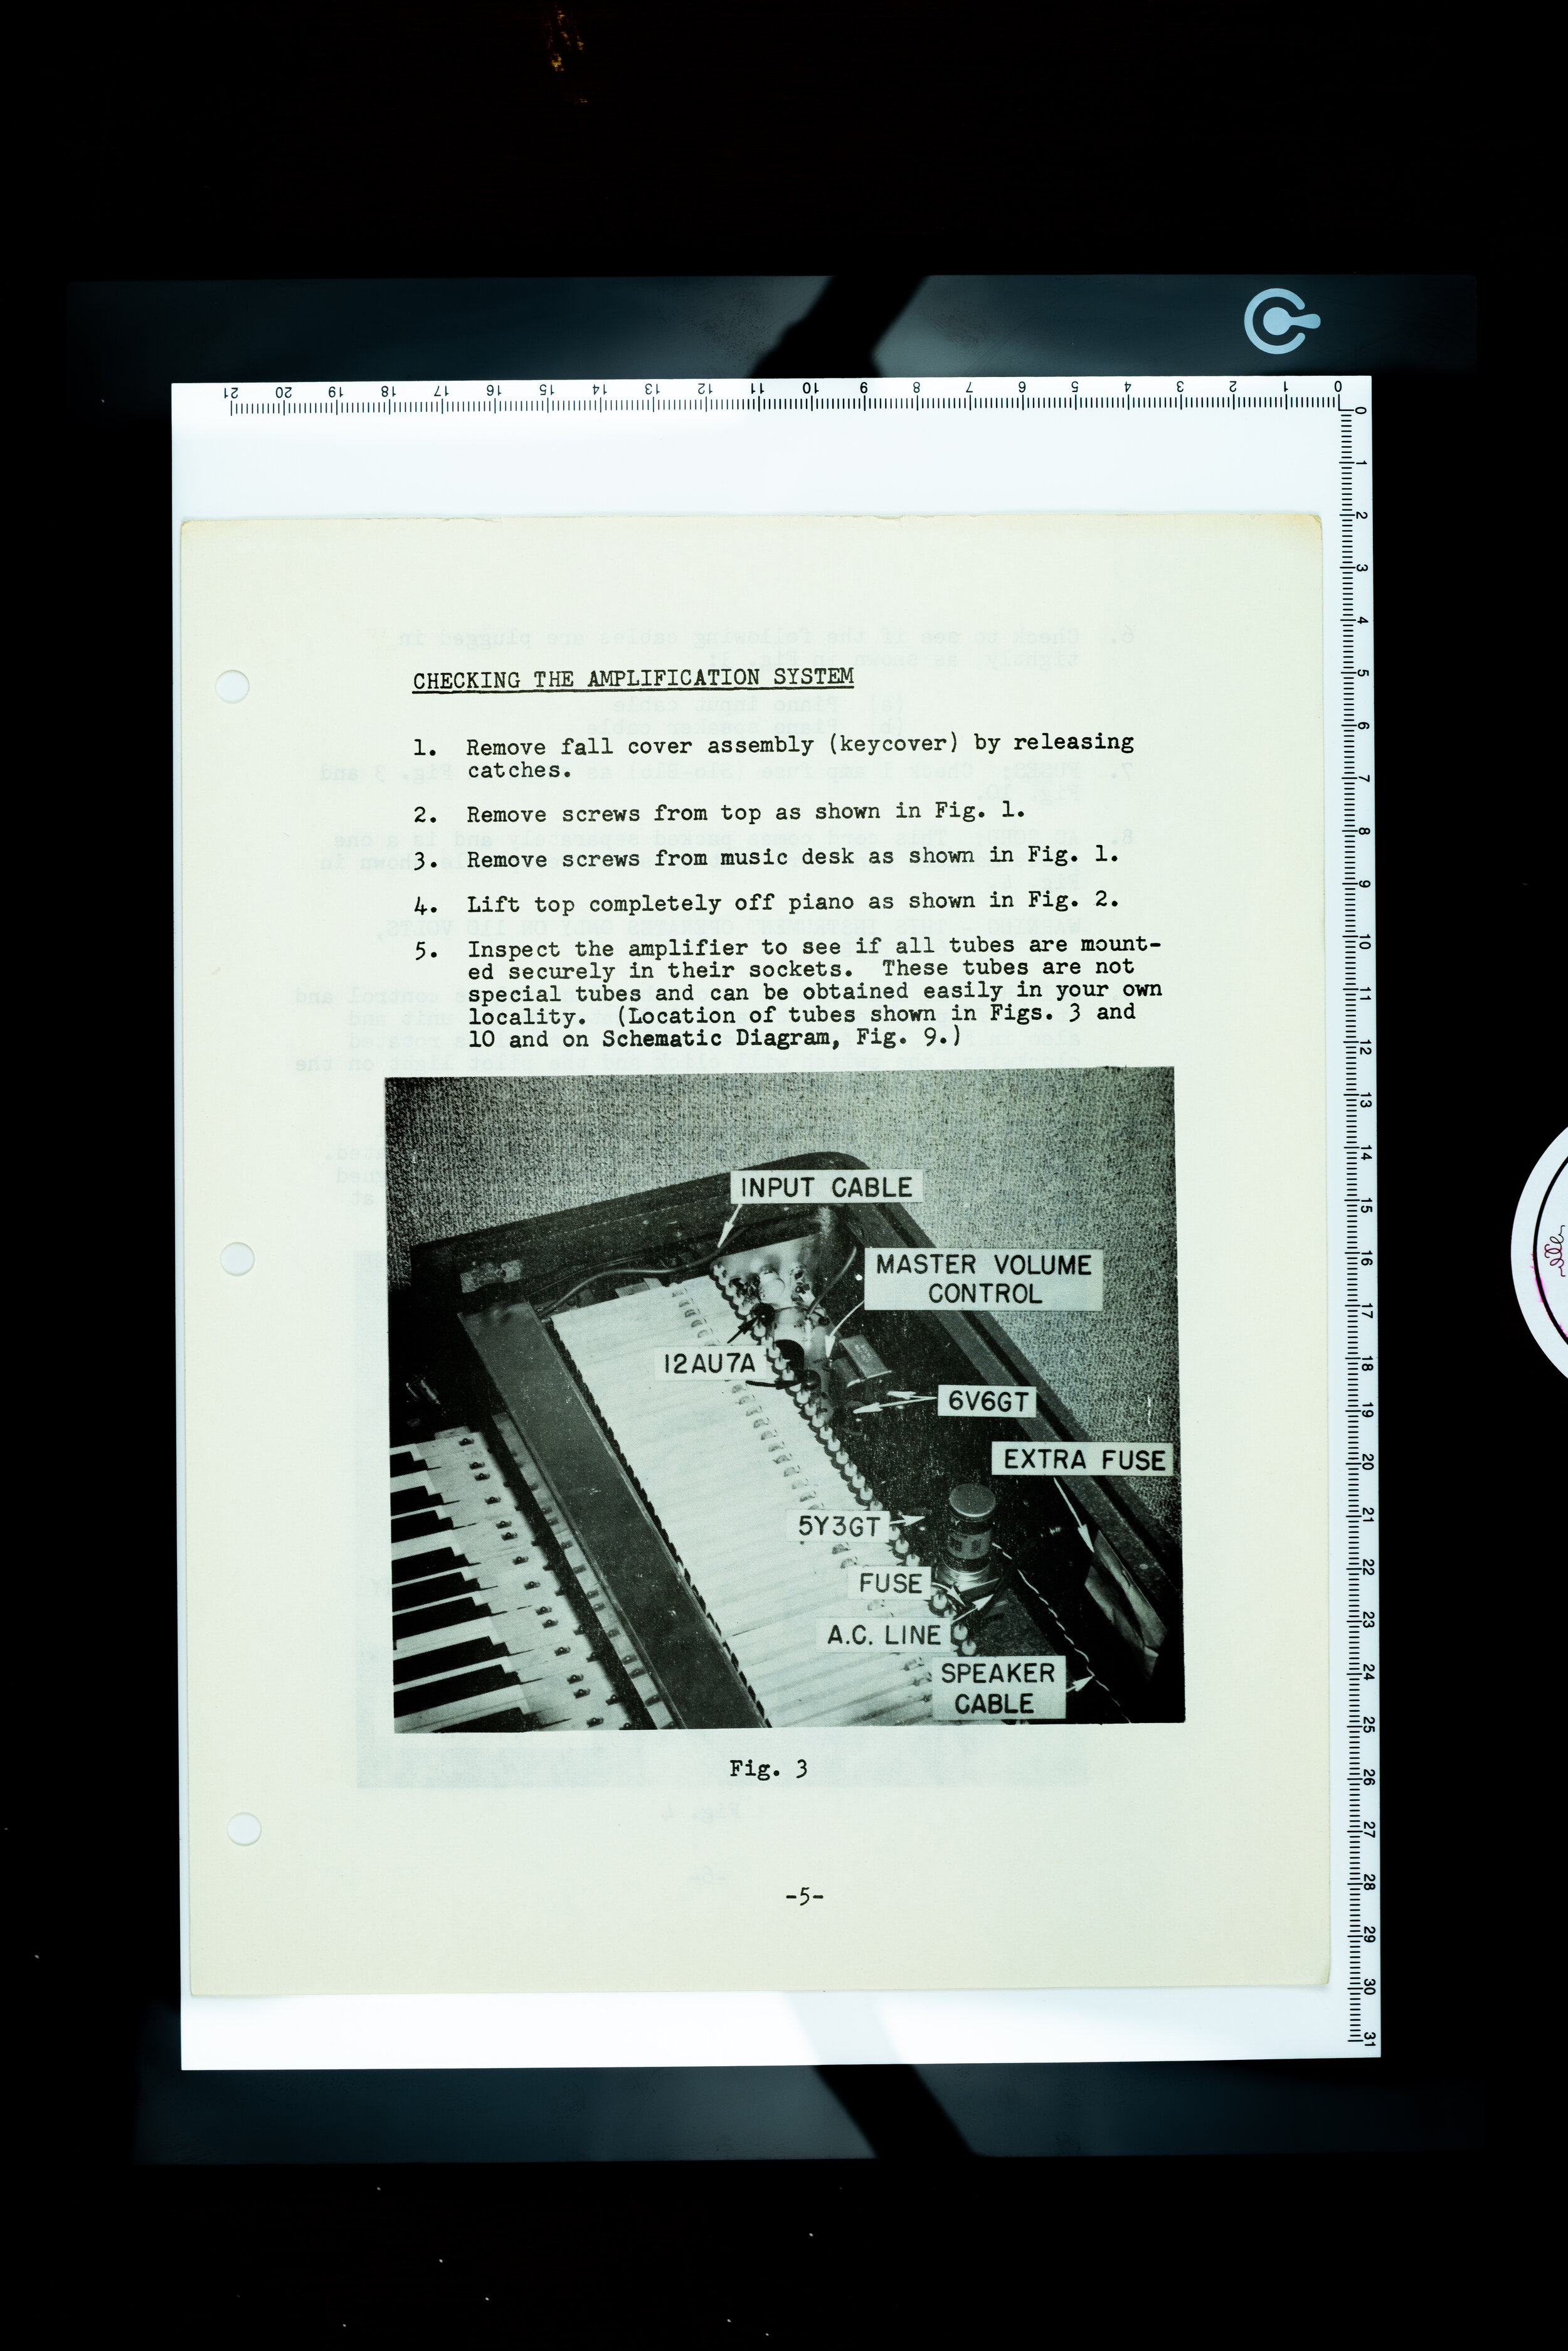
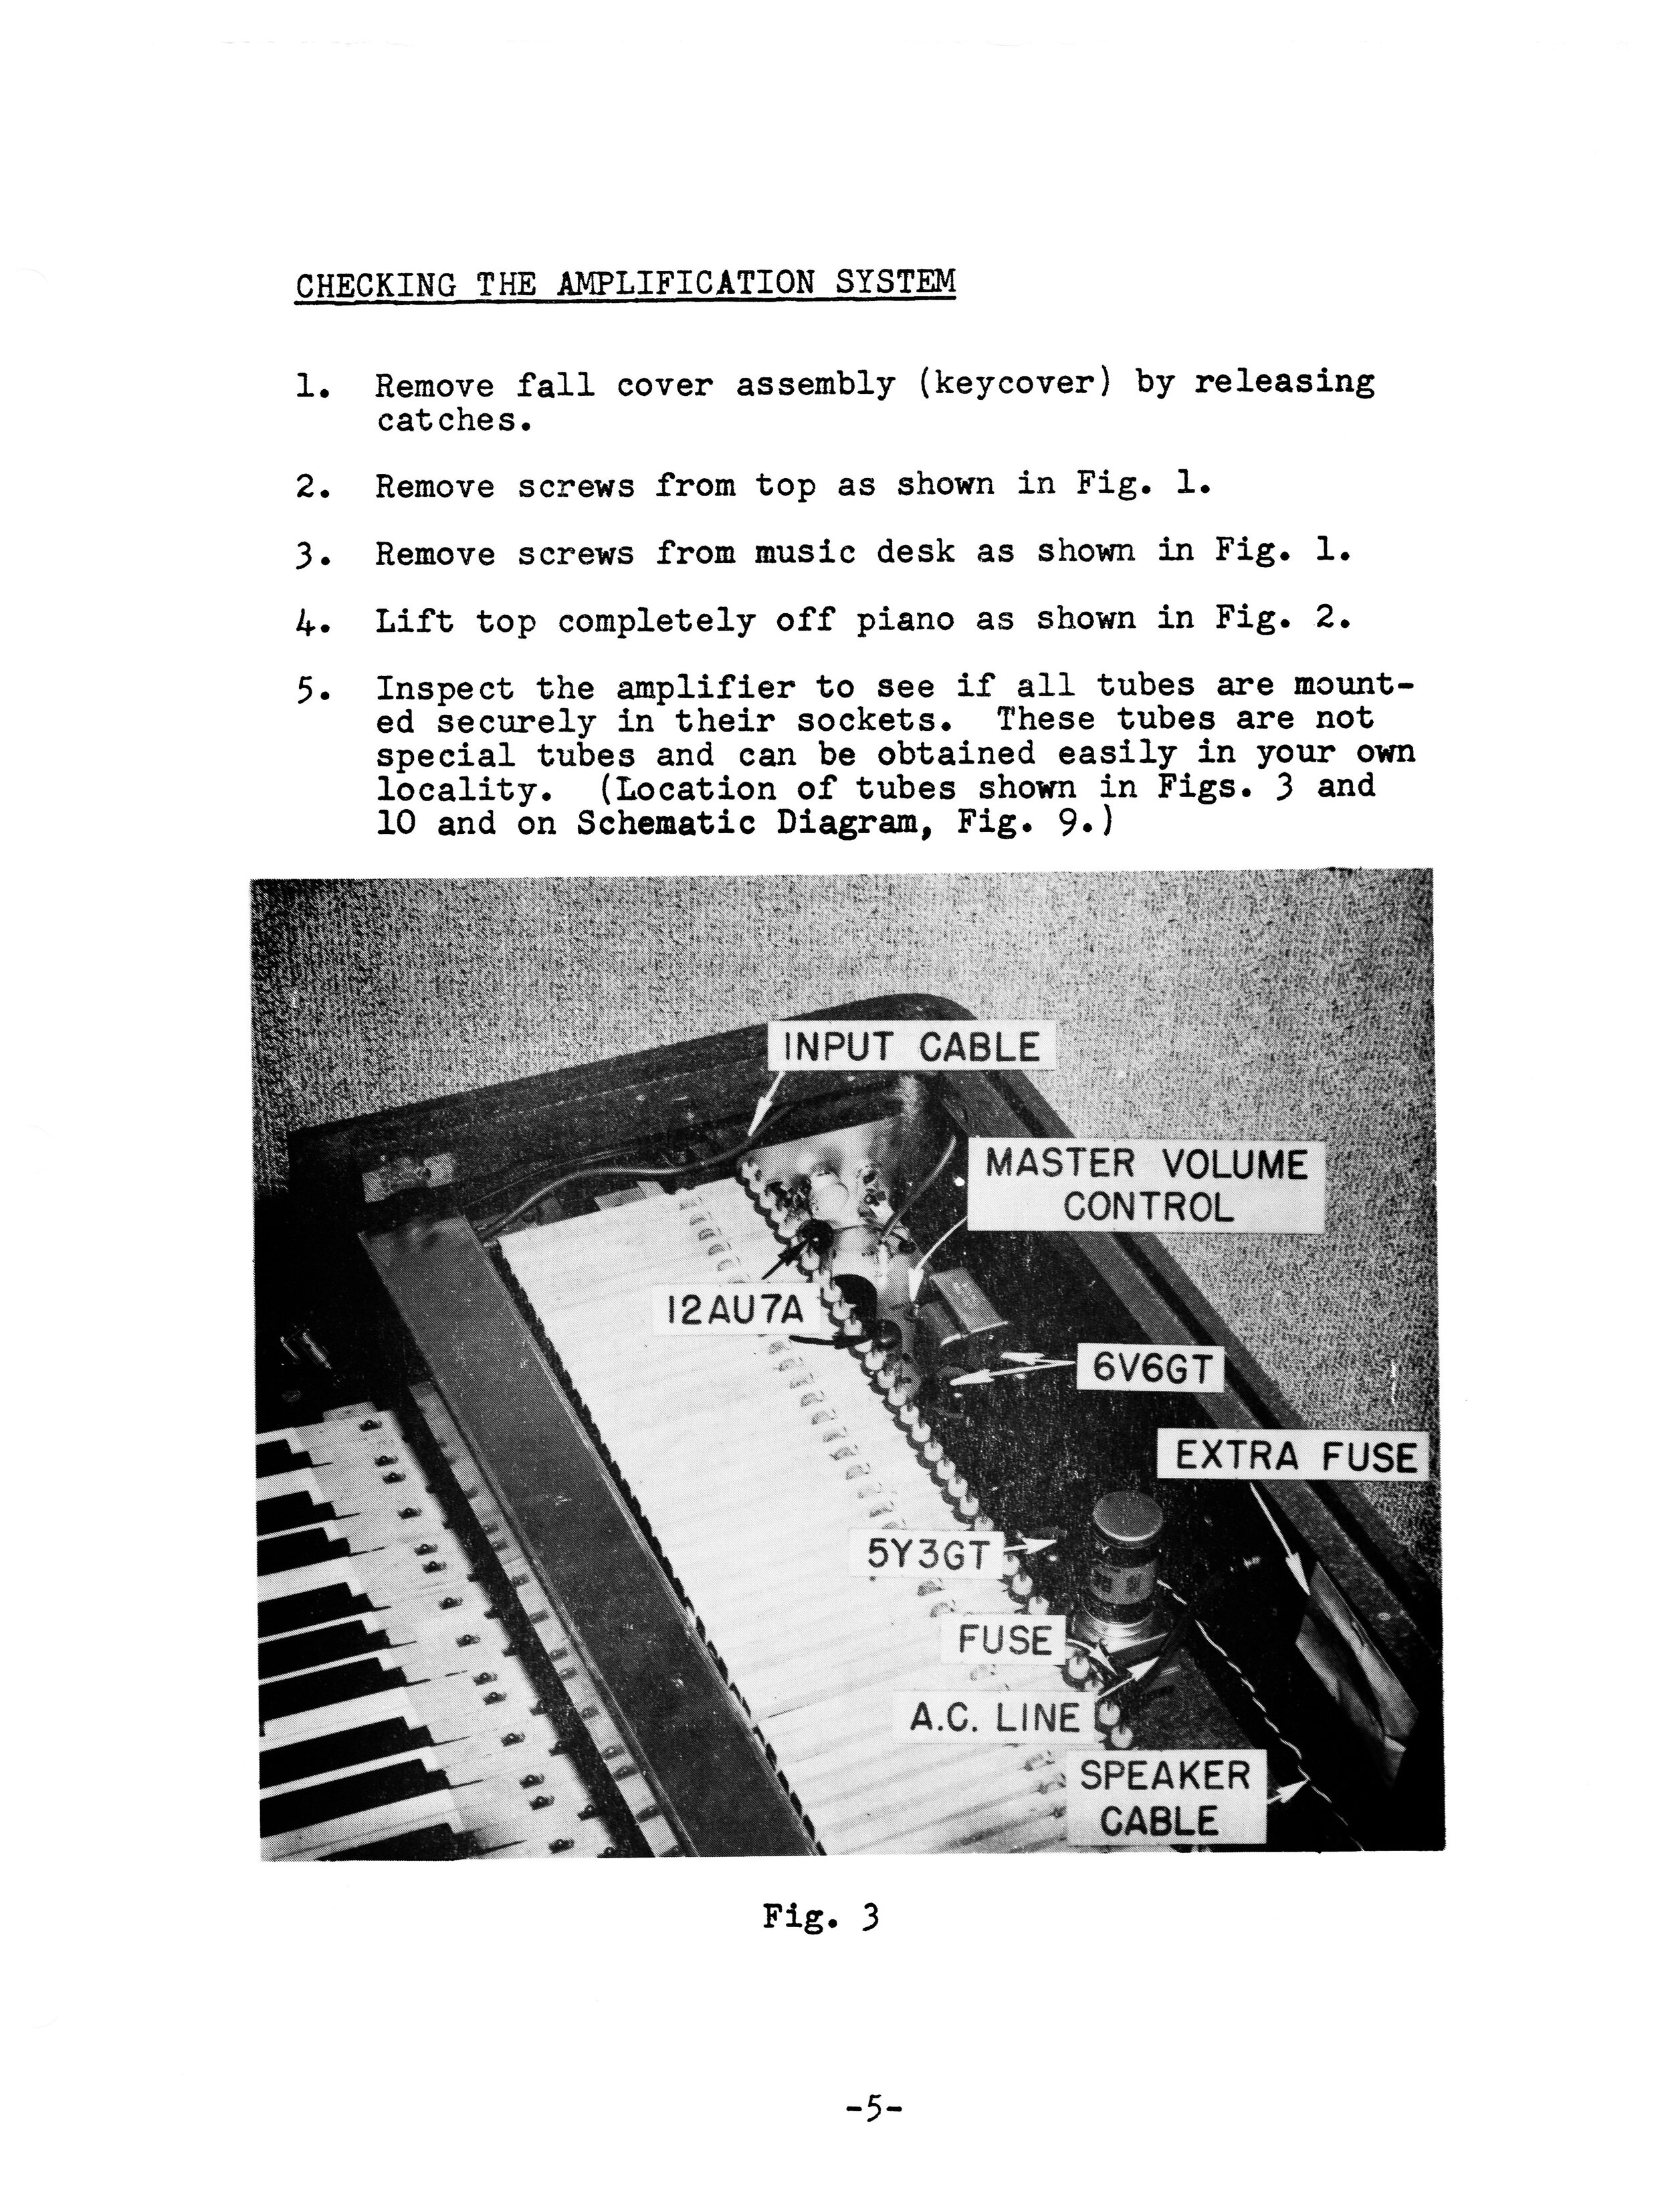
Pages with photographic illustrations. Our luminosity masks made the text and all line drawings look good, but they were too extreme for the photographs. We excluded the photographs from our luminosity mask layers, so that we could edit them independently. Again, we tried to preserve the vintage character of the photographs, so our edits focused on simply increasing contrast (but not too much) and correcting any color cast.
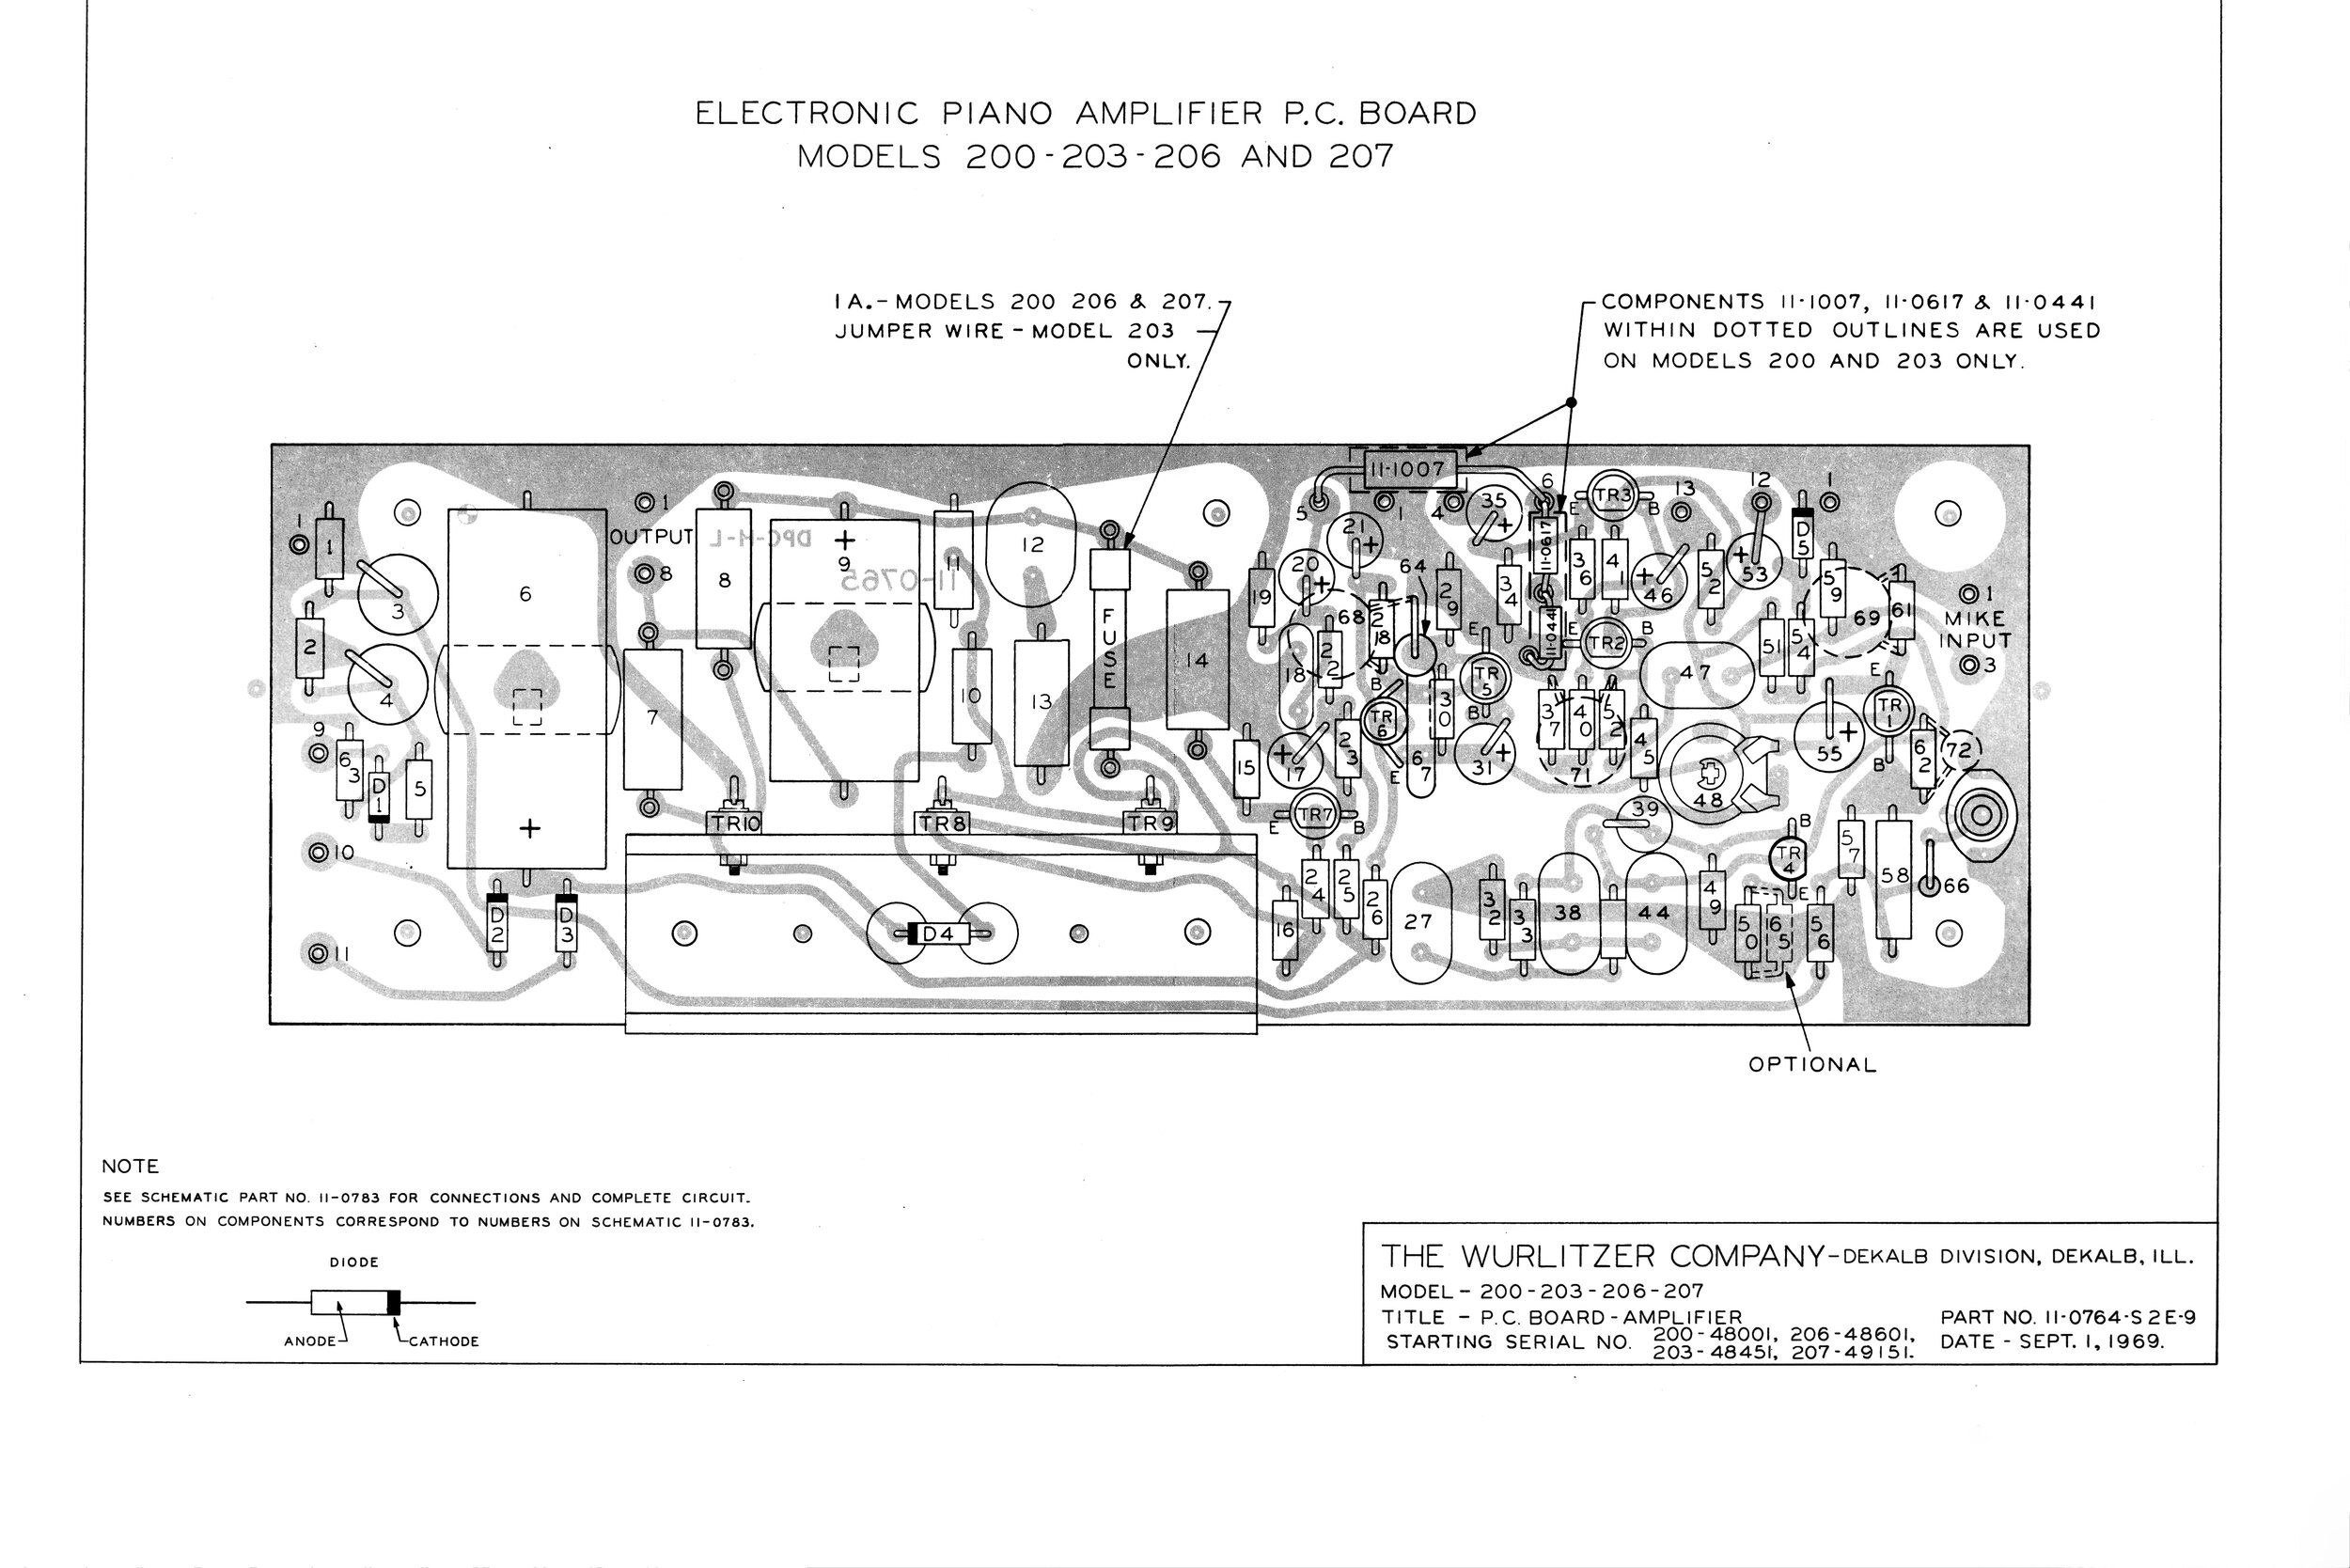
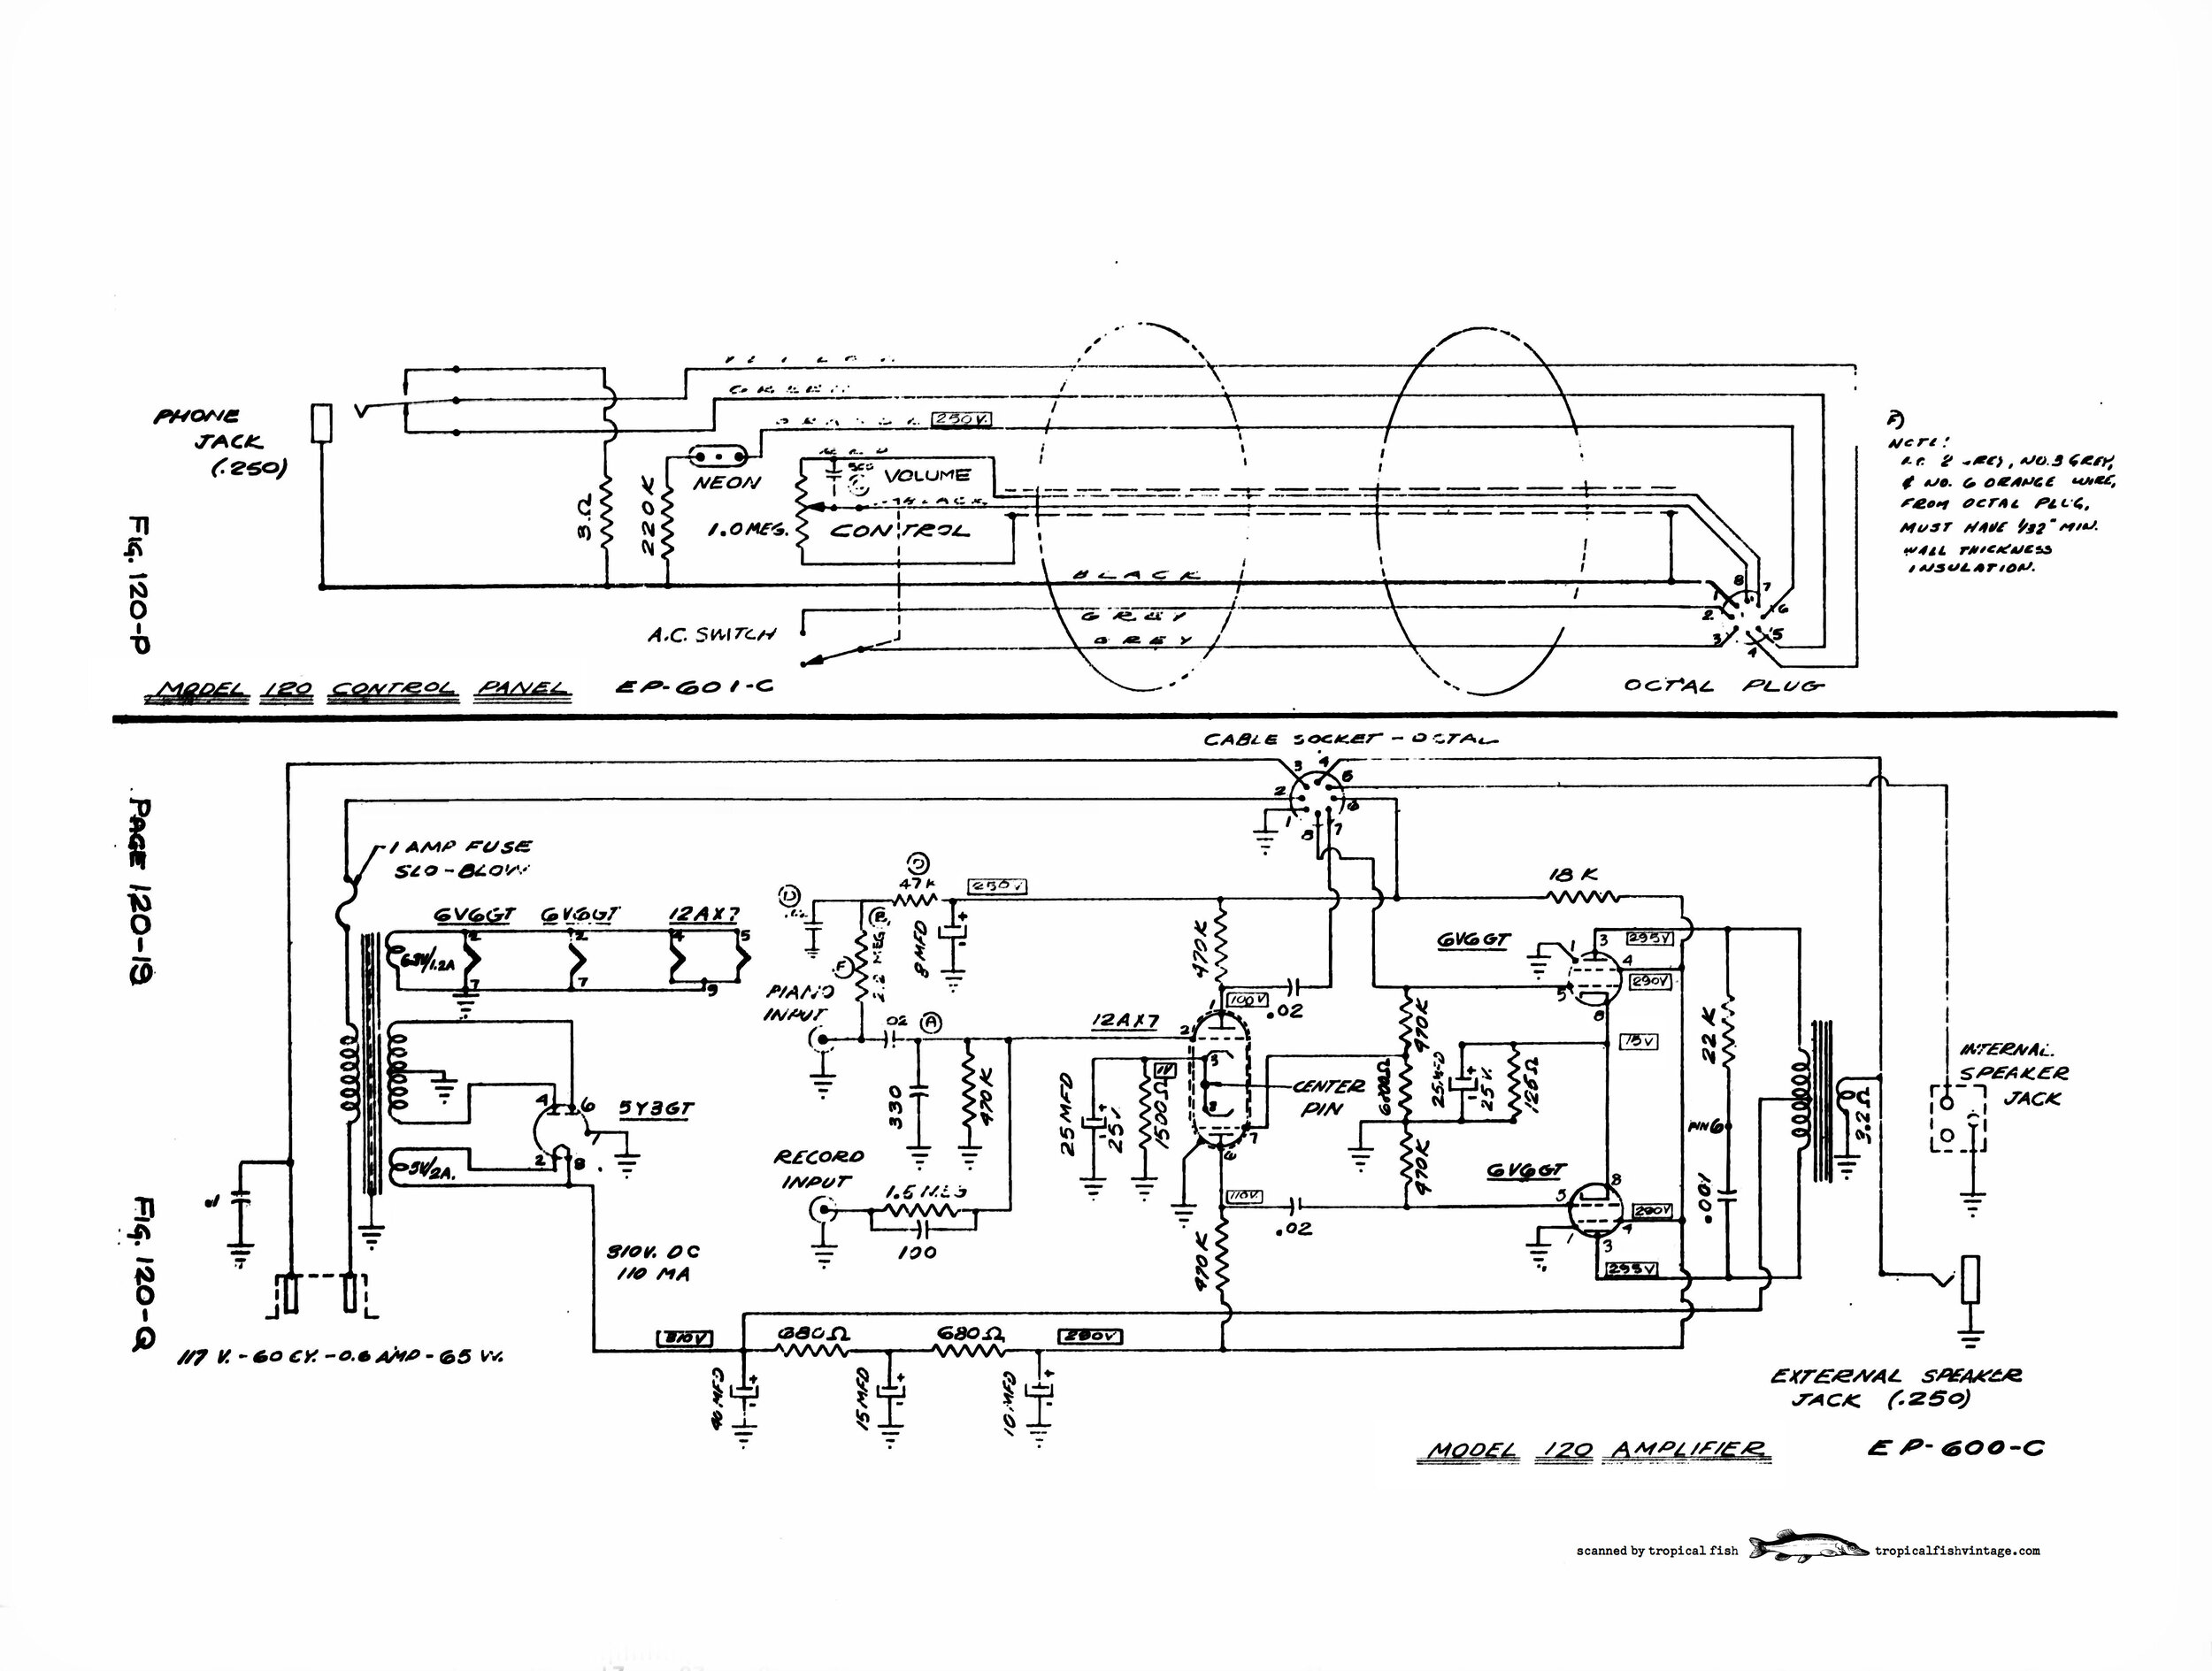
Pages with faint line drawings. The original manual had a few pages that were difficult to read, despite our best attempts at scanning. This included the Wurlitzer 120 schematic. This schematic is tricky to read in general, because there are a lot of wiring harness connections that need to be followed across the page. It definitely doesn’t help that most of the lines in the original document are extremely faint. Using Photoshop, we traced over the faint lines and filled in areas that had been missing ink. We followed the original lines very closely, in order to keep the final image accurate to the original drawing.
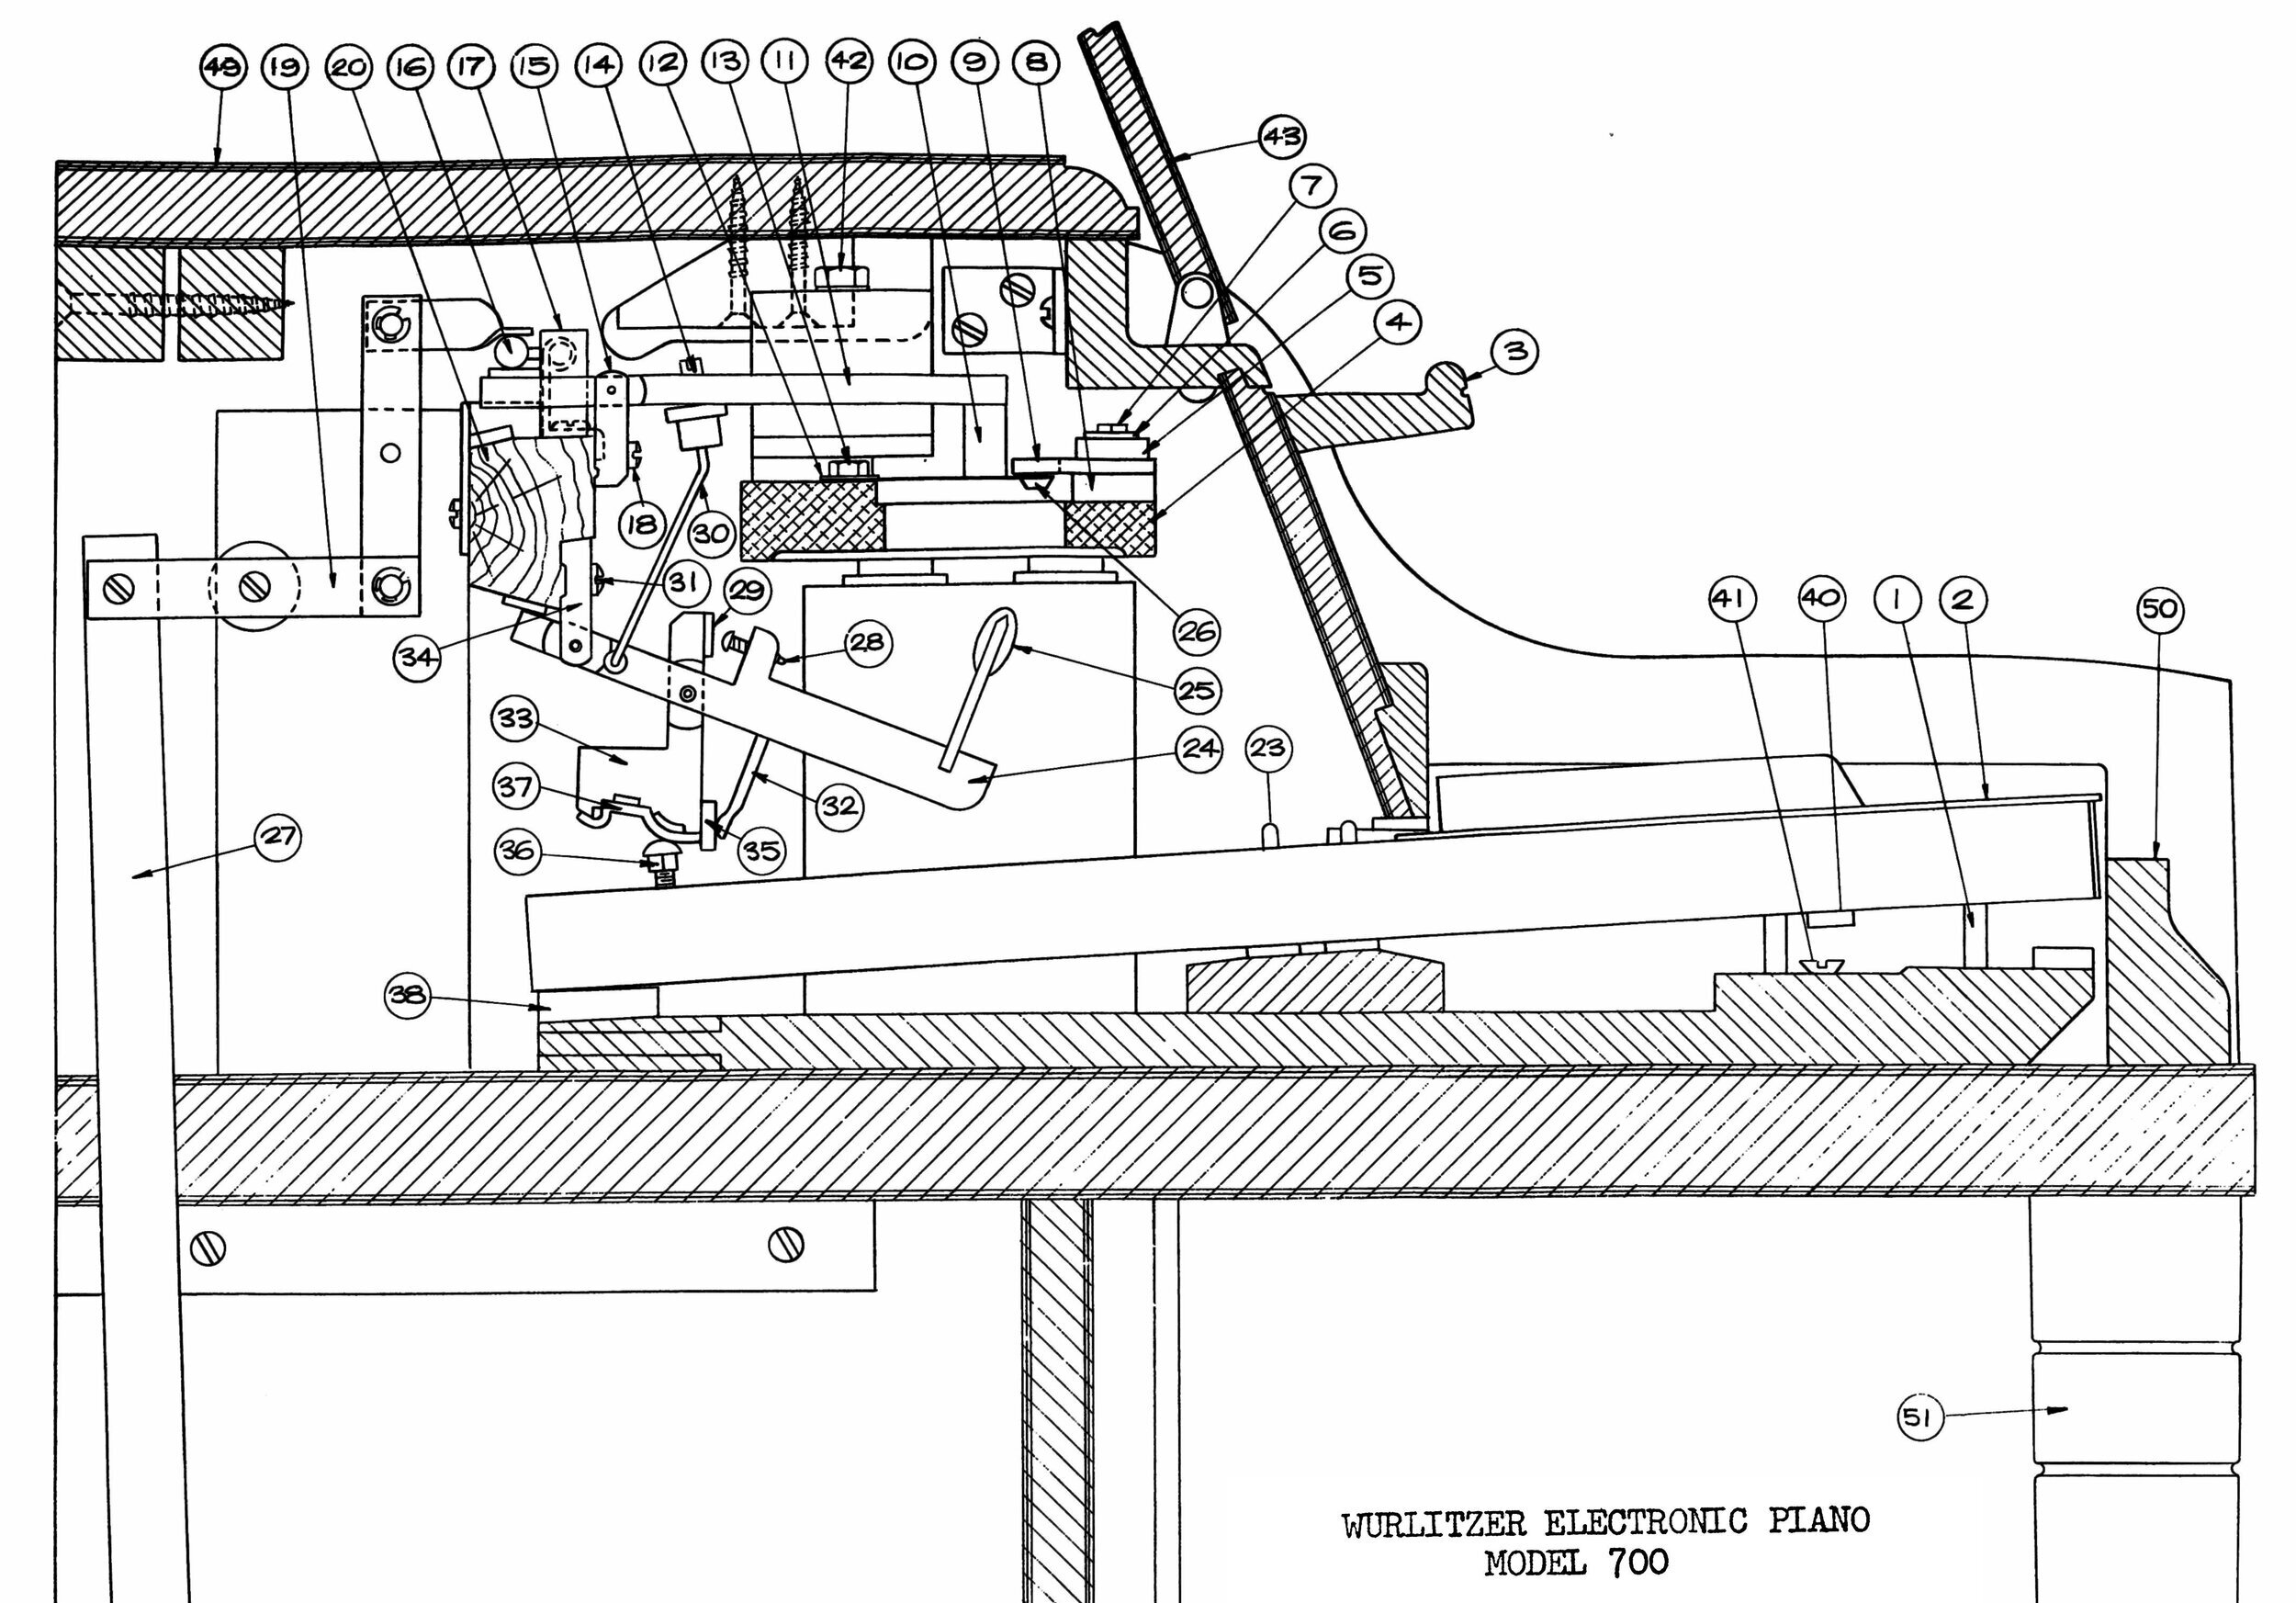
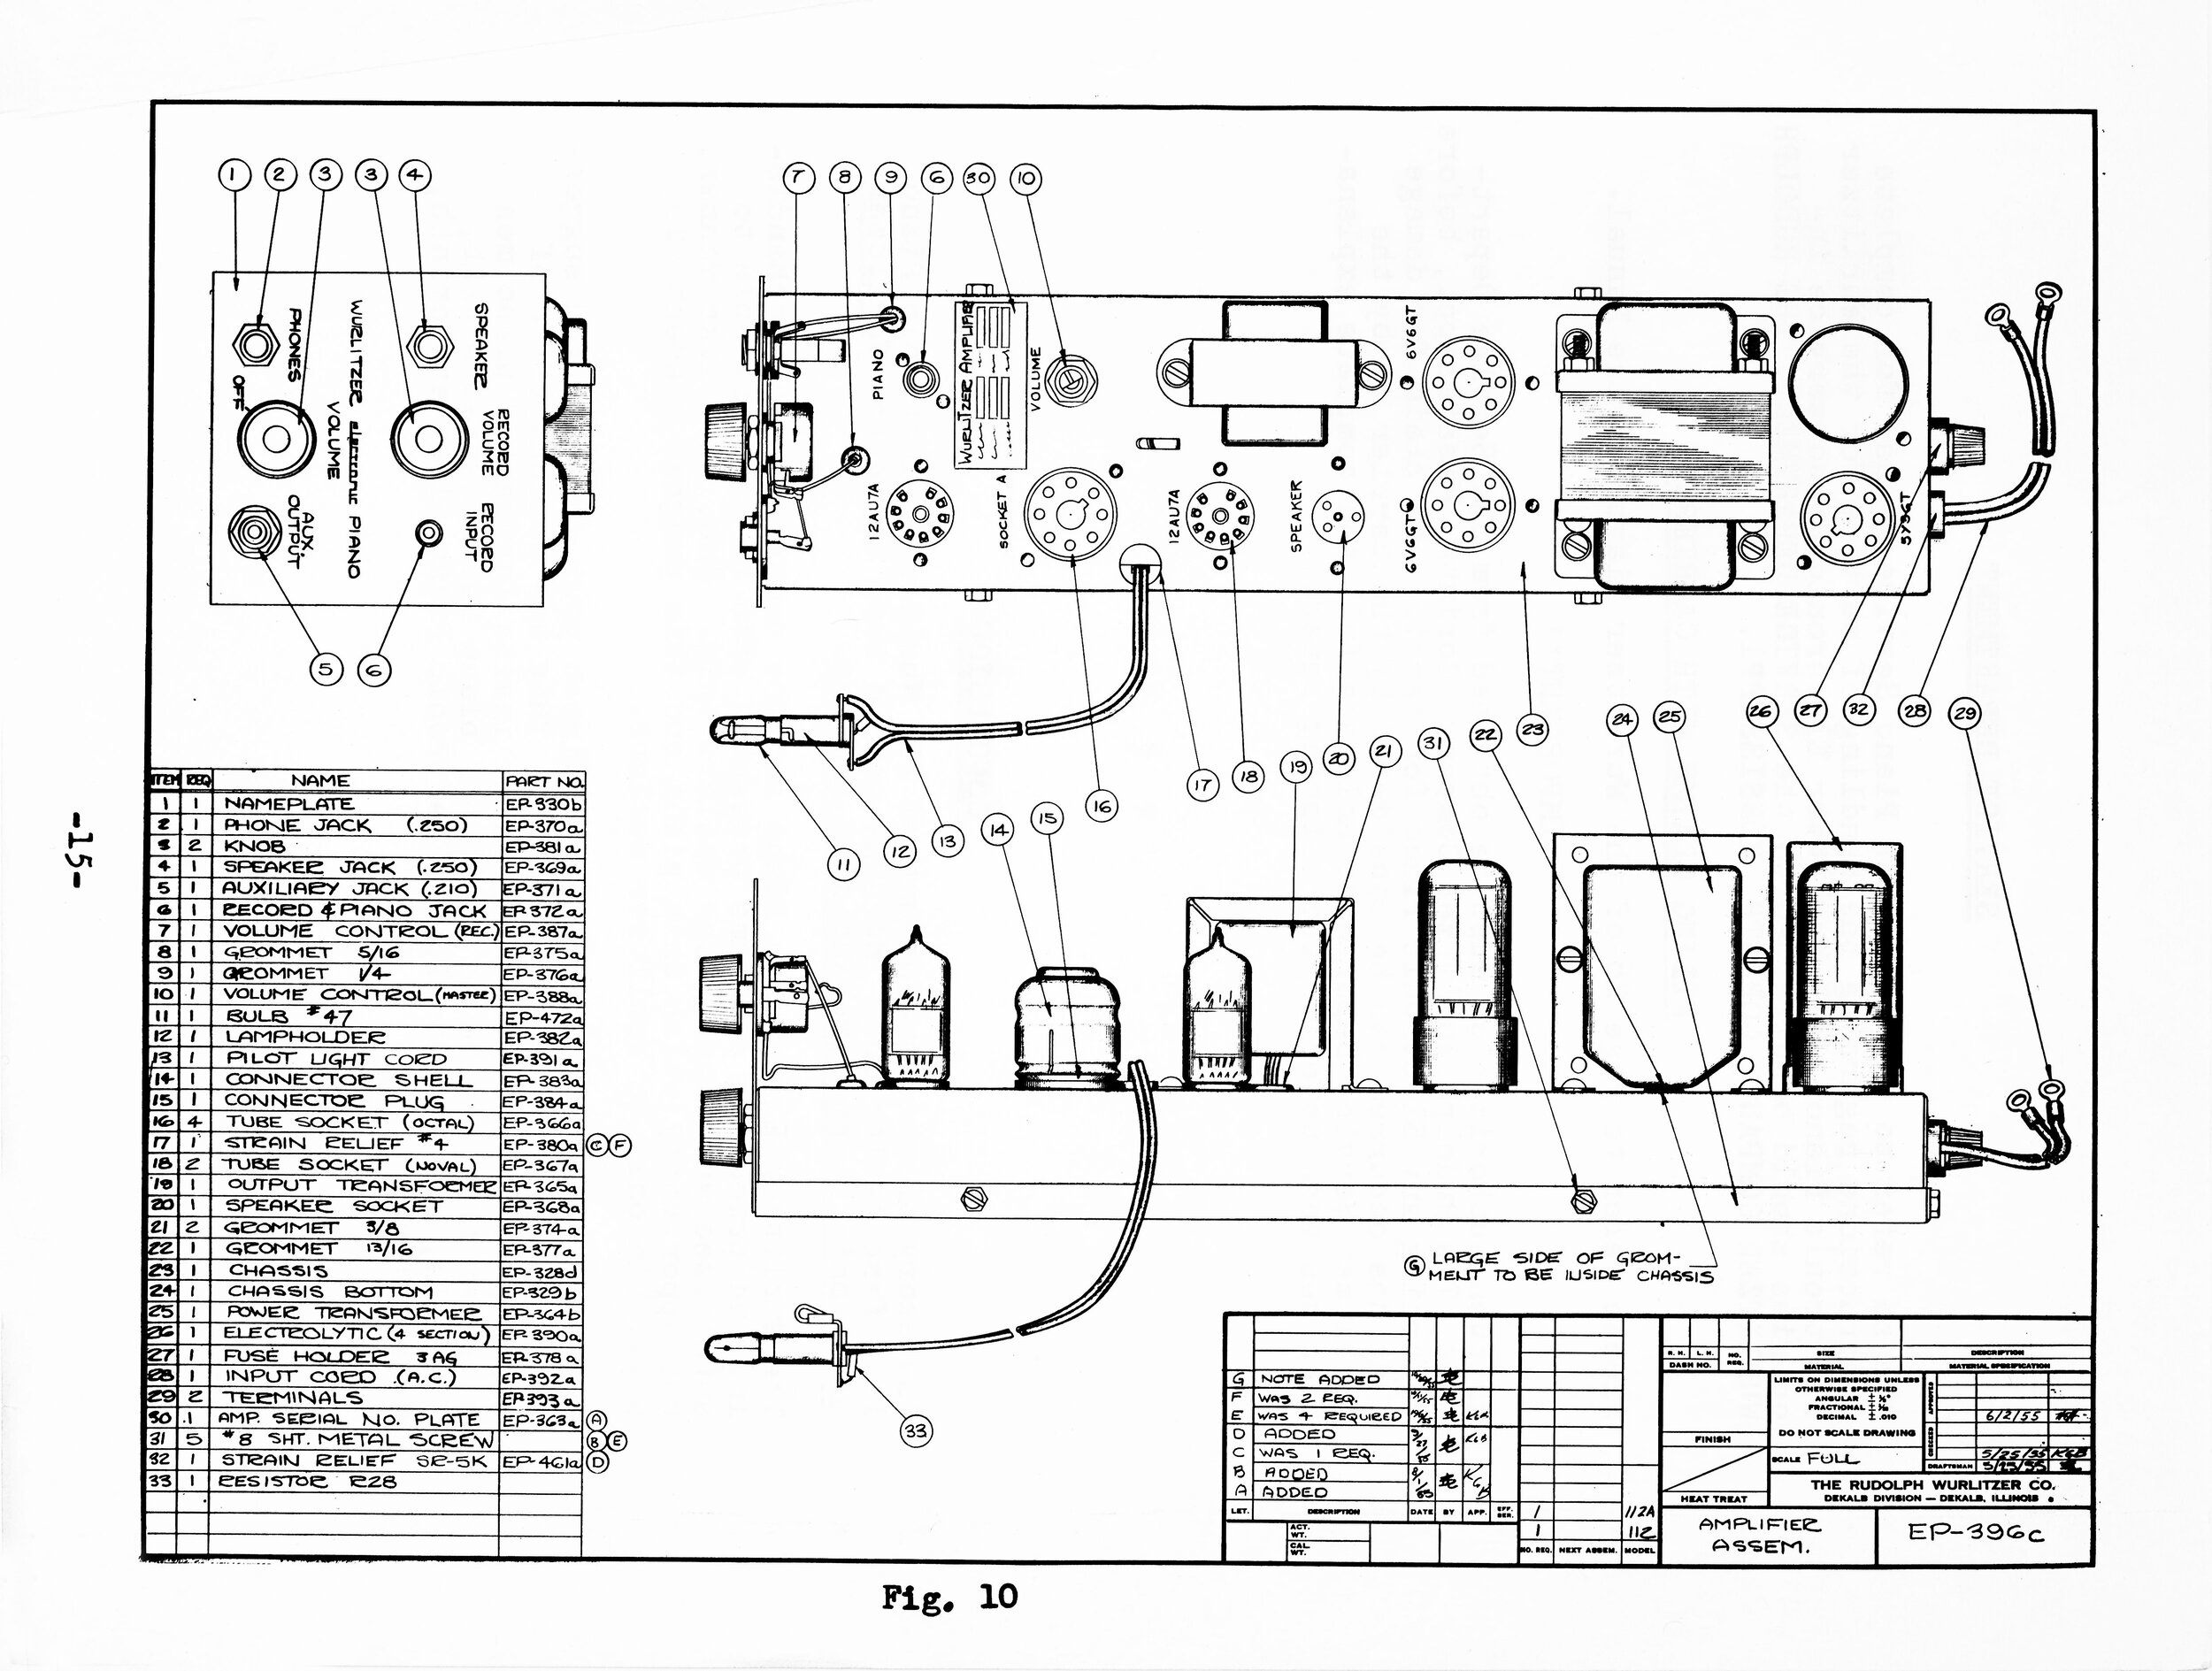
Large, pull-out diagrams. Some pages had large pull-out schematic drawings and illustrations. These pages were too large to be photographed in a single frame, so we photographed them in three or more sections. Then we stitched them together in Photoshop.
Creating the PDFs. Once we finished editing the individual images, we compiled them into PDFs using Adobe Acrobat. The text of the PDF documents is searchable. We hope you enjoy them!
Further Reading
Browse all of our articles on restoring vintage gear. Or, click on an image below.