How to De-Rust Wurlitzer Legs (or Any Oversized Item)

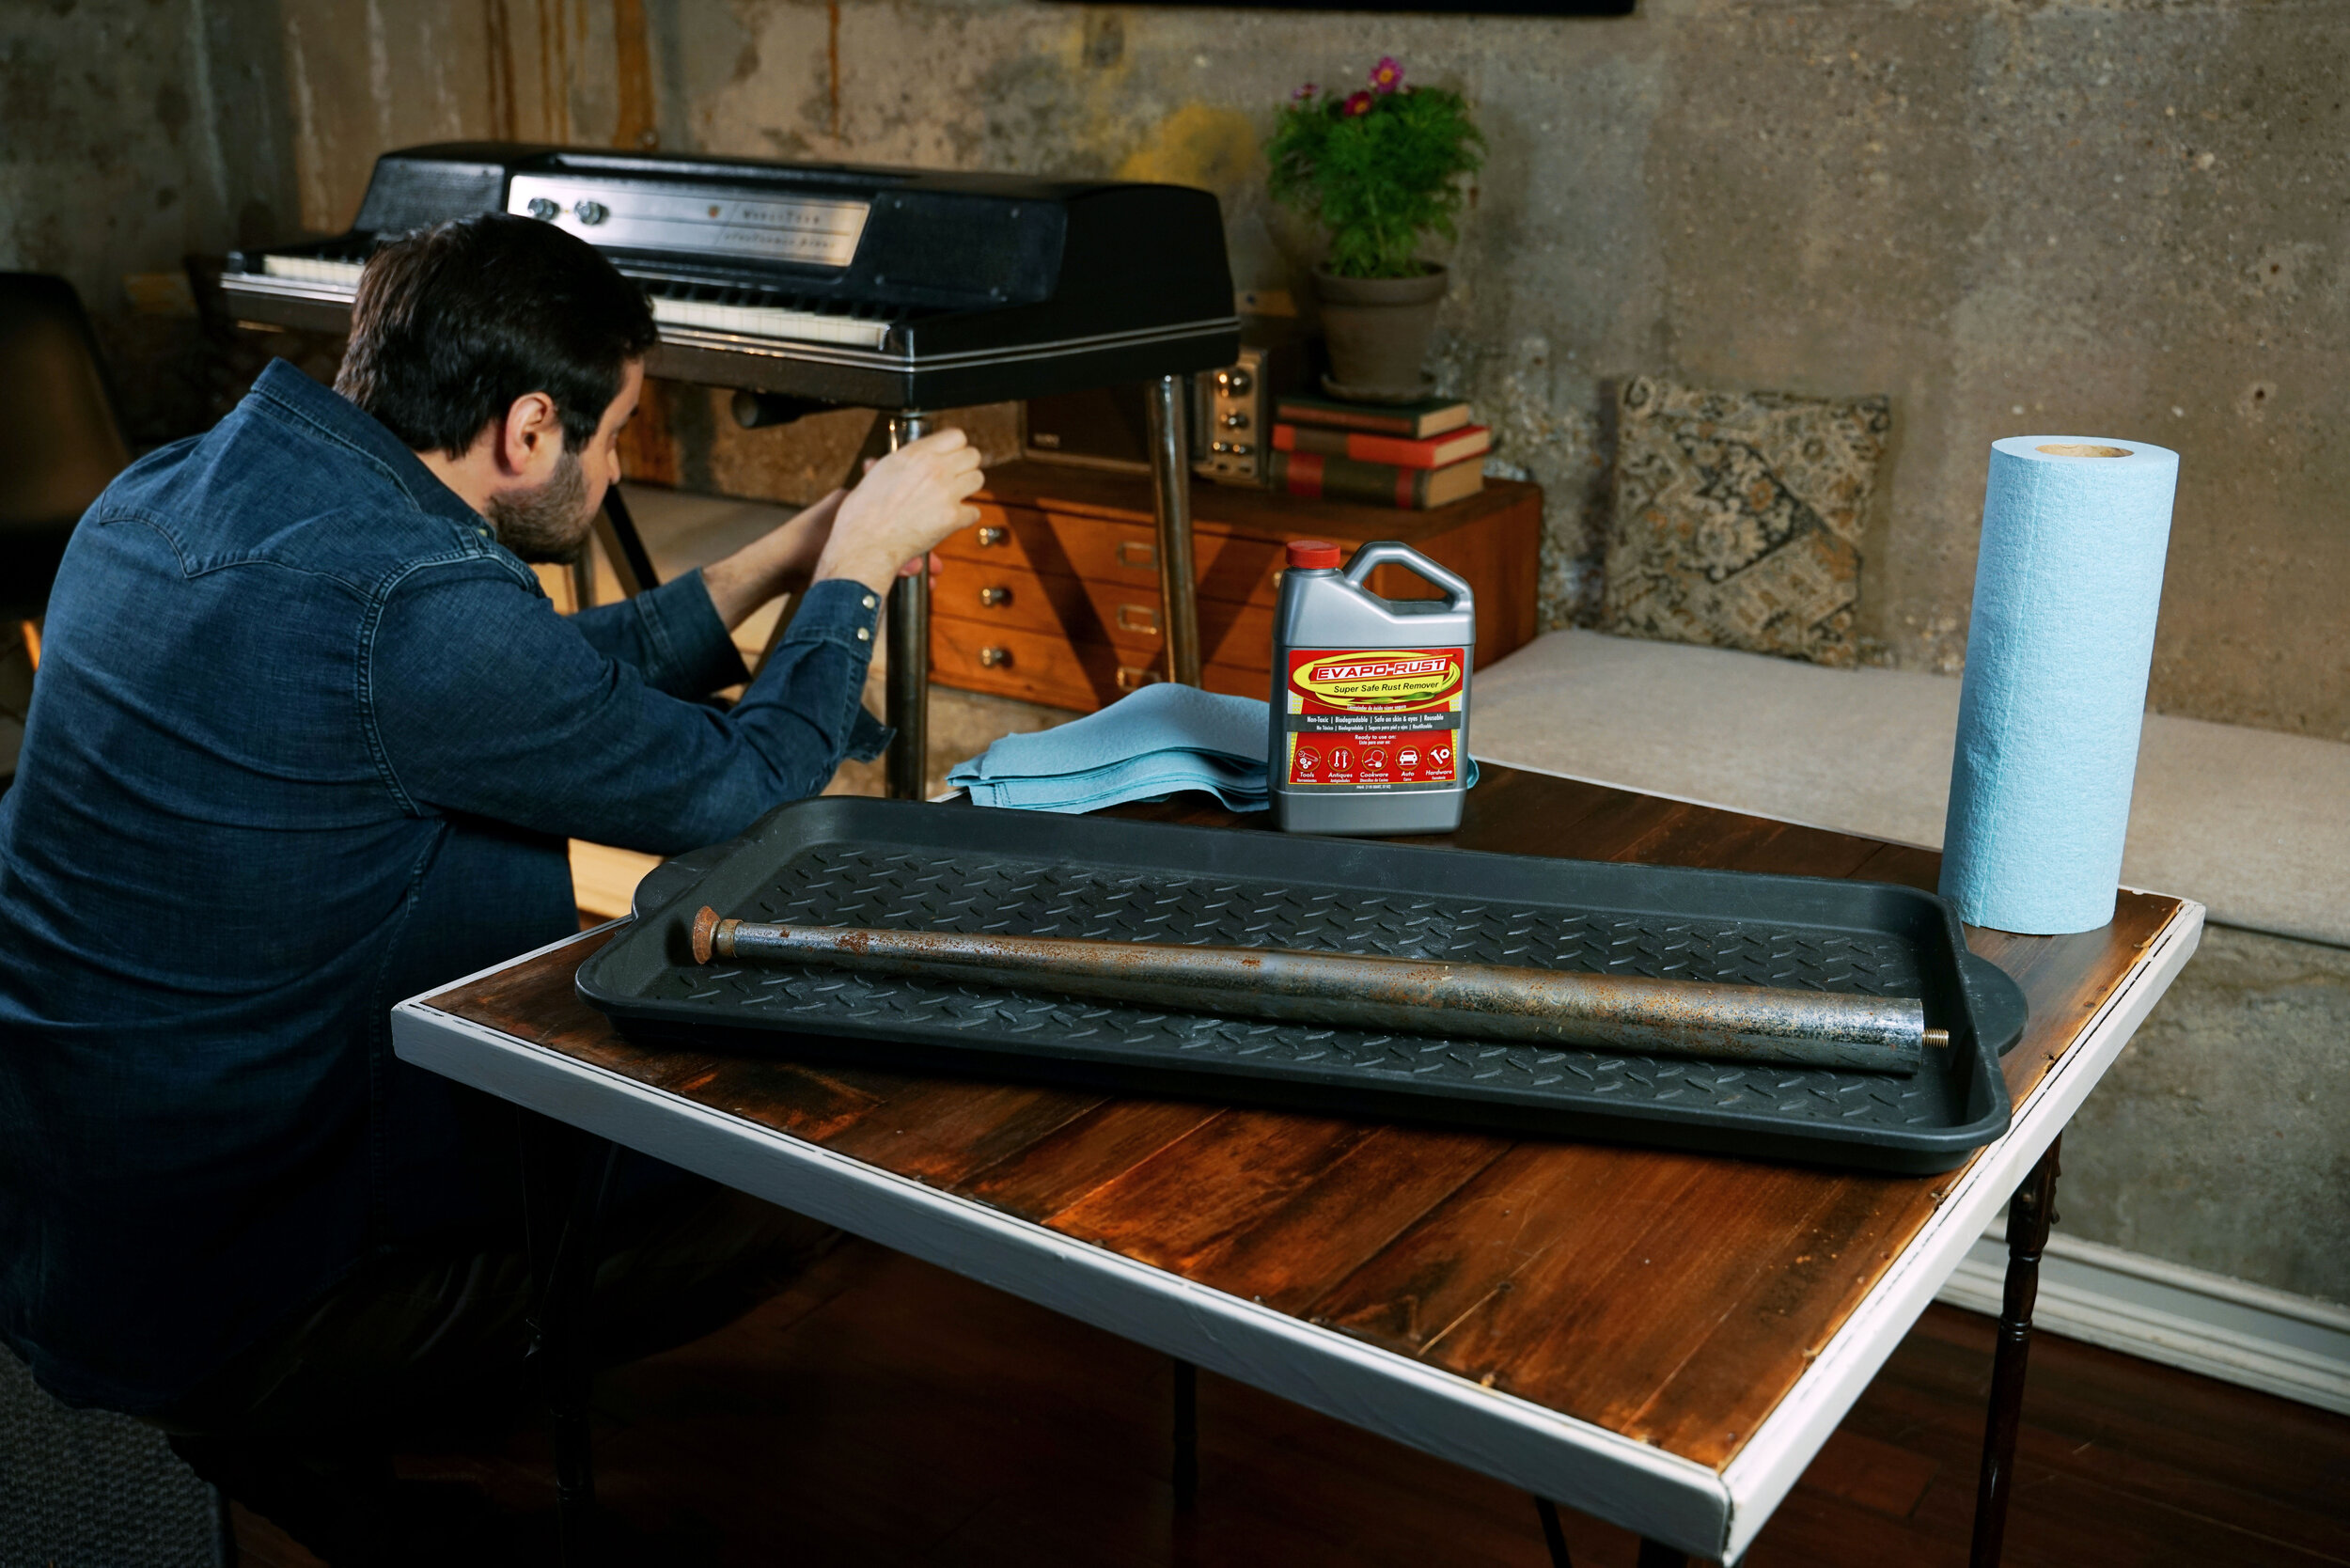
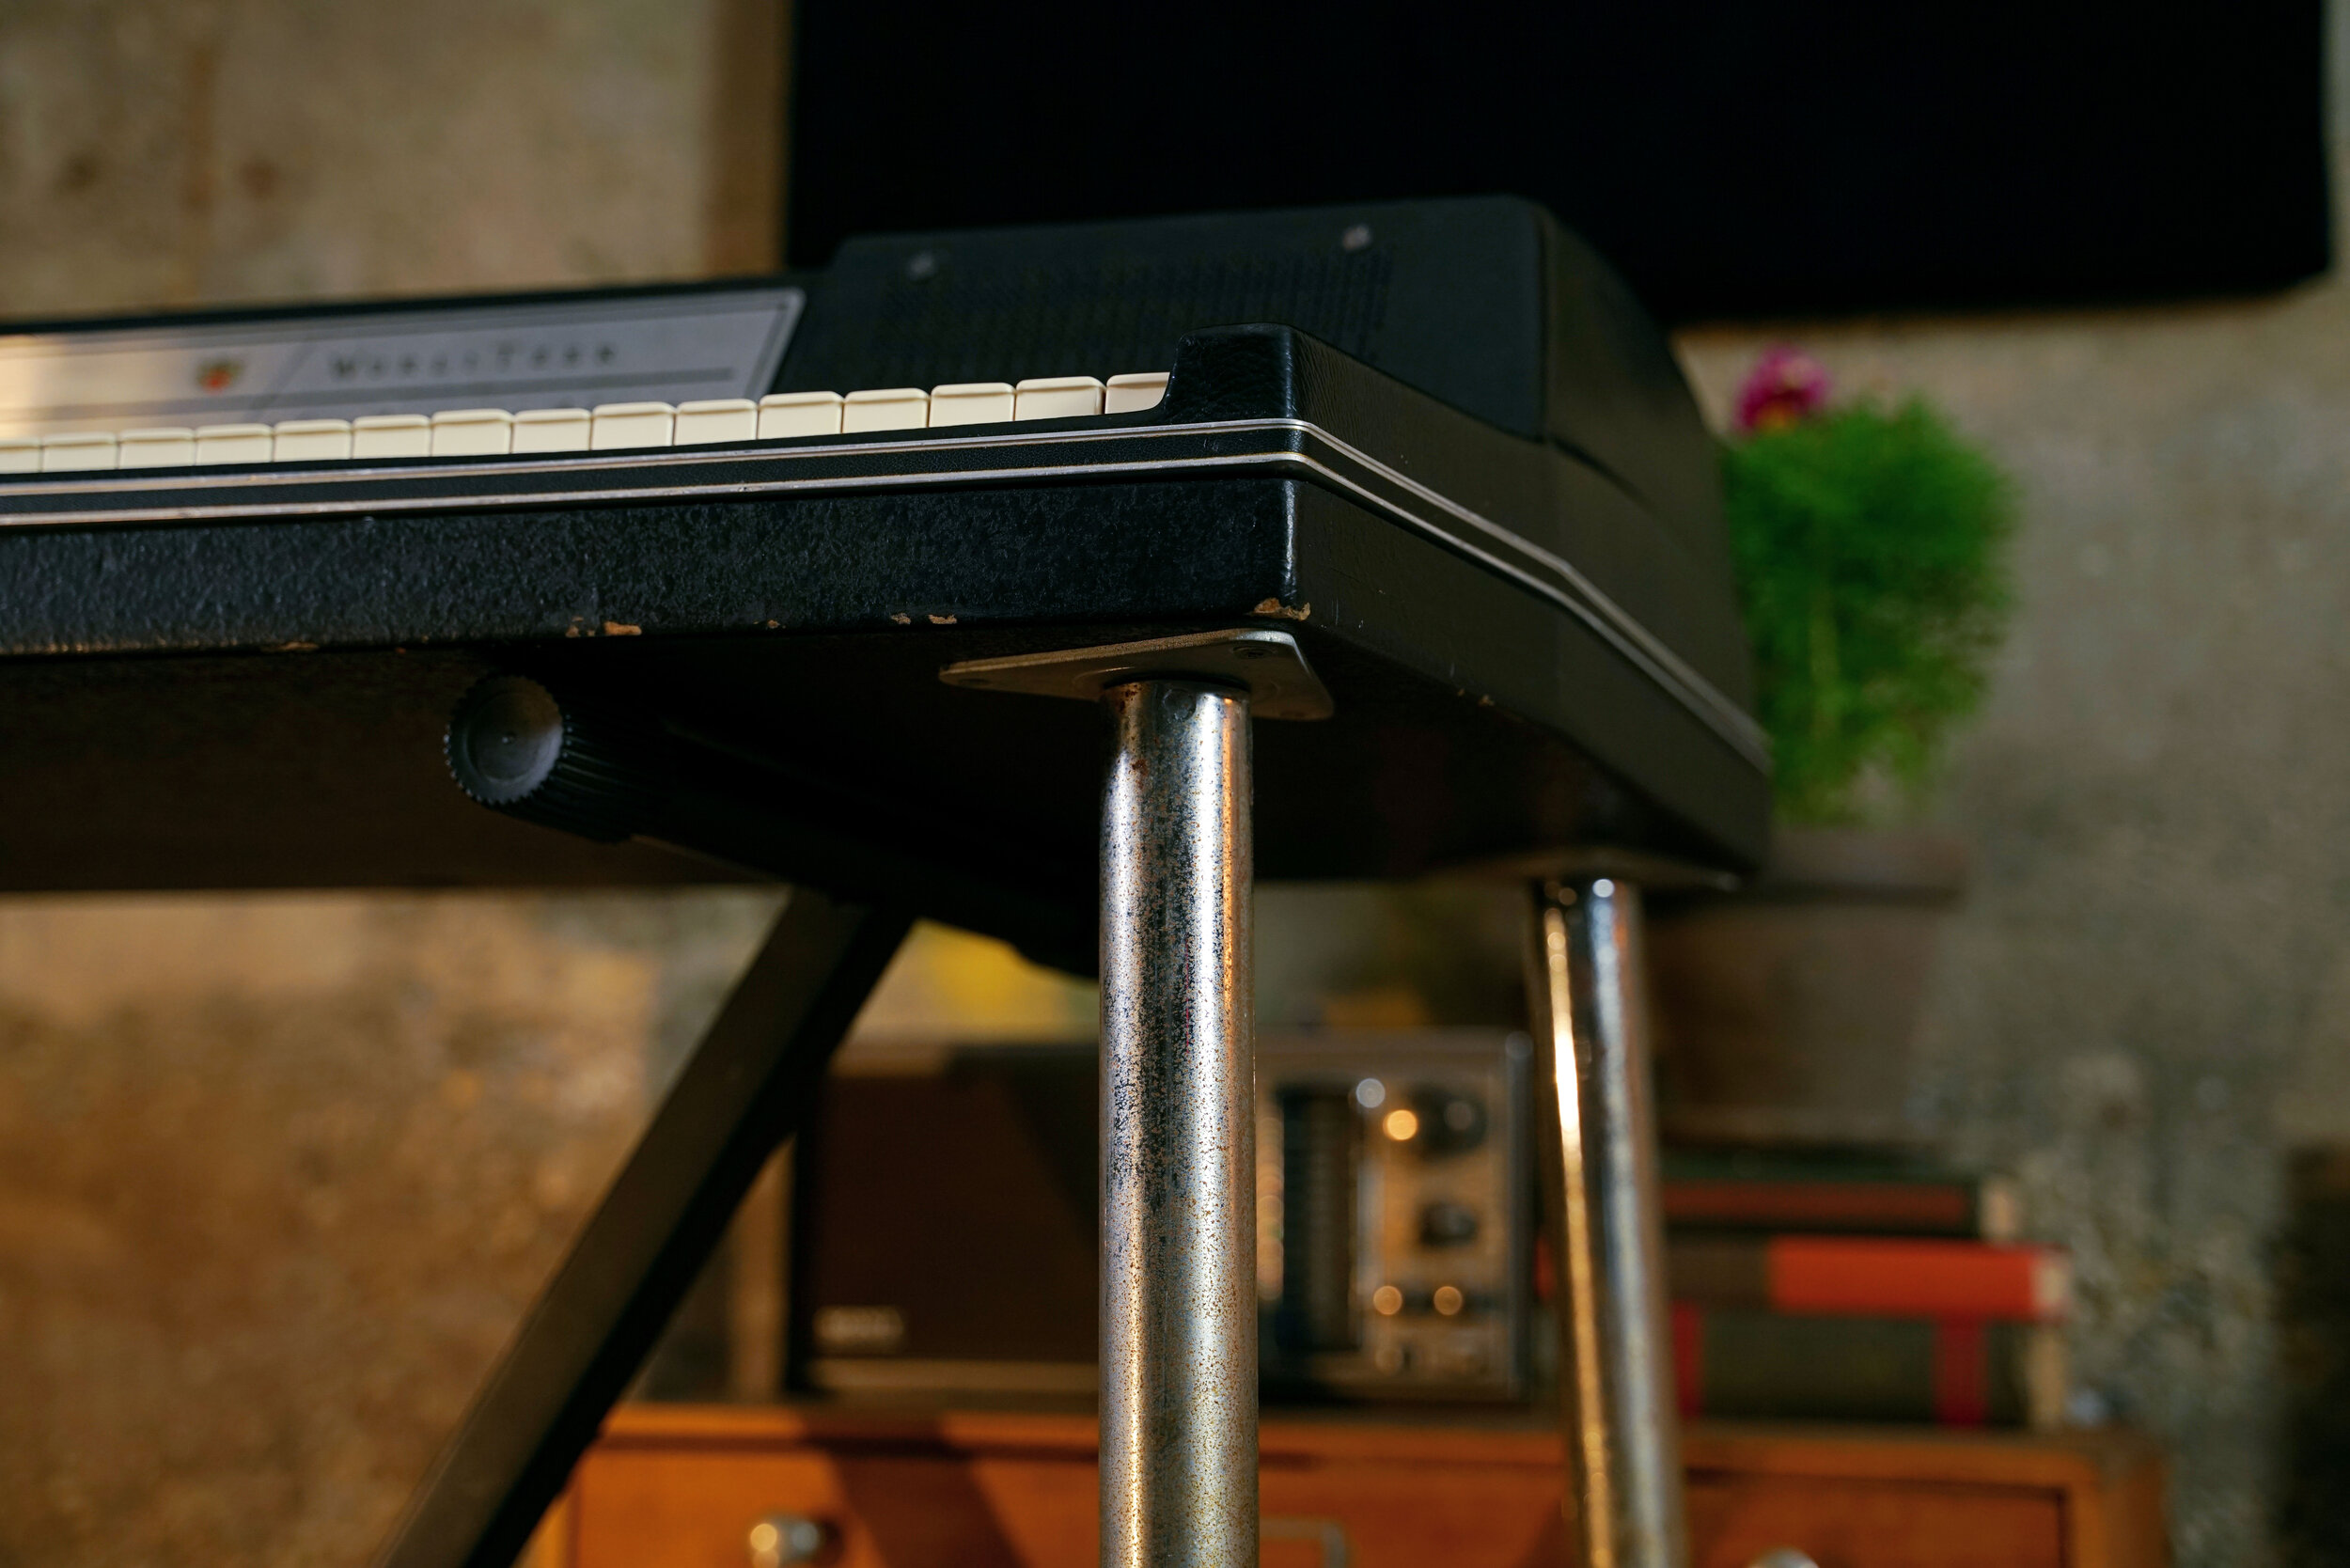
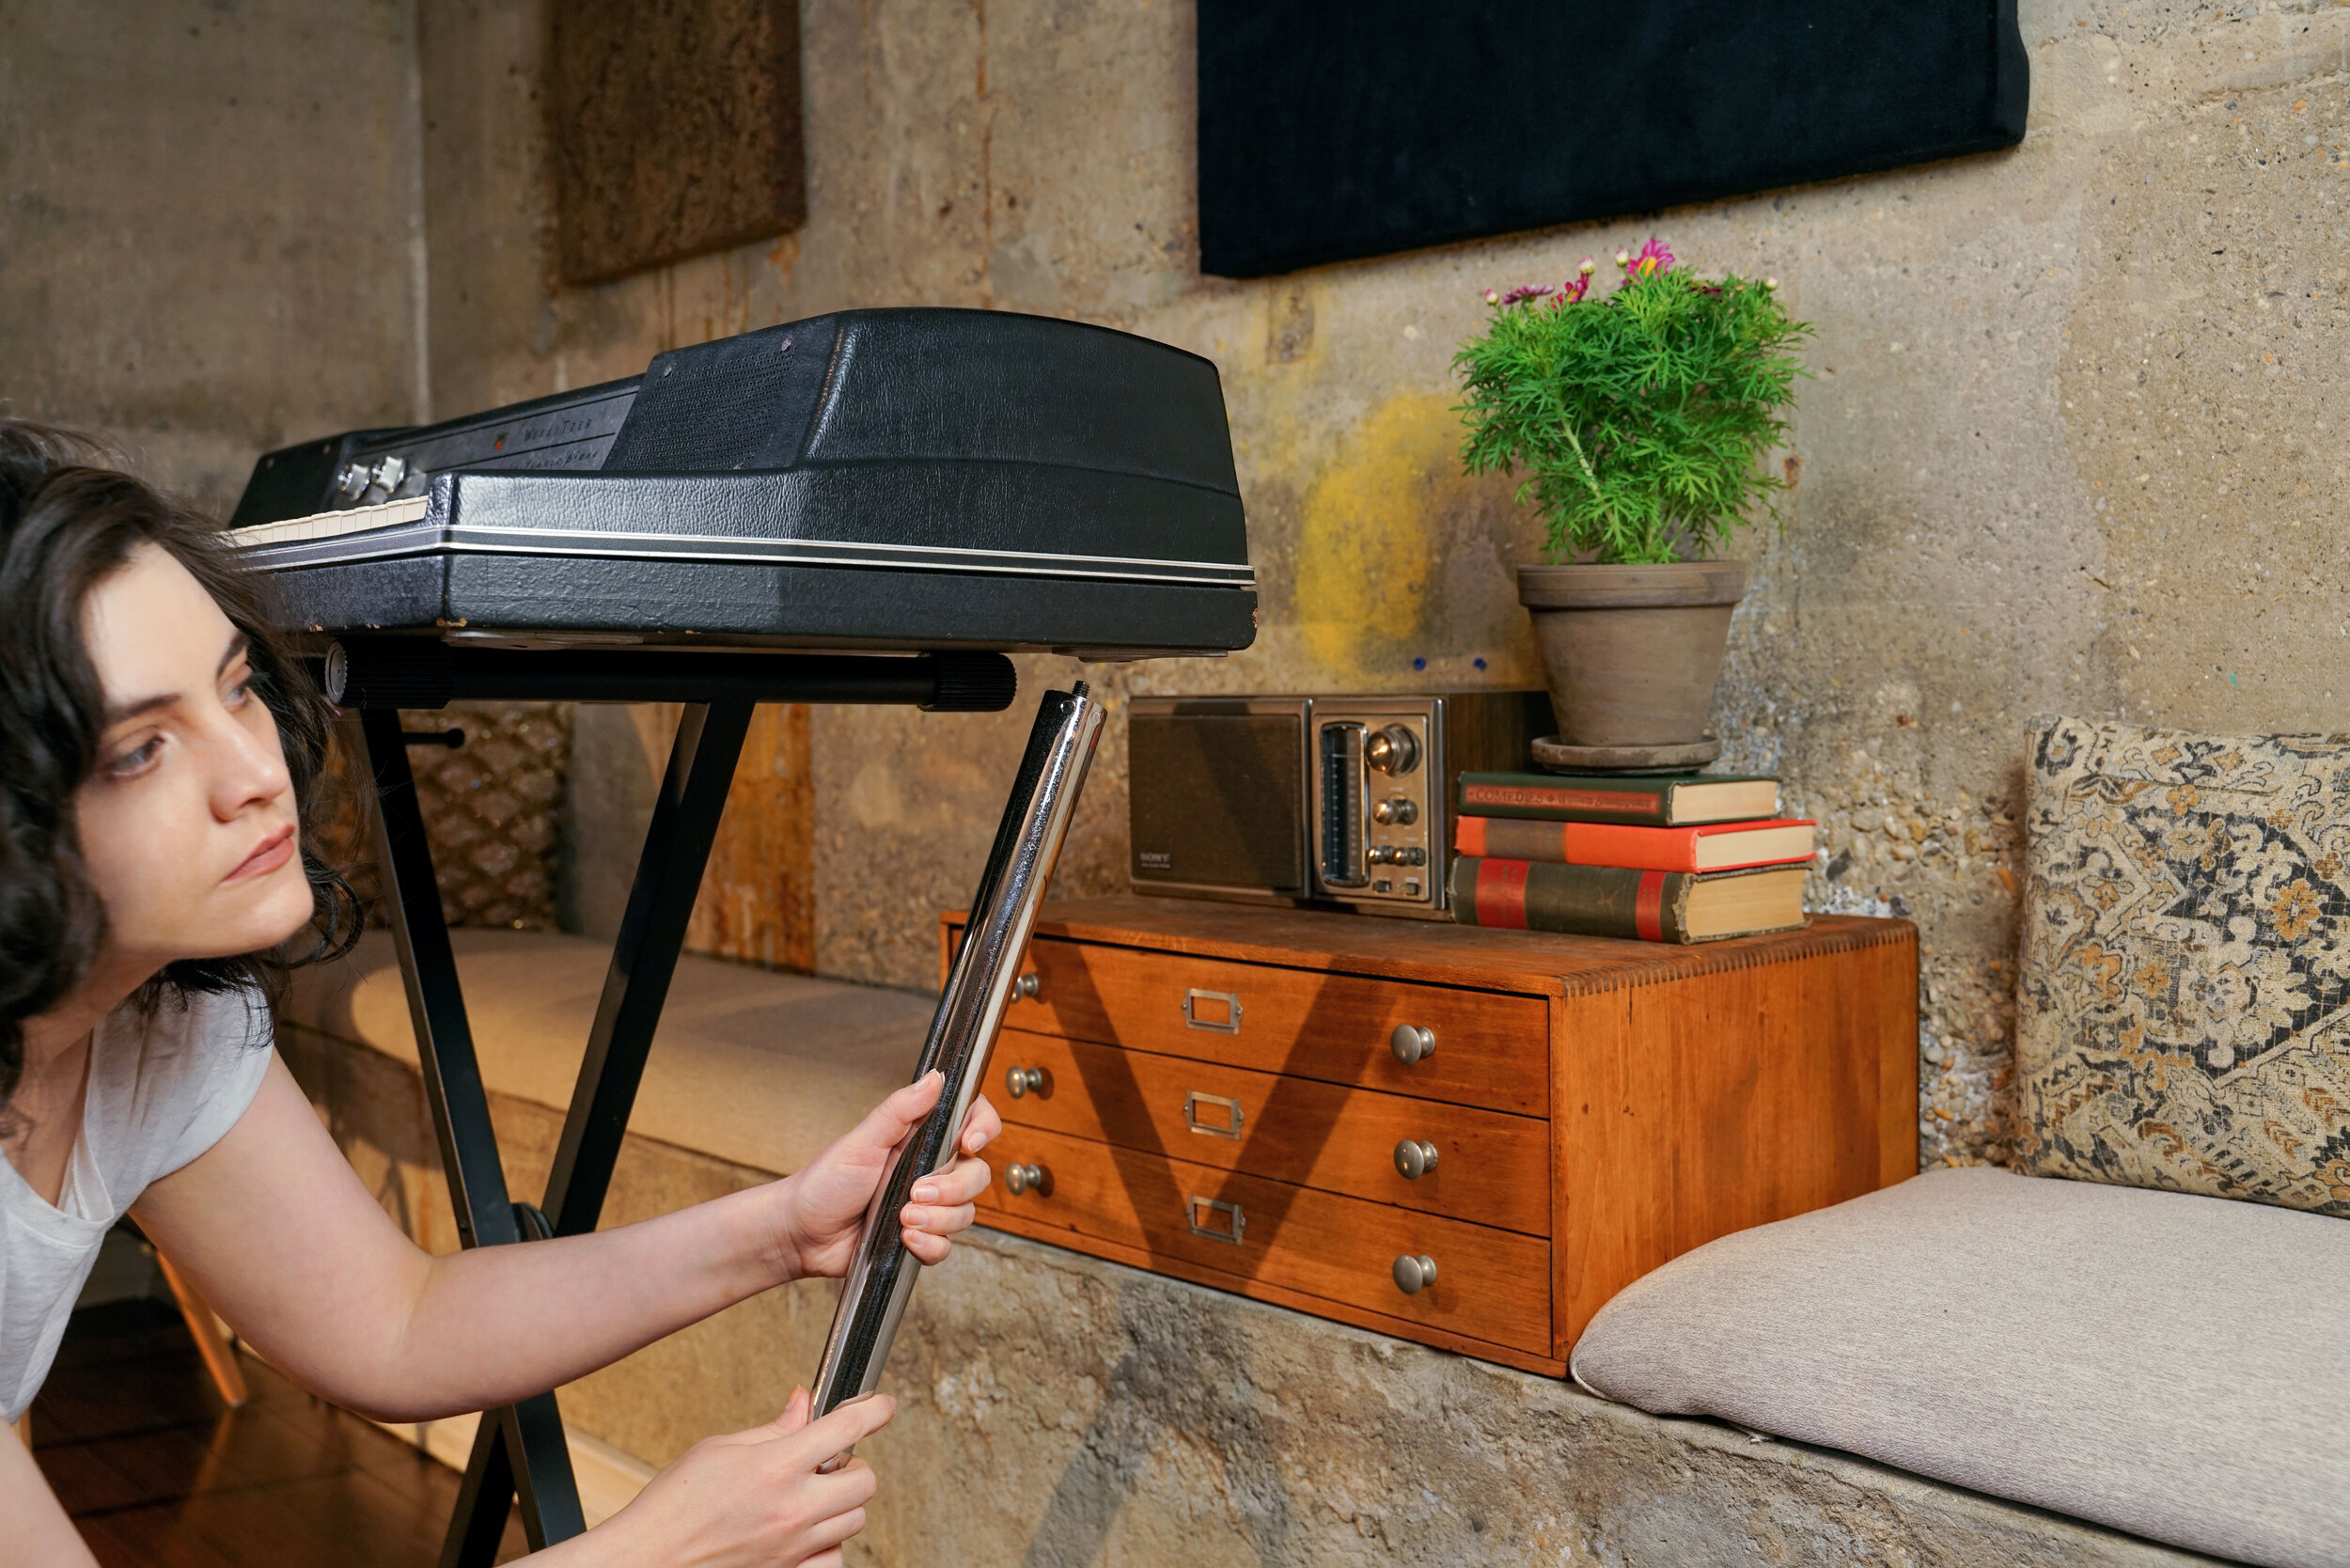
Chrome Wurlitzer 200 and 200a legs are often rusty. Unlike earlier models, the 200 and 200a do not have built-in leg storage. And chrome legs are often not stored as conscientiously as the keyboard itself — or, even if they were originally, they’re prone to rolling away (probably, as luck would have it, into the dampest corner of the room). Anyway, we’re happy anytime the original legs are present, regardless of their condition. (Without the built-in storage method, they are very easy to lose over a span of 35+ years!) And if they are covered in rust — good news! — it is easy to remove.
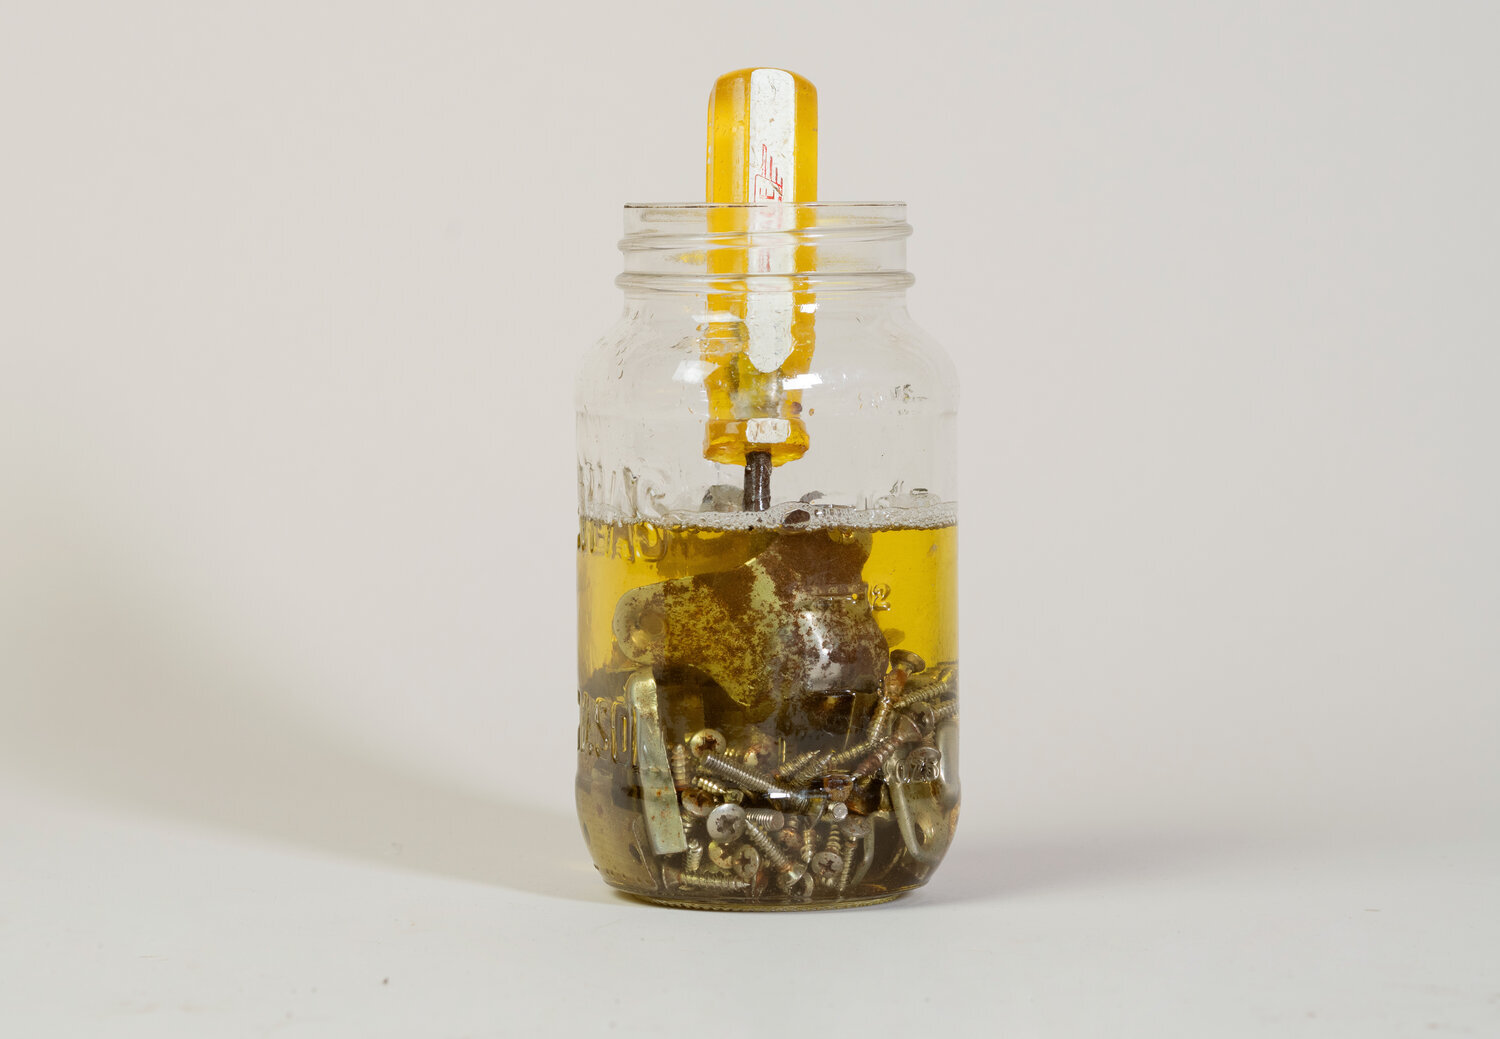
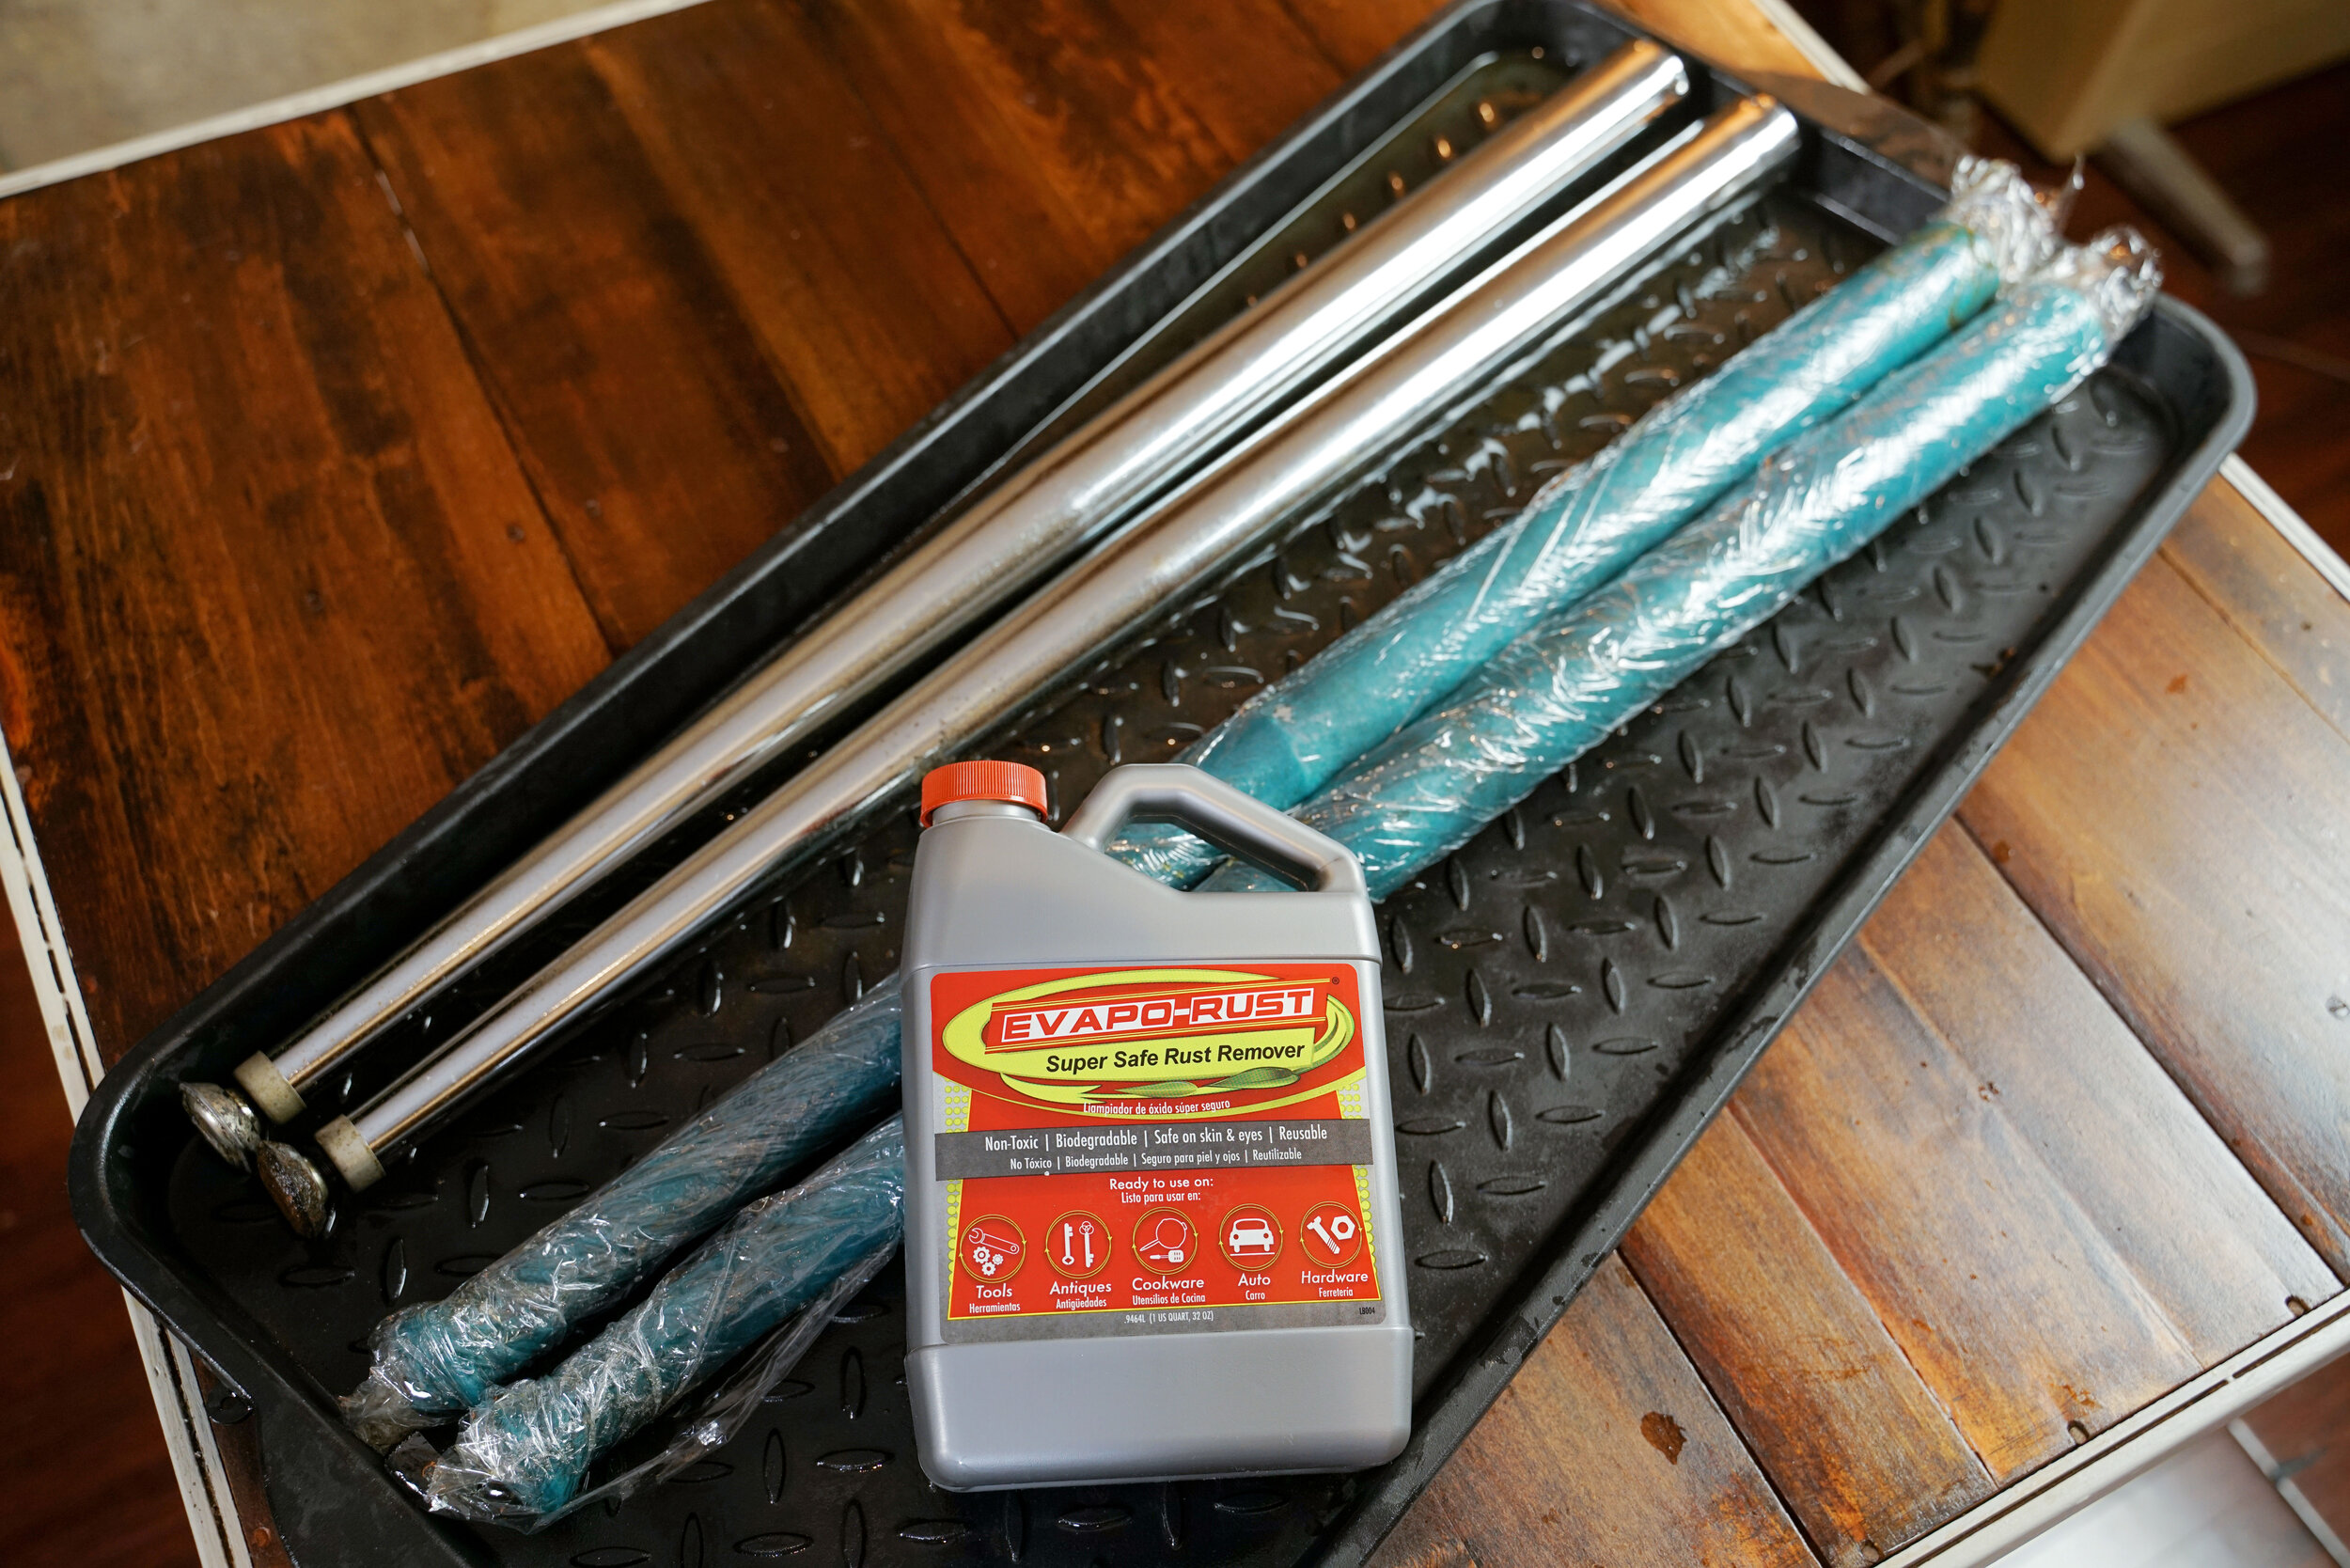
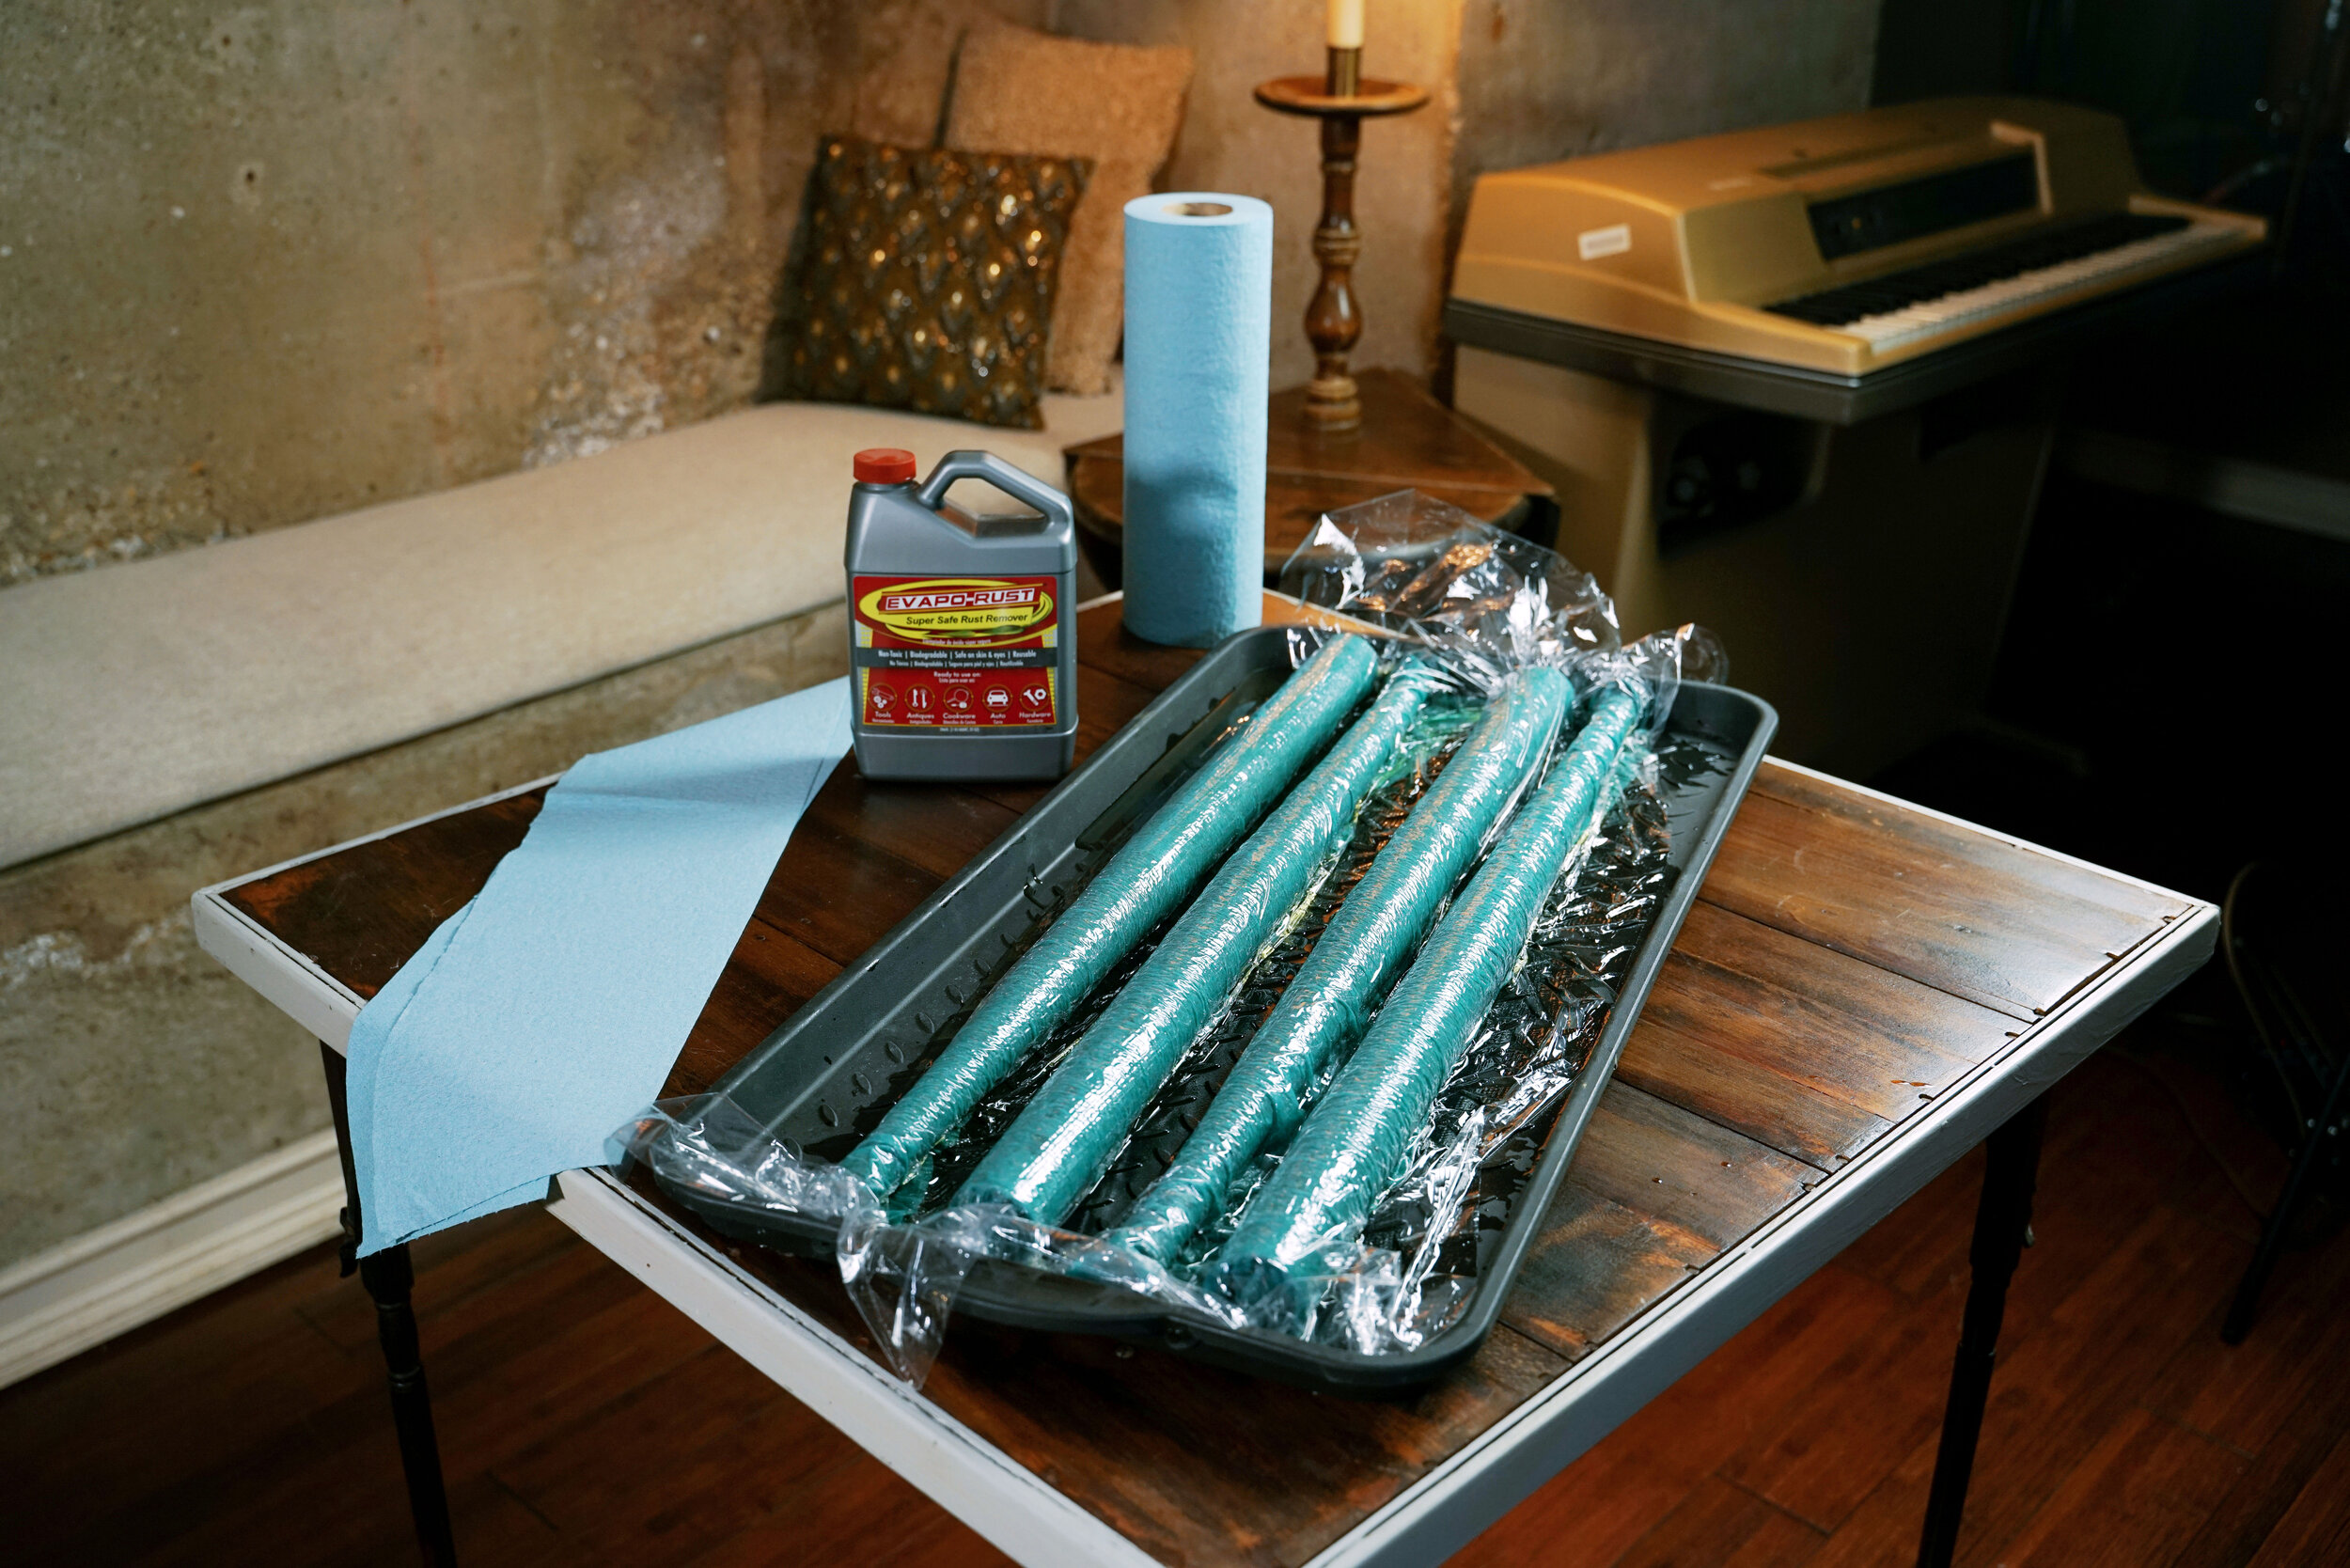
Our rust removal product of choice is Evapo-Rust. It is super easy to use: basically, cover the rusty object in Evapo-Rust, wait several hours, then enjoy your newly-derusted thing (whatever it may be). Evapo-Rust is most convenient when you are able to submerge the entire object in it. Since you can reuse the leftovers, you can even fill relatively oversized containers without worrying about wasting product. But, because we haven’t yet found the perfect container for submerging Wurlitzer legs, we have a different system for de-rusting them. This system will also work for any large item that cannot easily fit in a container.
Our Solution for De-Rusting Large Objects
For Evapo-Rust to work most effectively, you need to meet two requirements:

The Evapo-Rust has to be wet, and
It must be in close contact with the rusty object.
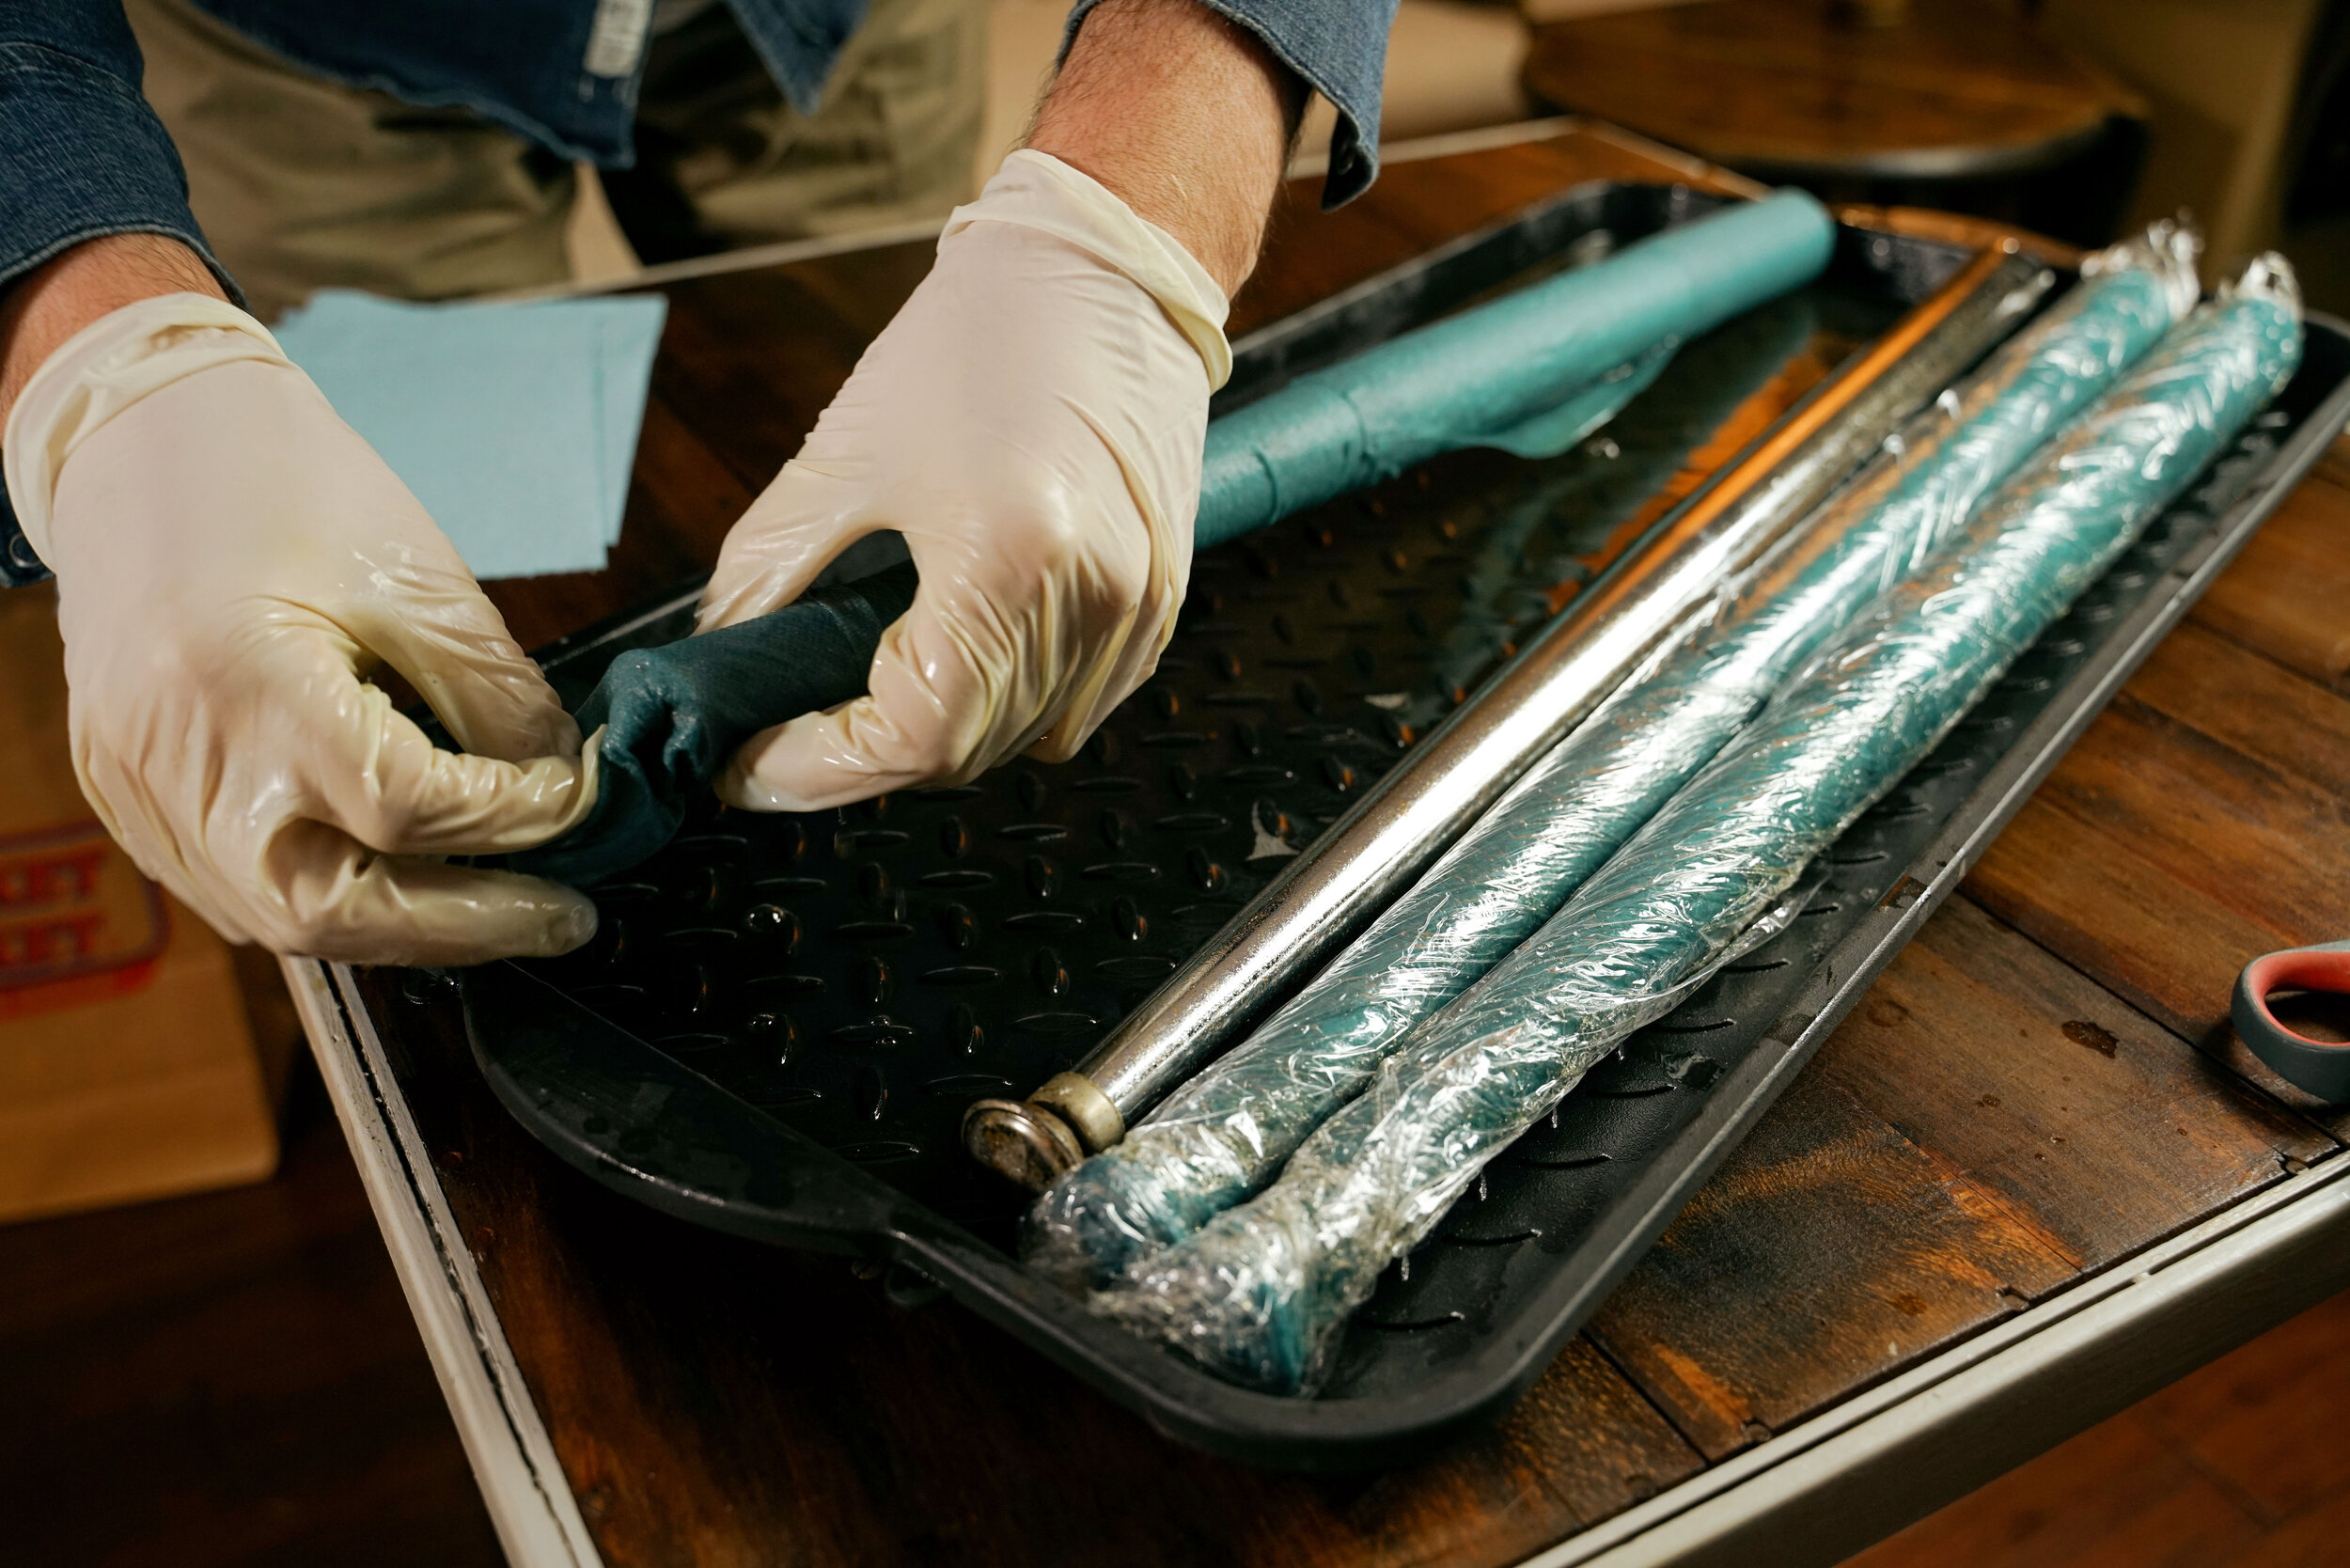
Submerging the item is great because it fulfills both of these requirements with a minimum amount of effort. However, any system that involves somehow plastering wet Evapo-Rust to the object for some length of time will also work. This is what we do:
Dip a paper towel in Evapo-Rust.
Wrap the wet paper towel tightly around the item.
Cover with plastic wrap.
Wait at least one hour for Evapo-Rust to work its magic.
When you are finished de-rusting, rinse the item with water.
Notes
The paper towel should be a durable material that reliably holds together when wet. We use blue shop towels.
The paper towel must be wrapped around the object tightly. The Evapo-Rust will not be able to do its job unless it is actually touching the object. If it is wrapped loosely, de-rusting will take longer and the item may never become de-rusted to the full extent that Evapo-Rust is capable of.
The whole thing should be covered with plastic wrap to prevent the Evapo-Rust from drying out. If the paper towel dries, the Evapo-Rust will stop doing its job. If the plastic wrap is wrapped tightly around the object, the Evapo-Rust will remain wet. The plastic wrap will also help keep the paper towel in place.
We usually leave objects in Evapo-rust for four hours or more. If the object is only a little bit rusty, it could be done in as little as one hour. Most objects can be left in Evapo-Rust indefinitely; however, if an item seems extremely fragile, we’ll check on it frequently to make sure that it is de-rusting in the way that we have envisioned. (In our previous article, we discuss the length of time that something can be left in Evapo-Rust in more detail.)
As the object de-rusts, you will see the paper towel begin to discolor. If the paper towel is extremely filthy, you can tell that a lot of de-rusting is happening! It may be time to check whether the object is completely de-rusted.
When you are finished de-rusting, rinse the item with water. Note that some materials (such as unseasoned cast iron) are prone to flash-rusting. This means that, as soon as you get them wet — say, in your final rinse — the ambient humidity will cause them to immediately rust again. If this happens, you should re-soak the item in Evapo-Rust until the flash rust has been removed. Then, do your final rinse with Evapo-Rust instead of water.
Even if the item is not prone to flash-rusting (and, in our experience, Wurlitzer legs and other chrome parts are not), you can give it a final rinse with more Evapo-Rust to provide temporary protection against de-rusting. For prolonged protection, you can spray the item with a rust inhibitor, such as Evapo-Rust Rust-Block.
One downside to the paper towel method is that it is more difficult to reuse the leftover Evapo-Rust. However, you can squeeze out some leftover Evapo-Rust from the paper towel into a container for reuse. For this reason, we try to submerge items whenever we have the opportunity to do so.
De-Rusting Wurlitzer Legs, Specifically
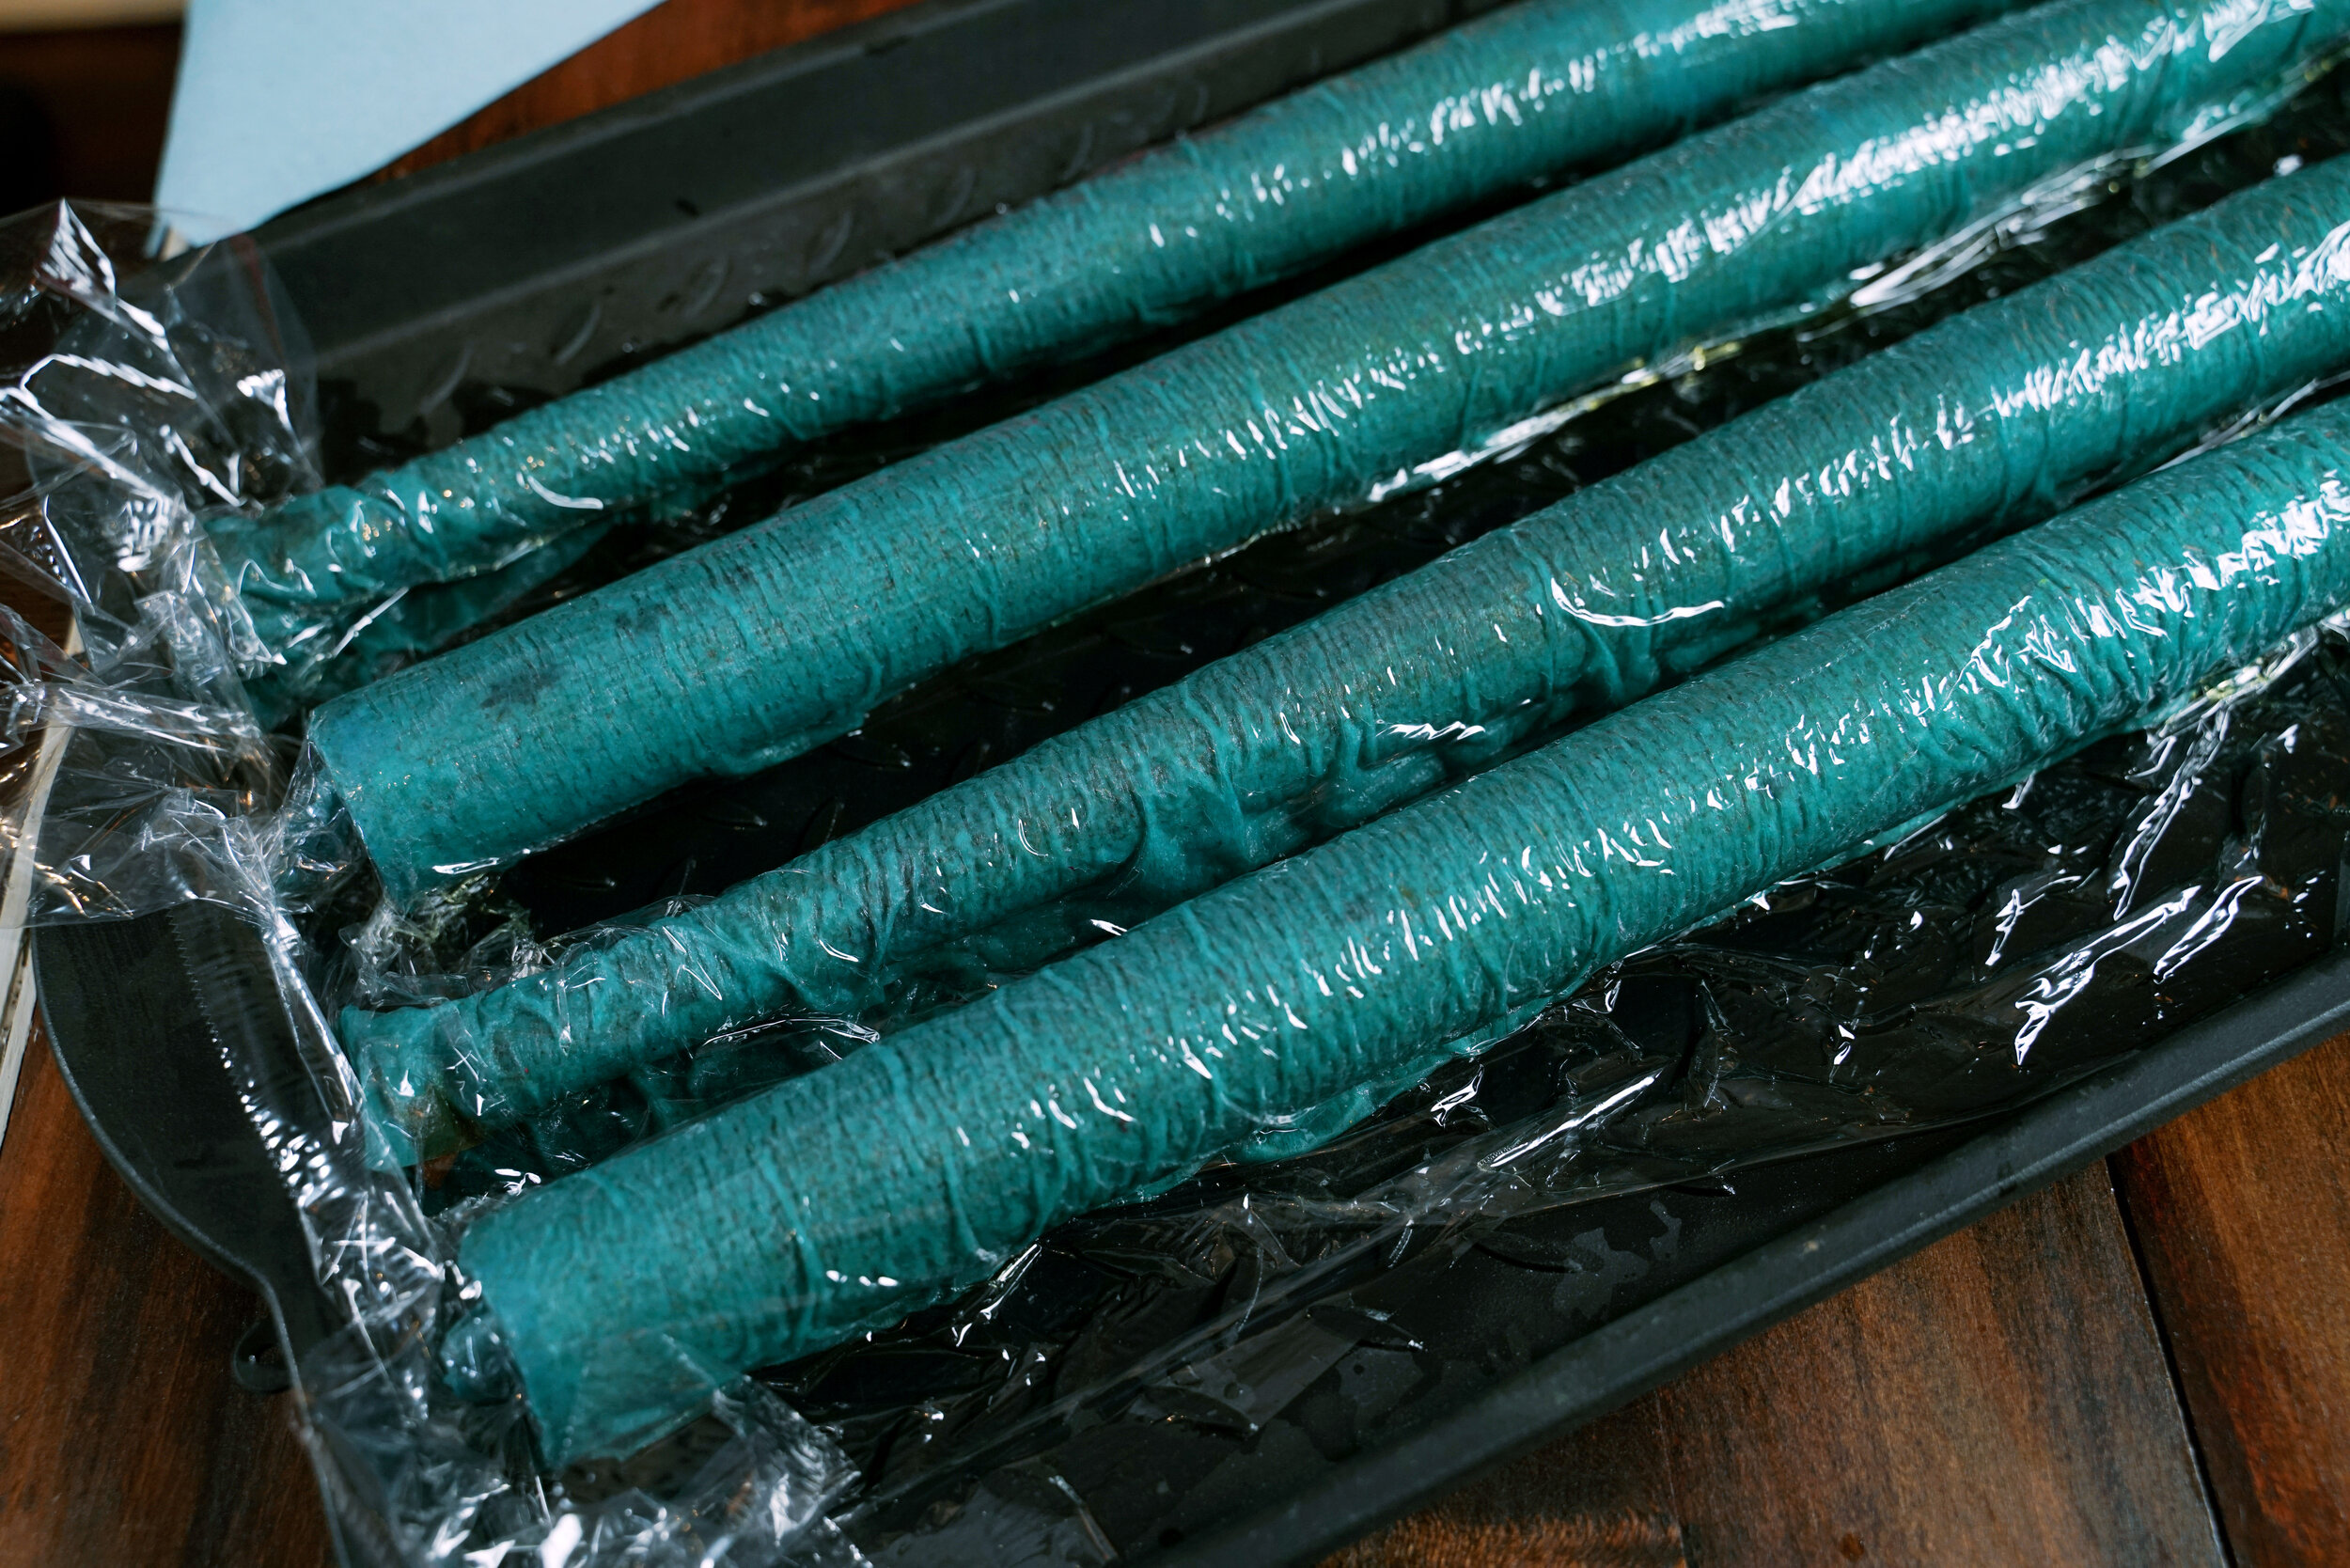
When de-rusting Wurlitzer legs, we follow the steps above. However, this last set of legs was so rusty that we actually came up with additional tips for de-rusting Wurlitzer legs specifically. Our main problem was that we did not wrap our legs tightly enough the first time we dipped them into Evapo-Rust. Ultimately, we had to give the legs a second pass. Our re-do was successful: this improved technique removed all of the rust from the legs.
How we wrapped the legs the first time
We wrapped the legs in the same manner that we used to remove rust from previous sets of legs: pretty tightly. However, we did not militantly ensure that the paper towel was flush to the leg across the entire surface of the leg. Because the leg tapers, this left gaps at the lower, more narrow part of the leg.
Previous sets of legs came out thoroughly de-rusted, even though we used the same loose-wrapping method. This is probably because the rust on these legs was confined to the surface of the chrome. Although we couldn’t really tell by looking at it, the rust on this set had penetrated extremely deep. In some places, it had eaten straight through large areas of chrome. After removing the rust, these areas would become large blotches of bare metal. At the time, it just looked like a set of moderately rusty old legs.
On the first pass, when we checked on the legs after our usual four hours, we saw a big improvement in the appearance of the legs. A lot of the rust was gone, and the they were definitely shinier. However, they still had obvious and visible rust, mostly on the bottom half of the leg. We decided to wrap them back up and check on them again later.
Unfortunately, after checking them again, we were not seeing the level of de-rusting that we have come to expect. We noticed that the top half of the leg looked great. Most of the remaining rust was concentrated on the bottom, more narrow half. However, there wasn’t anything particularly different about the condition of the two halves of the legs.
We did, however, notice that the two halves were wrapped differently. The top half was wrapped tightly with the Evapo-Rust soaked paper towel. However, we had wrapped the feet and the bottom half of the leg using the same length of paper towel. Because the legs taper narrower than the diameter of the feet, this created an air gap between the paper towel and the leg. The size of the gap increased near the feet.
How we wrapped the legs the second time
On the second pass, we wrapped the legs much more carefully, in order to eliminate this air gap. This is our technique:
We wrapped the bottom portion of the leg first, starting at the area just above the feet.
Then, we gave the feet their own paper towel. We ensured that this one was wrapped tightly as well.
Finally, we wrapped paper towels tightly around the rest of the leg.
We wrapped each leg individually (and tightly) in plastic wrap.
This provided all the coverage that the legs needed to become completely de-rusted on the second pass. We’re not sure how long it took, since wrapped them up late in the day and ended up leaving them to de-rust overnight. It probably didn’t need all that time, but it is very convenient that we can leave the chrome legs in the Evapo-Rust for so long without worrying about any adverse effects.
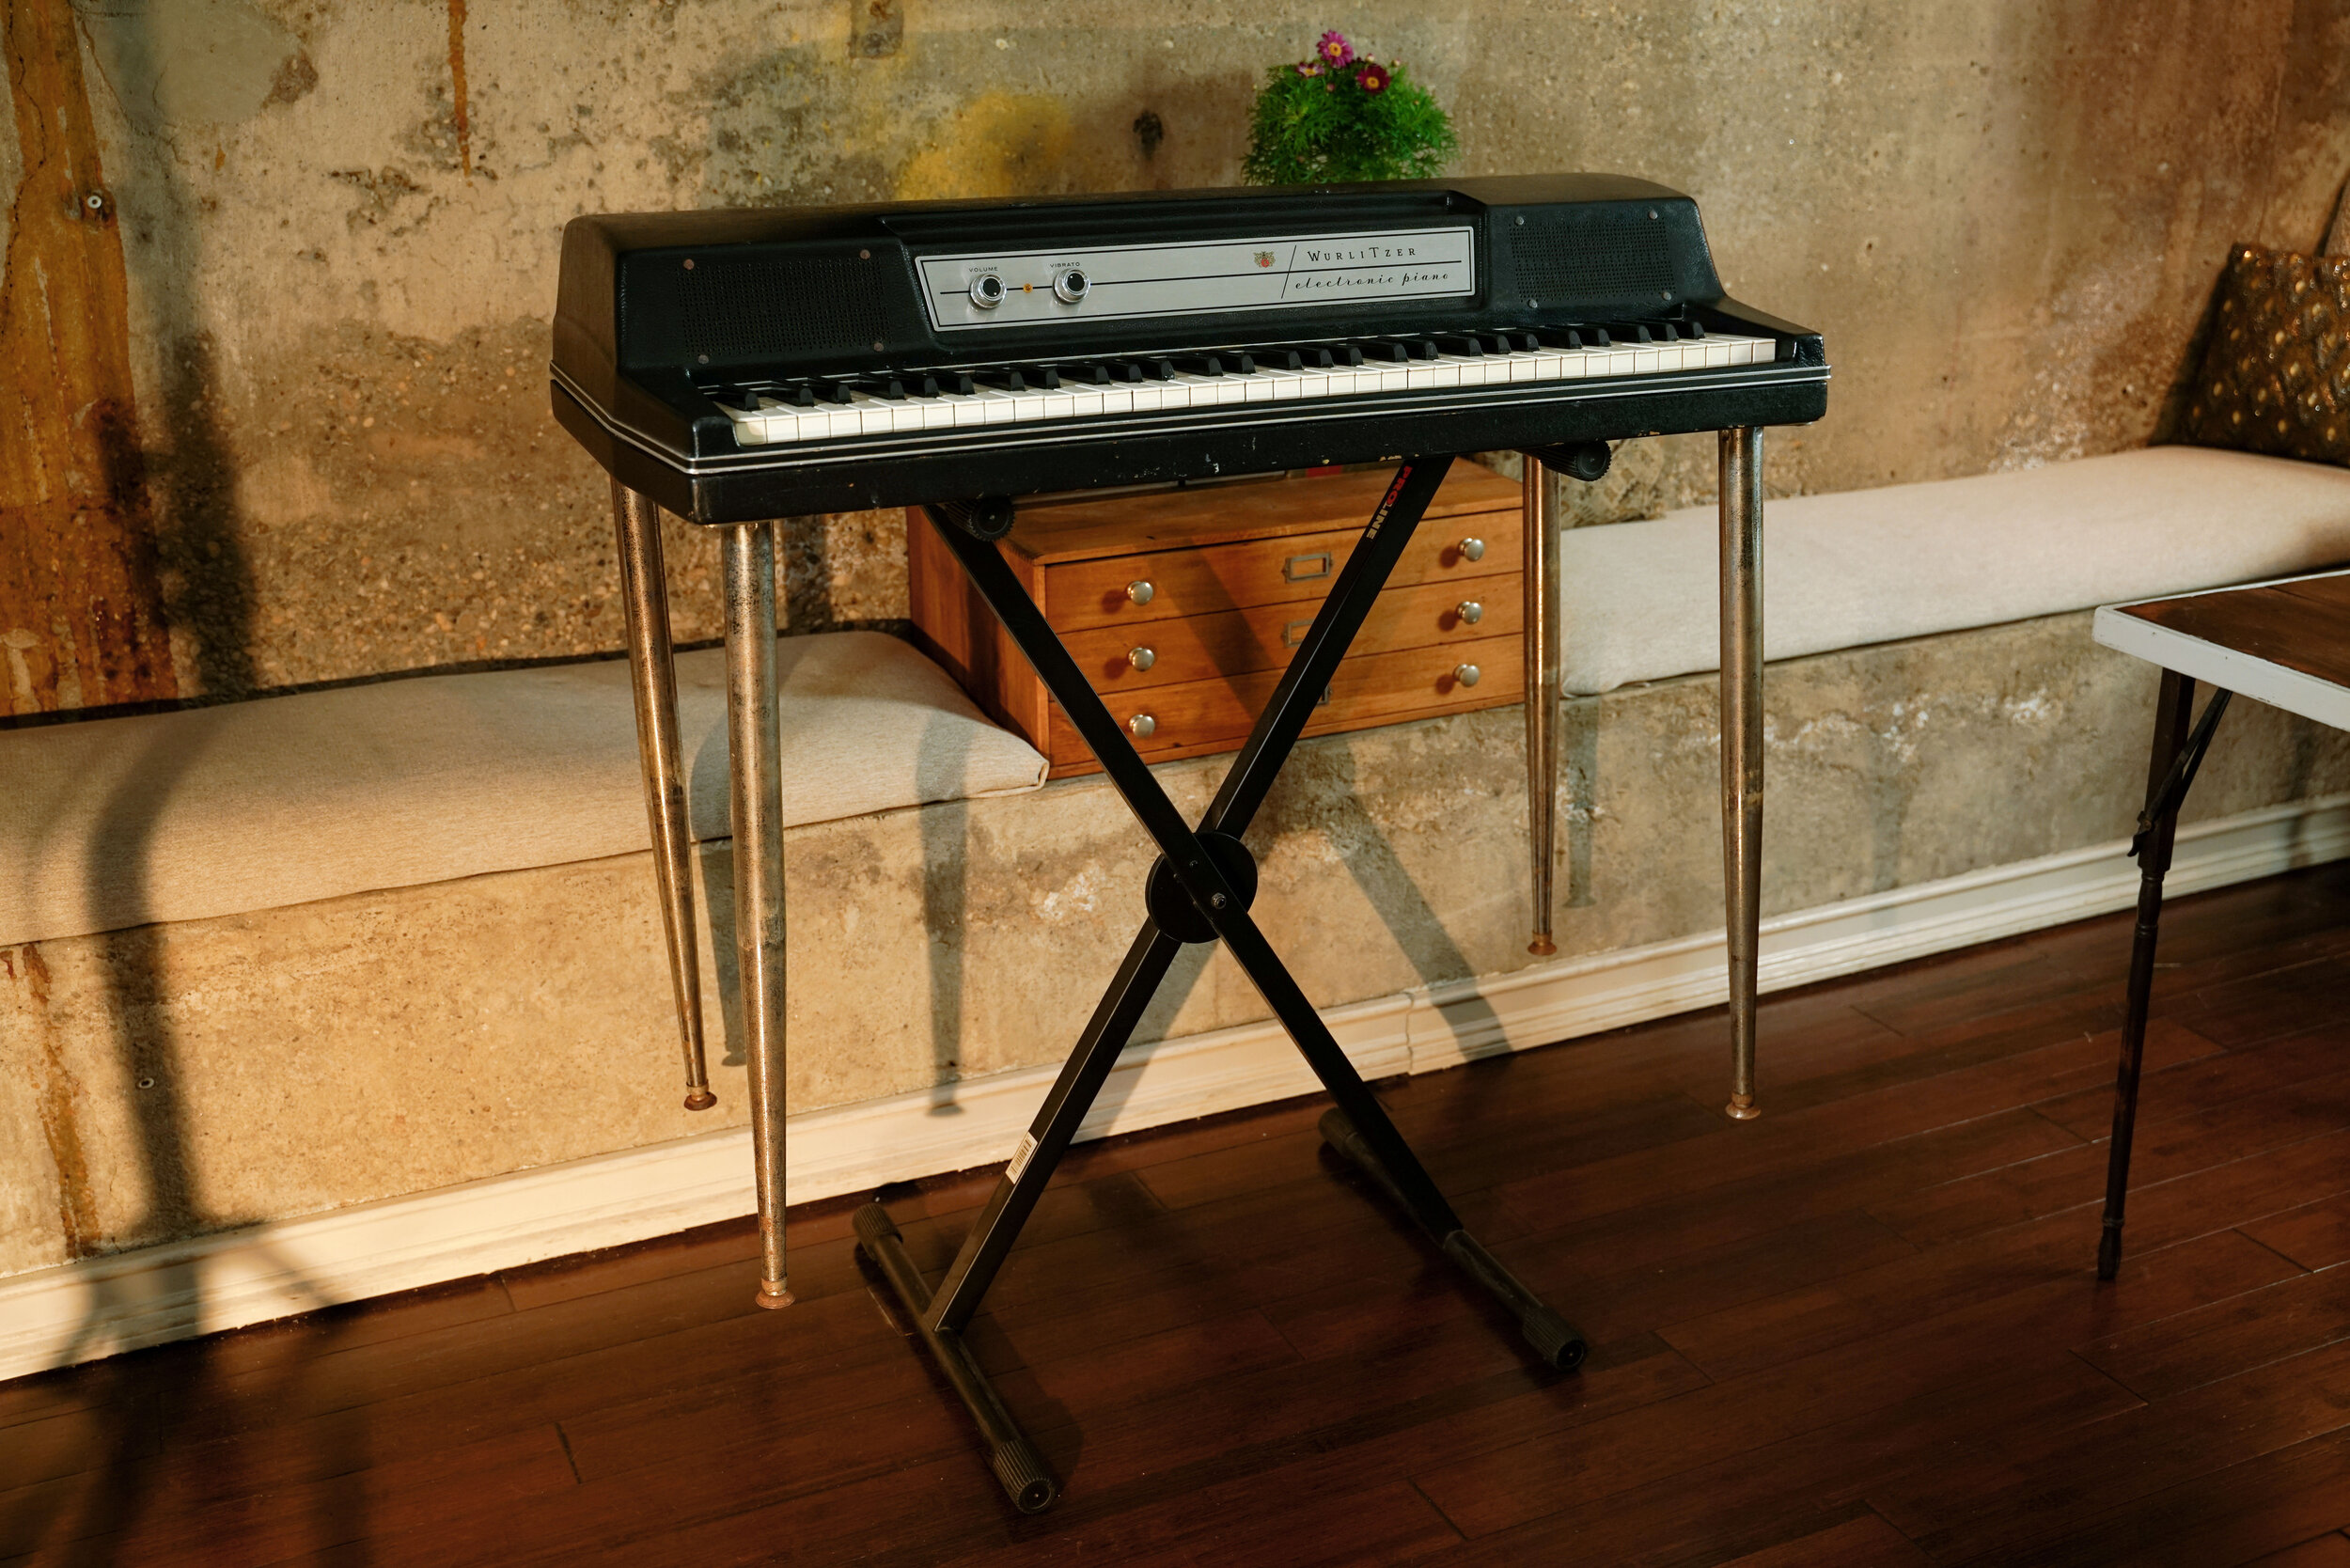
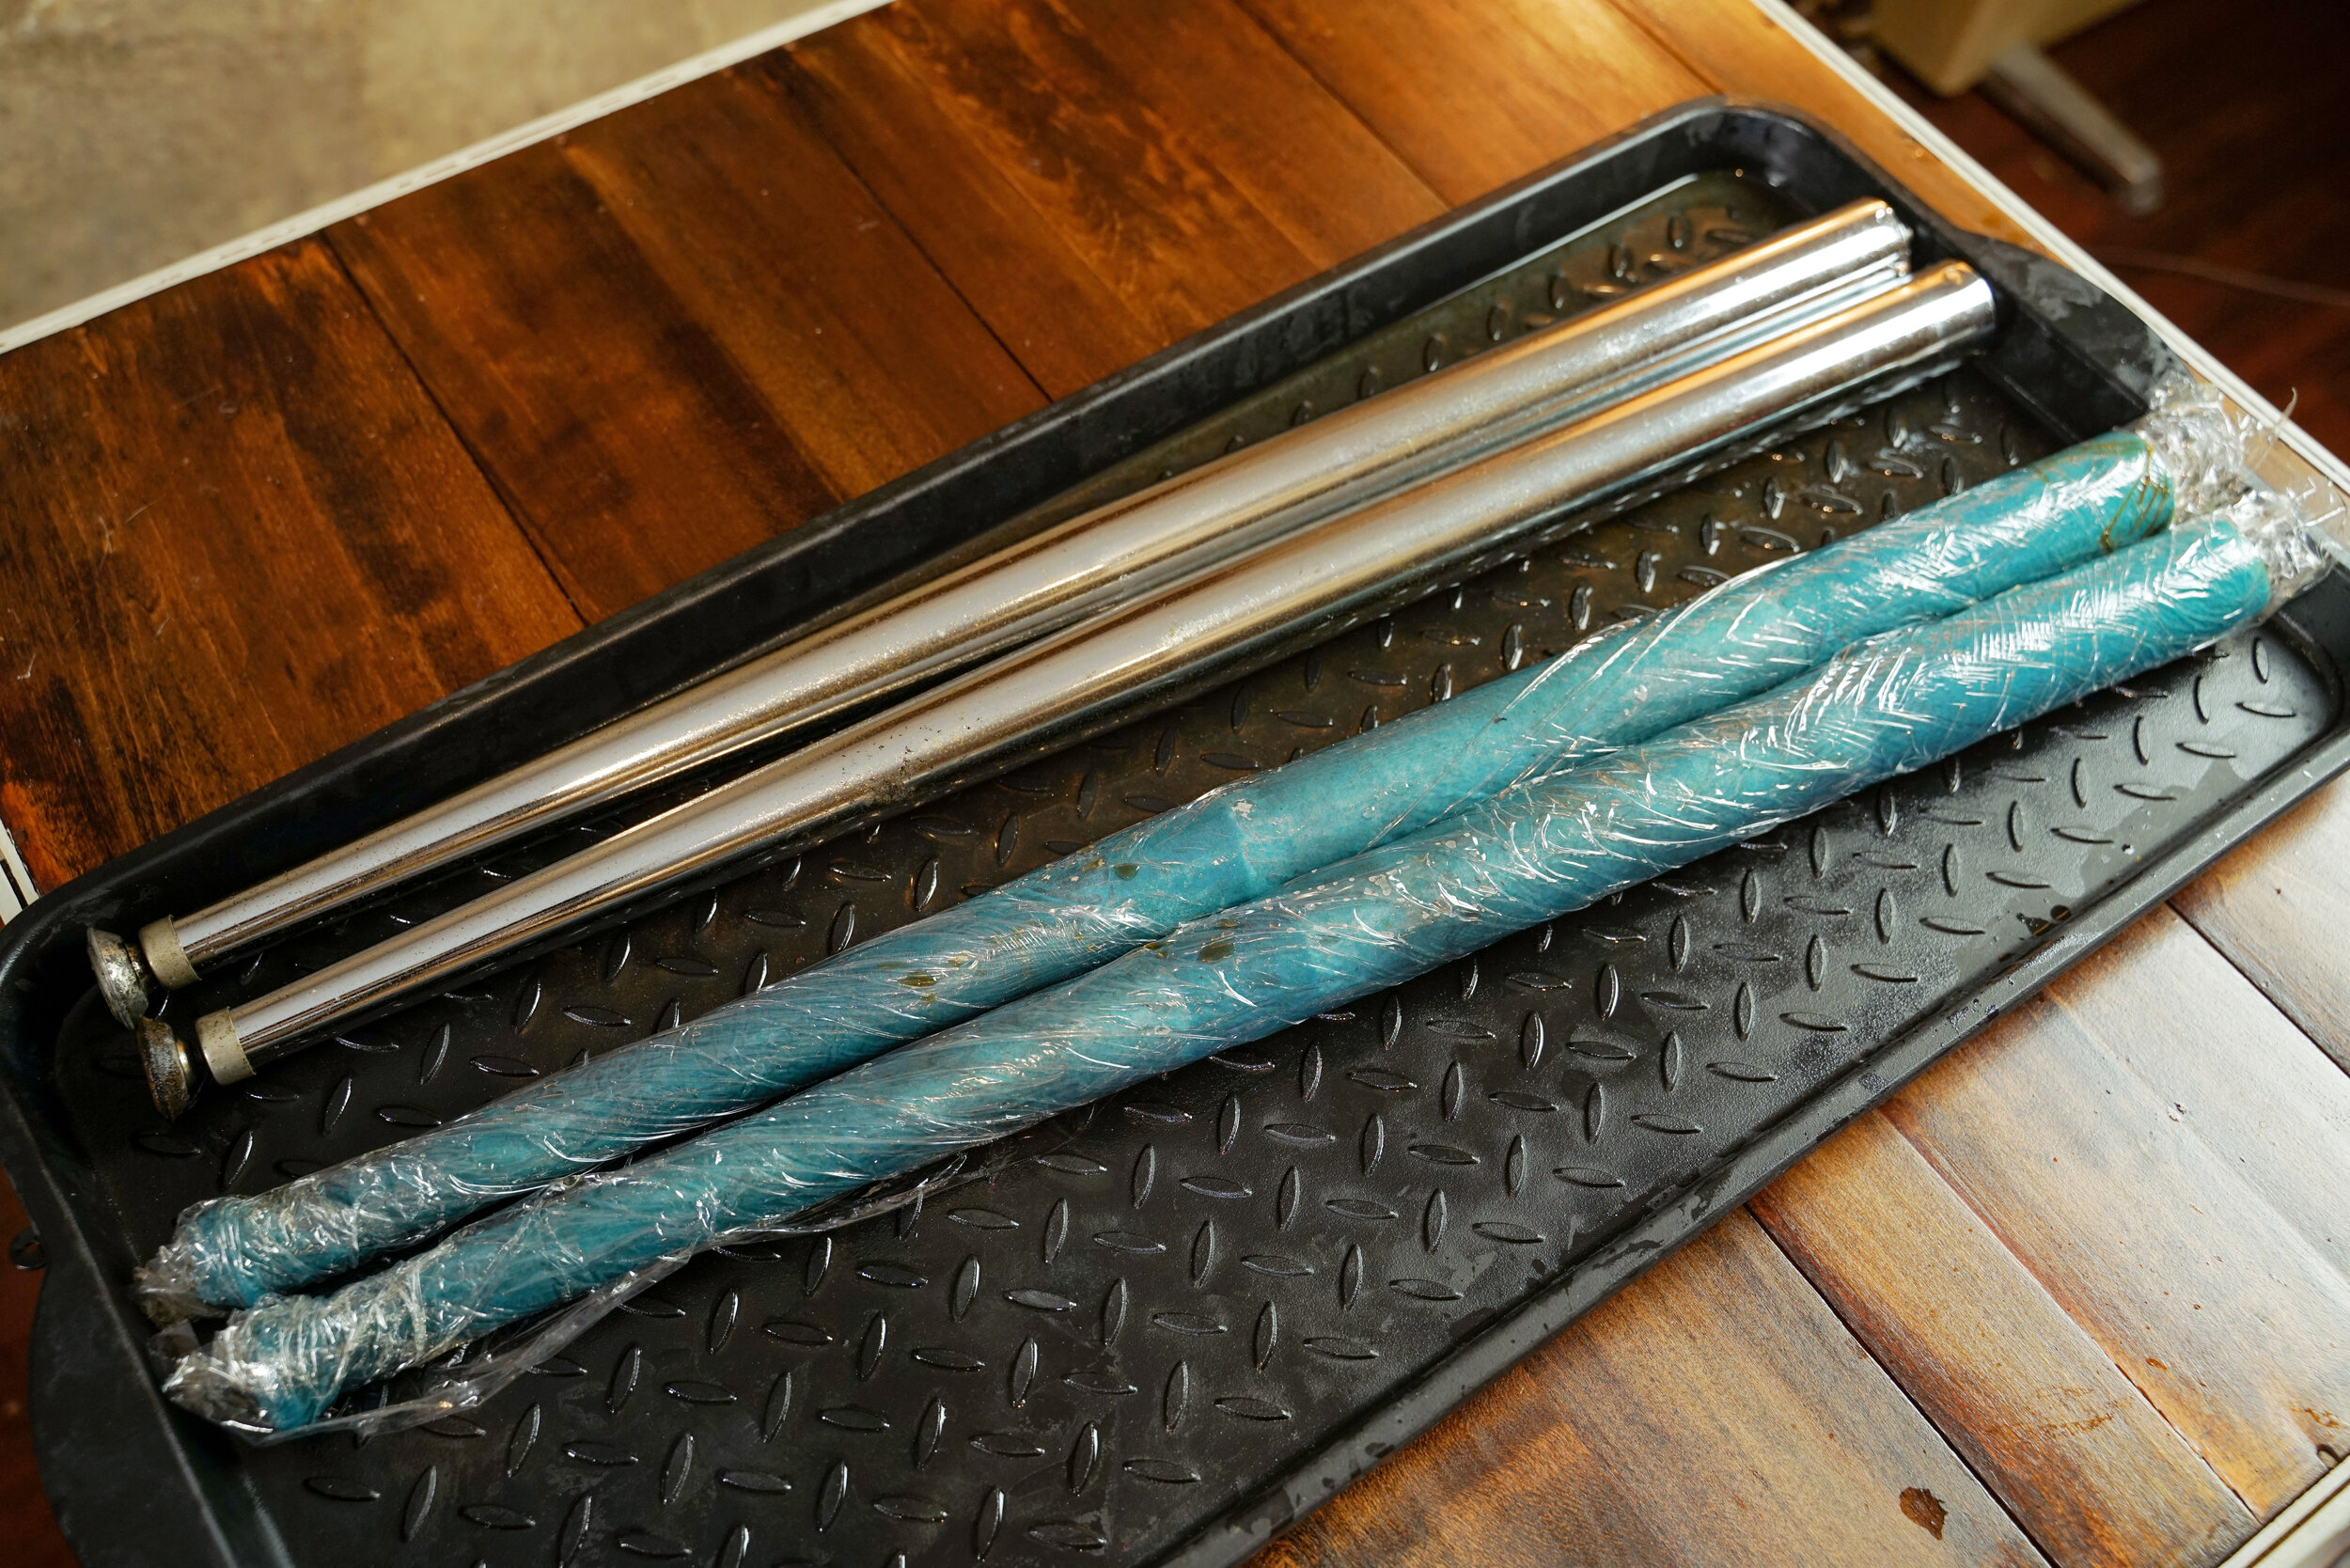
The finished product!

In the end, the legs came out beautifully shiny. Evapo-Rust only affects rust — not chrome — so it restored a lot of that original mirror-finish. However, because rust eats straight through chrome, there is still some visible pitting and even a few patches of bare metal. These “imperfections” are a byproduct of rust, not the Evapo-Rust bath. Rust already ate the chrome; although the Evapo-rust thoroughly removed the rust, it can’t replace missing chrome with new chrome! (It is magical, but not that kind of magical!)
Note about the feet
Even though the feet de-rusted completely, we ended up replacing them because the rust had eaten through all of the chrome. They were definitely still usable, but they simply did not match the rest of the legs anymore! We discuss the process in another post — but basically, you just pry the old feet off and shove the new ones on.
If you de-rust your Wurlitzer legs, get in touch and send us photos! We love to see rusty legs transformed!
Further Reading
Browse all of our articles on restoring vintage gear. Or, click on an image below.